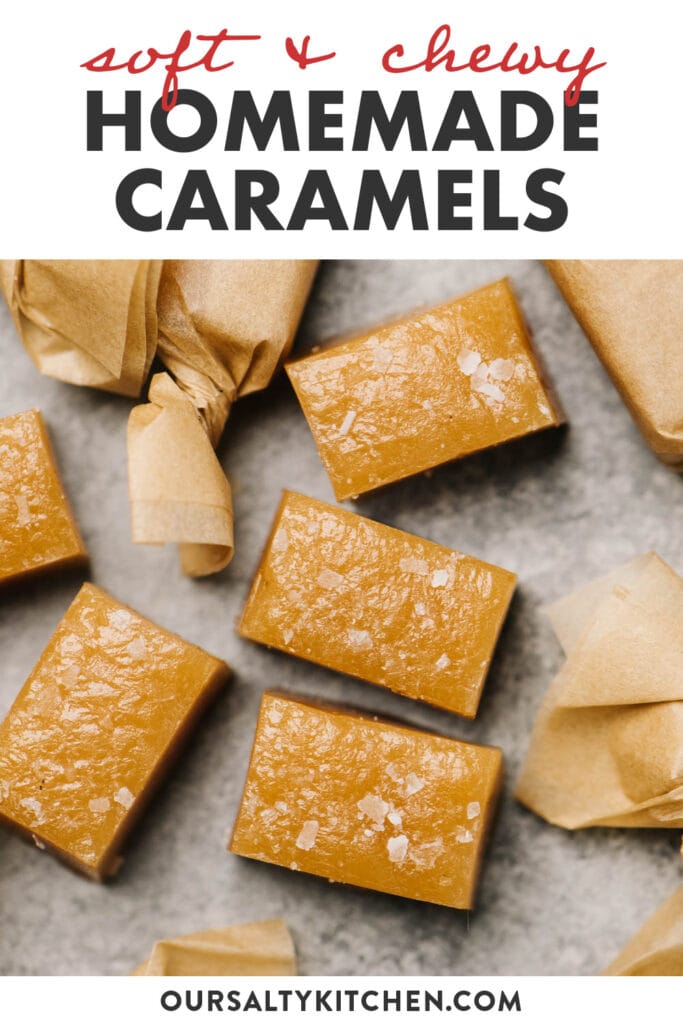
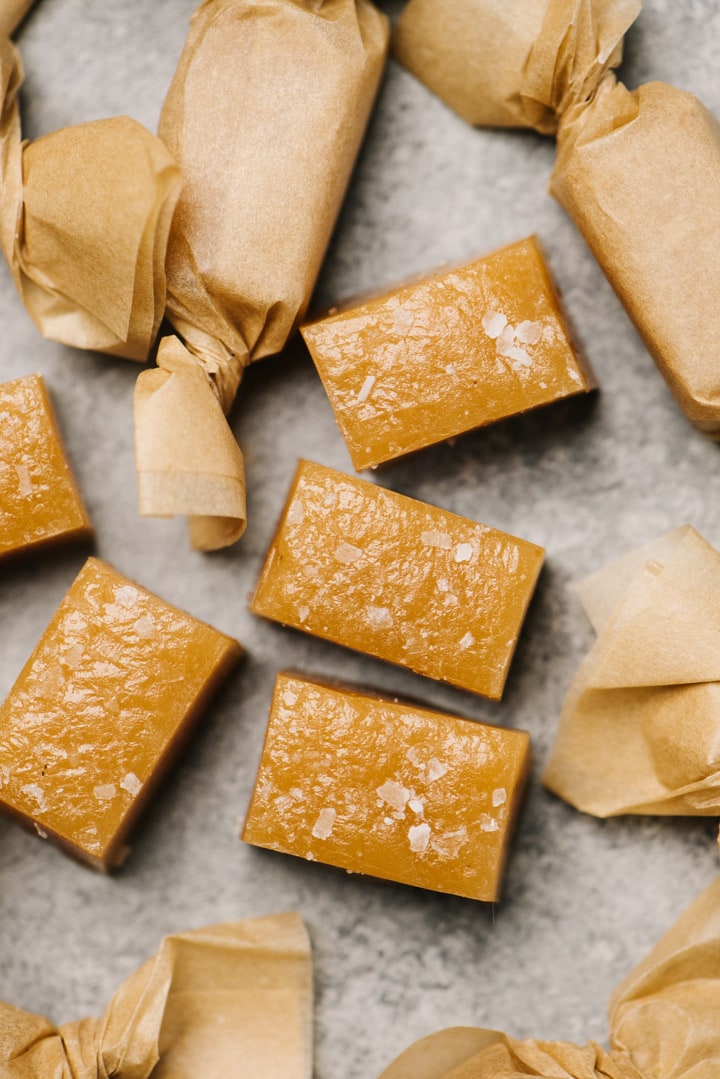
Soft and chewy Salted Caramel Candies are an easy, homemade holiday gift for family, friends, neighbors, teachers, and most importantly, yourself. They're soft, creamy and sweet, with a healthy dusting of flaky sea salt for the perfect sweet-savory bite. I've been making these treats for years, and friends near and far start clamoring for them as soon as December 1st hits.
Jump to:
It's the most wonderful time of the year - caramel candy time! I've been making this recipe for soft and chewy salted caramels for years and years. It's the first Christmas candy I ever made, and the first Christmas tradition I established for myself as an adult.
In the beginning it was a cheap way to gift something lovely to friends and coworkers in my super broke 20's, but these days it's plain ol' tradition. Plus I'd have mutiny on my hands if I skipped a year. Last year I made around 40 dozen. This year I think it'll be closer to 60. I know. But really, they're that good.

Luckily these salted caramels are pretty foolproof. The hardest part is a tossup between cutting up all those tiny parchment squares for wrapping, and not eating so many that I have to make yet another batch to supplement the stash. I have a big bowl of them by the front door for guests to nibble on, I save another stash for Christmas Eve and Christmas Day, and the rest I tuck into gift boxes to share with friends, family, neighbors, and teachers. And then there's the secret stash for myself - baker's treat!
Easy One Step Caramel Candy
There are many many recipes for soft and chewy caramels out there, and most of them are done with a two-step process. As has been repeatedly established on this blog, I generally like to take the easy way out. The less fuss, the better. I'm not knocking on the recipes that do it up proper. I'm just lazy. Which is why I love this recipe so much - you basically just dump all of the ingredients into a pot, melt 'em until smooth, and then cook and cook and cook until the caramel reaches 245-250°F.
Tips for Making Perfect Caramel Candy
- Read through the recipe start to finish so you know what to expect along the way.
- Prep the baking or casserole dish first - once the caramels reach the right temperature, you need to get them into the baking dish stat, so the last thing you need to do is fuss with parchment at the last minute.
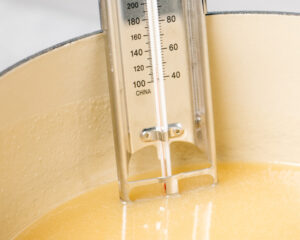
- Use a reliable, calibrated thermometer (see below).
- Use real heavy cream and good quality unsalted butter for best flavor.
- Use a large, heavy bottomed pot for cooking that evenly distributes the heat. I like to use a dutch oven.
- Don't rush! For soft, creamy caramels that won't turn grainy, be sure to maintain a steady medium-low heat once the caramels have come to a simmer.
- Stir occasionally (every 10 minutes or so). First, this will prevent the sugars from crystallizing around the edges of the pot. Second, this will help redistribute the heat so that your thermometer reads a consistent and accurate temperature.
- Protect your hands! Fulled cooked caramels are HOT and you can easily burn yourself if you don't protect your hands and arms (ask me how I know). Use long oven mitts when you pick up the pot and pour the caramels into the mold.
- Cool completely before cutting. Allow the caramels to cool at room temperature or in the fridge until completed cooled - at least 2 hours.
Caramel Cooking Stages
While it's important to use a candy thermometer, the more you cook caramels the more you'll be able to gauge how far along in the process they are by their color and texture. Both change as the temperature rises and the sugars caramelize. The recipe card includes photos and a video so you have a visual.
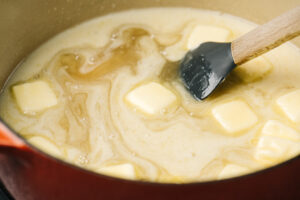
- Stage 1: all ingredients have melted, the consistency is thin and syrupy, and and the color is light and milk; no bubbles.
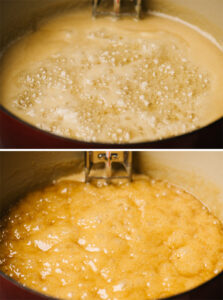
- Stage 2: what I like to call the "simmer stage". One the caramels just barely coming to boil, you'll see small, foamy bubbles starting in the center. The color and consistency will remain similar to the first stage.
- Stage 3: the caramels will deepen in color, the bubbles will be evenly distributed across the top, and the consistency will thicken slightly - think the consistency of honey.
- Stage 4: the caramels will be just slightly darker in color with fatter bubbles, but the consistency and texture will be much thicker. At this stage, they're done.
- Stage 5: too far! If the color turns a deep, deep golden brown with thick, fat bubbles, it's cooked too long (and will be too hot) - your final candies will be rock hard.

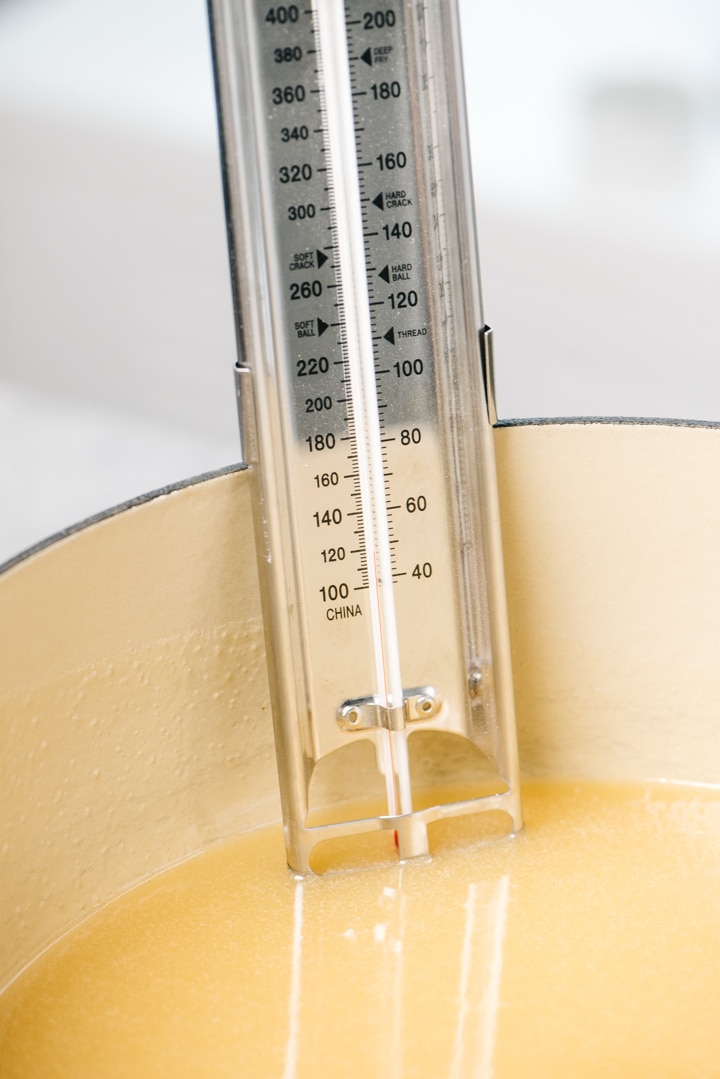
Caramel Candy Temperature
For soft and chewy one-step caramels, cook to at least 245°F, but no higher than 250°F.
Closer to the "soft ball" stage (235-240°F) will create caramels that are too soft to cut and keep at room temperature. Too much above 250°F will create caramels that are too hard to both cut and chew.
Calibrate Your Thermometer
A couple weeks ago I made my first caramel batch of the season. I patiently waited for the the thermometer to hit 245°F. I'll be honest - I was distracted and it didn't immediately register that (1) the process was taking too long and (2) the color looked off.
Big Mistake. Huge. Since I was only relying on the thermometer and not my eyes and the actual consistency, I didn't realize until I poured the caramels how off the color was. I immediately knew they were overcooked, and an hour later I was proven right - the caramels were hard as a rock. BUT - my thermometer had read the exact right temperature.
The issue? My thermometer was completely off. I calibrated it later that night and learned that somehow (I honestly have no clue) my thermometer got completely out of whack sometime between last year and this year. It was off by 12 degrees!! After calibrating and taking the temperature differences into account, the next batch came out perfectly.
So here's my best pro-tip: always calibrate your thermometer before cooking caramels (or any kind of candy). Here's how to do it:
- Fill a pot with 4-6" water, then affix the thermometer at least 1 inch below the water line.
- Bring the water to a boil.
- Allow the water to boil at least 10 minutes.
- Check the temperature of the thermometer. Water boils at 212°F degrees, so if your thermometer isn't reading that temperature precisely, it's off.
In my case, my thermometer was registering boiling water right between 224-225°F. Eek! I adjusted the next batch of caramels by letting them cook to around 233°F, and they were perfect. (Then the next day I bought a brand-new thermometer.)
Can I Double the Recipe?
Yes! With 2 notes:
- Reduce the butter by 2 tbsp, or the larger batch will be too greasy.
- Use a larger pot - I use a 12-quart stock pot when doubling the recipe.
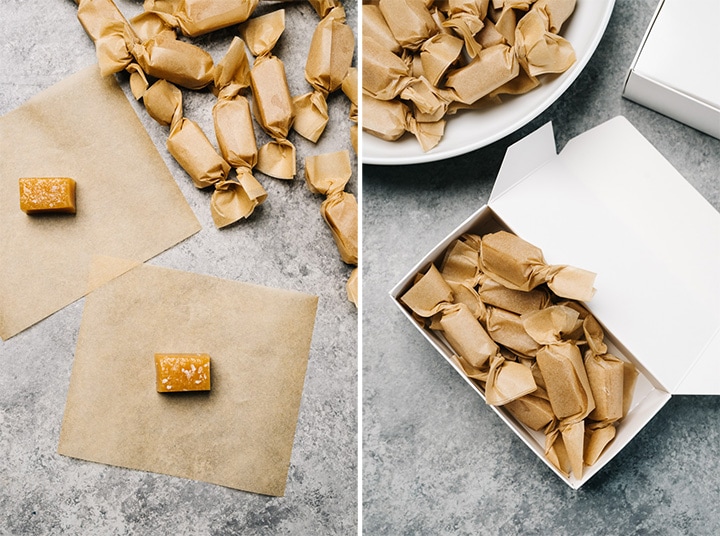
Packaging and Gifting
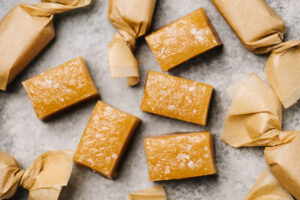
I gift these in 1-lb candy boxes, and can generally fit about a dozen and a half candies into a box. These keep for a couple of weeks at room temperature (if you don't eat them within the first 2 days). I've also gifted them in seasonal candy bags, and by shoving them directly into friend's hands and pockets. You do you.
More Easy Edible Gifts
- 20+ Easy and Elegant Edible Gifts
- White and Dark Chocolate Bark
- Cinnamon Sugar Candied Nuts
- Blueberry Vanilla Applesauce
- Italian Butter Cookies
Did you make this Homemade Caramel Candy? I'd love to know how it turned out! Leave a comment and a rating below.
While you're at it, let's be friends - follow me on Pinterest and Instagram for the latest and greatest.
Homemade Caramel Candy
Description
Ingredients
- 2 c white sugar
- 1 c packed light brown sugar
- 1 c light corn syrup
- 2 c heavy cream
- 1 c unsalted butter, cut into small cubes
- 2 teaspoon vanilla extract
- ½ teaspoon fine sea salt
- 1.5 tablespoon maldon sea salt
Instructions
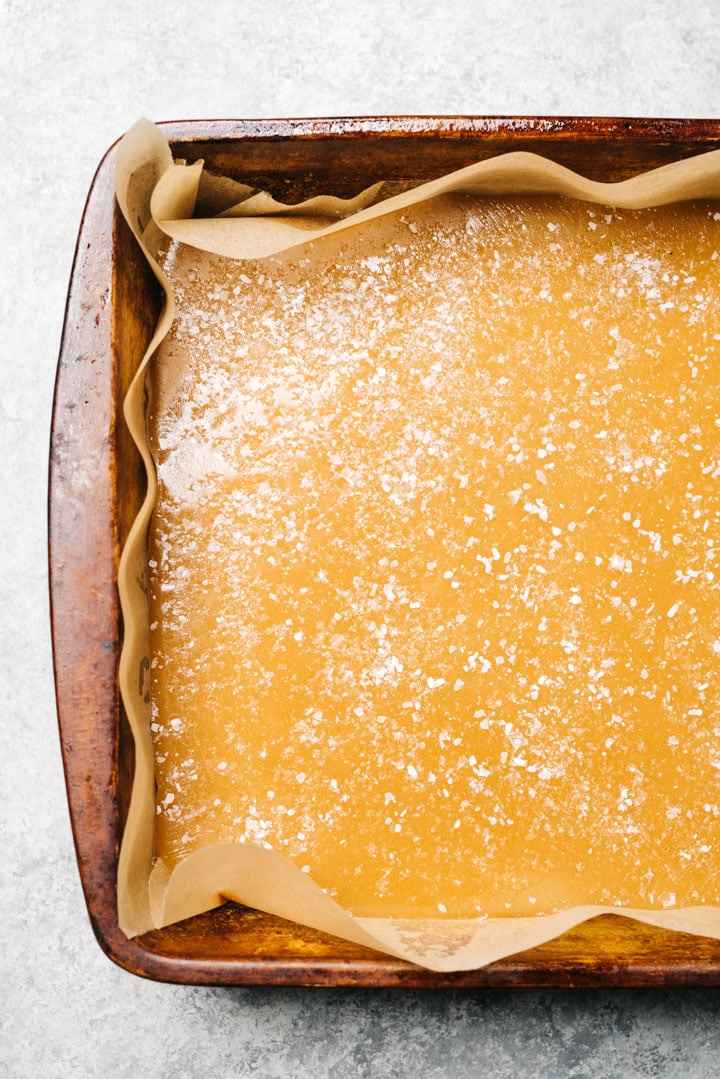
- Line a 2-quart (see Note 1) baking dish with parchment paper, leaving enough hanging over two opposite sides to easily lift the cooled caramels out of the pan. Liberally grease the parchment with butter or cooking spray.
- Combine the white sugar, brown sugar, corn syrup, heavy cream and butter in a 6-quart dutch oven or other heavy bottomed pot. Heat over medium heat and stir constantly until all ingredients are melted and blended together.

- Affix a candy thermometer to the side of the pot, roughly 1" above the bottom of the pot. Postion the thermometer so that it's submerged below the surface of the caramels throughout the cooking process. Increase the heat to high and bring the sugar mixture to a boil.

- Once boiling, reduce the heat to medium low and let the sugar mixture simmer with slow, medium-sized bubbles until the candy thermometer reaches 245-250°F. Stir every 10 minutes. It will take 40-45 minutes to reach the correct temperature. NOTE: watch the thermometer carefully after it reaches 230°F, as the temperature increases pretty quickly after that point.

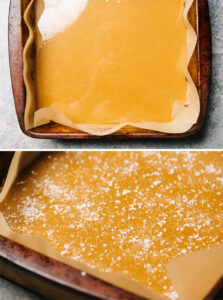
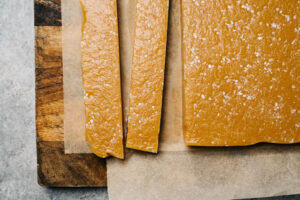
- Once the mixture hits 245-250°F, immediately remove from heat and pour in ½ teaspoon fine sea salt and the vanilla. The mixture will vigorously bubble (this is the alcohol in the vanilla boiling off). Stir in the vanilla until evenly incorporated, then pour the caramel into the prepared baking dish. Use oven mitts to protect your hands and wrists from any splatter (it's extremely hot!). Allow the caramel to cool at room temperature for 15-20 minutes and then sprinkle half the maldon salt over the caramels.
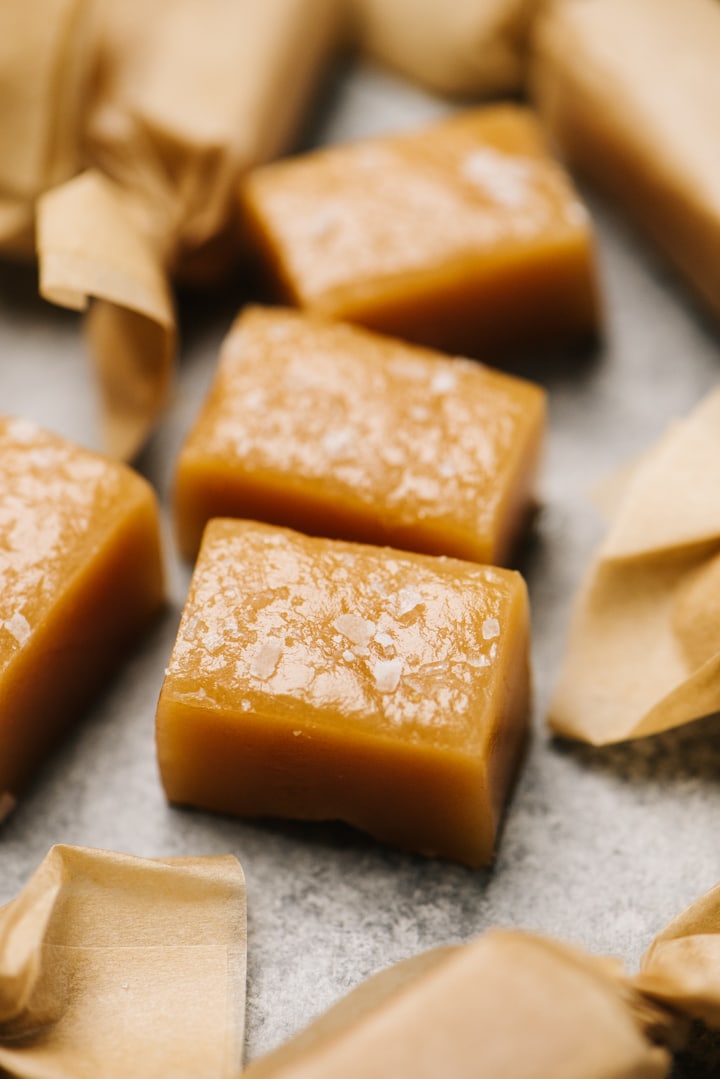
- Allow the caramels to cool at room temperature or in the fridge until set - at least 2 hours. Once cooled, sprinkle the remaining salt over the caramels. Lift up the caramels by the parchment paper flaps and transfer to a cutting board. Cut the caramels into 1" x ⅔" rectangles with a sharp, non-serrated blade or a bench scraper. Wrap the caramels in 4" x 5" squares of wax paper.
- The caramels are good for 2-3 weeks if stored in an airtight container. I gift these in 1-lb gift boxes in 1.5 dozen increments.
Recipe Notes
- Baking Dish Size: I use an 8x8 baking dish when making a single batch of caramels; this size baking dish will yield caramels that are roughly ½" thick. If you are doubling the batch, pour the caramels onto a parchment lined baking sheet, or use 2 dishes.
- To double the recipe: reduce the butter by 2 tablespoons and use a 12-quart stock pot.
- Use a reliable, calibrated thermometer (see blog post for instructions).

Jennifer
These were the best caramels I've ever made and a big hit with those I've been gifting them to. I've tried making caramels following other recipes and they were greasy or too hard. These were fantastic and less challenging than other methods I've tried.
Erin Lovett
These are DELICIOUS!!!! The best part is they don't stick to the paper that you wrap them OR your teeth!!! With just the perfect amount of salt on top they melt in your mouth. Wonderful to give as gifts or have out at a party!
Elena
I love the direction to dump everything together from the get-go: sugar, syrup, cream and butter. This is much more convenient. Another topping I've used is cracked pink peppercorns. YUM!
Shanna
These caramels are so delicious and easy to make! A bit of advice, however. If doubling the recipe, use bigger than a 6 quart pot. Mine overflowed on the stove. What a mess! Luckily I have an amazing husband who helped me clean up.
Lynette Hofferber
Hi I was wondering if you had any idea if 1 batch would make 2 pounds?
Thank you
Lynette
Amber
I’ve made this recipe twice now, both times were amazing. 👏🏻👏🏻👏🏻
Thank you so much for sharing this!
Linda
We made this for the second time today. First time, it was too soft. Could not cut it into pieces. Ended up just eating it with a spoon. It was delicious! I convinced myself that I took it off the heat just a tad too soon. So today we left it on til it hit 252. I think that was a tad too long. Within a couple of hours, it was hard as a rock. Literally. We could not cut it with a knife. Had to take a hammer to it. Still, it is delicious! So we will keep trying. Hoping to make some good enough for Christmas treats for family members we will be unable to celebrate with. Here's hoping the third time is the charm!
Danielle
Oh no!! Have you calibrated/checked your thermometer? I had a rough time with my first 2 batches this year as well (and I've been making these for almost a decade!). After the second round it occurred to me that it might be an issue with my thermometer, and sure enough I checked it out and it was off by about 10 degrees!! To calibrate the thermometer simply bring a pot of water to a boil with the thermometer attached and let it boil for about 10 minutes. Check the temperature and see how close it is to 212. In my case, I removed my third batch of caramels when they came to about 238 degrees (since it was "over" by 10 when I calibrated) and they were perfect. I'm also putting out a video this week for this recipe, so I hope that helps you get them just right! Feel free to email if you have more questions 🙂
Eva Bergius
It all seems great and I am about to make them. I will cover mine with dark chocolate with a couple of sea salt flakes on top. But to the thermometer...at our home, we never had any of that. We tried the caramel consistency during the cooking by dripping a tiny caramel drop into cold water. It was done if you could shape the drop into a small ball. Then immediately poured onto parchment paper. So my first thought was I will try my sweet grandma's way- without risking a batch - then I can always buy a candy thermometer if needed.
Holly
Wouldn’t you add 10 degrees? If your boiling temp is 224 you would add to your final temperature?
Jan
I made this super easy caramel recipe this year for xmas-first batch lasted 1 day!! Sooo I doubled the recipe next time. The secret was making them-wrapping & packaging for gifts before family got home from work!! The very easiest & best caramel recipe I've ever tried. Thank you-found a new family tradition that EVERYONE loves!!
Cindy Johnston
Making these right now. Taking FOREVER to reach 245 even at a steady bubble. It's been 90 minutes and still not firm ball. What the heck?
Nicole
Are you at altitude? I’m high up so my candy boil is always lower. Perfect finishing temp for me for this recipe is 238 at about 6000ft above sea level, and it takes me around 50min to get there
Shasta
I never made caramels before but this turned out spectacular!!
I calibrated my candy thermometer, something I never knew to do.
(thank you for adding that info in, will be helpful info in the future, im sure!)
I did forget to add my vanilla at the end but even without- it's so good! Perfectly soft as well.
I pored my caramel into an 8x8 pan but decided to split mix into a second 8x8 so the candies wouldn't be so thick
Along with eating these, I plan to use some to make chocolate cookies with caramel as the core centers!
Mary M Ward
Outstanding and easy to make. Have patience and do a bit of babysitting. Thank you.
Leah
Best salted caramel recipe! I come from a family of candy makers, and these caramels blew us all away! I only used 1/4 tsp of sea salt and 1/2 a tsp of maldon flakes, and really enjoyed the hint of saltiness. Using the suggested pan, the recipe made 135 caramels.
Kelly
This is probably my first rating ever of a recipe, but this deserves it. These are the best! Super clear instructions and the best caramels ever.
Dana
I am 4 years late writing this review, but today I squinted at the bottom of my printed out recipe and found your website again. I am now famous every Christmas for these caramels!
So I thought I better send a thank you for posting this delicious recipe!
It’s perfect! My only difference is that I’ve always used just regular salted butter (and not add any salt during the cook)and it’s always come out great! This year I even finally bought the Maldon salt instead of my plain old sea salt and they looked cooler and of course, heaven to eat!
So, thank you so much for making me appear to be the best candy maker in my circle of friends!
Have a wonderful holiday!
Lori
I would REALLY LOVE 💕 to try your recipe for these caramels! But I Really Need the Baking Dish SIZE, Please 🙏🏻. Is it 9X13 for the single batch🤷🏻? Thank You!☺️ I would hate to overflow all the yummy hot cooked caramels…
Danielle Esposti
Hi there! The size of the baking dish is 8×8, and the recipe card has been updated; I apologize for the confusion, the size of the baking dish was previously listed under the “equipment” section, which has been temporarily disabled so that I can trouble-shoot an issue.
Baker
Could someone tell me what size baking dish. I see no reference. Is it square or 9x13 type size you used for the size caramels shown? Excited to make.
Danielle Esposti
Hi there - use a 2-quart baking dish (I use an 8x8 dish, or a quarter-sheet pan!).
Jackie
What size baking dish do you use?
Danielle Esposti
The size of the baking dish is 8×8, and the recipe card has been updated; I apologize for the confusion, the size of the baking dish was previously listed under the “equipment” section, which was temporarily disabled.
Melody Smith
What size baking dish?
Danielle Esposti
Hi! The size of the baking dish is 8x8, and the recipe card has been updated; I apologize for the confusion, the size of the baking dish was previously listed under the "equipment" section, which was temporarily disabled.
Nancy R.
These were my first try at caramels. Recipe was much easier than recipes asking you to stir the cooking mixture for an hour. They were delicious. Don’t skimp on the salts. It’s needed to balance out the sweet. It made about 120 pieces, so I had lots to give as gifts.