Perfect your pancake game with this simple How-To guide. Our complete recipe tutorial on how to make pancakes includes every tip, trick, and technique to get the fluffiest homemade pancakes every time! Plus, it's loaded with ideas for add-ins and tasty toppings to make this recipe your own!
Jump to:
- Homemade Pancakes are the Best Pancakes
- Best Skillets for Pancakes
- Milk vs Buttermilk
- Must-Know Tips for Fluffy Pancakes!
- Must-Know Tips for Cooking Pancakes
- How to Make Pancakes: A Step-by-Step Photo Tutorial
- Adding Mix-Ins
- Toppings for Pancakes
- What to Serve With Pancakes
- Make Pancakes Your Way
- Storing Pancake Batter
- Storing Pancakes
- How to Make Pancakes
- Ratings
This one goes out to everyone who's uttered the phrases "I got this!" or "How hard can it be?" while attempting to whip up a batch of fluffy pancakes on a whim.
Pancakes may seem like an easy breakfast recipe for placating fussy children or impressing a date who wound up back at your place the morning after. But we've all prepared a batch that only yielded one lone cake suitable for guests.
As someone who has had a varied (and storied) life doing both those things (How'd you think I wound up with those fussy kids?), I have spent more time than most perfecting pancake recipes that keep the three lads in my life coming back for more.
I've got pumpkin pancakes for the fall, gingerbread pancakes for winter break, blueberry buttermilk pancakes and strawberry pancakes in the summer, and hearty banana oatmeal pancakes that'll stick-to-your-ribs on days you need a bit more gas in the tank.
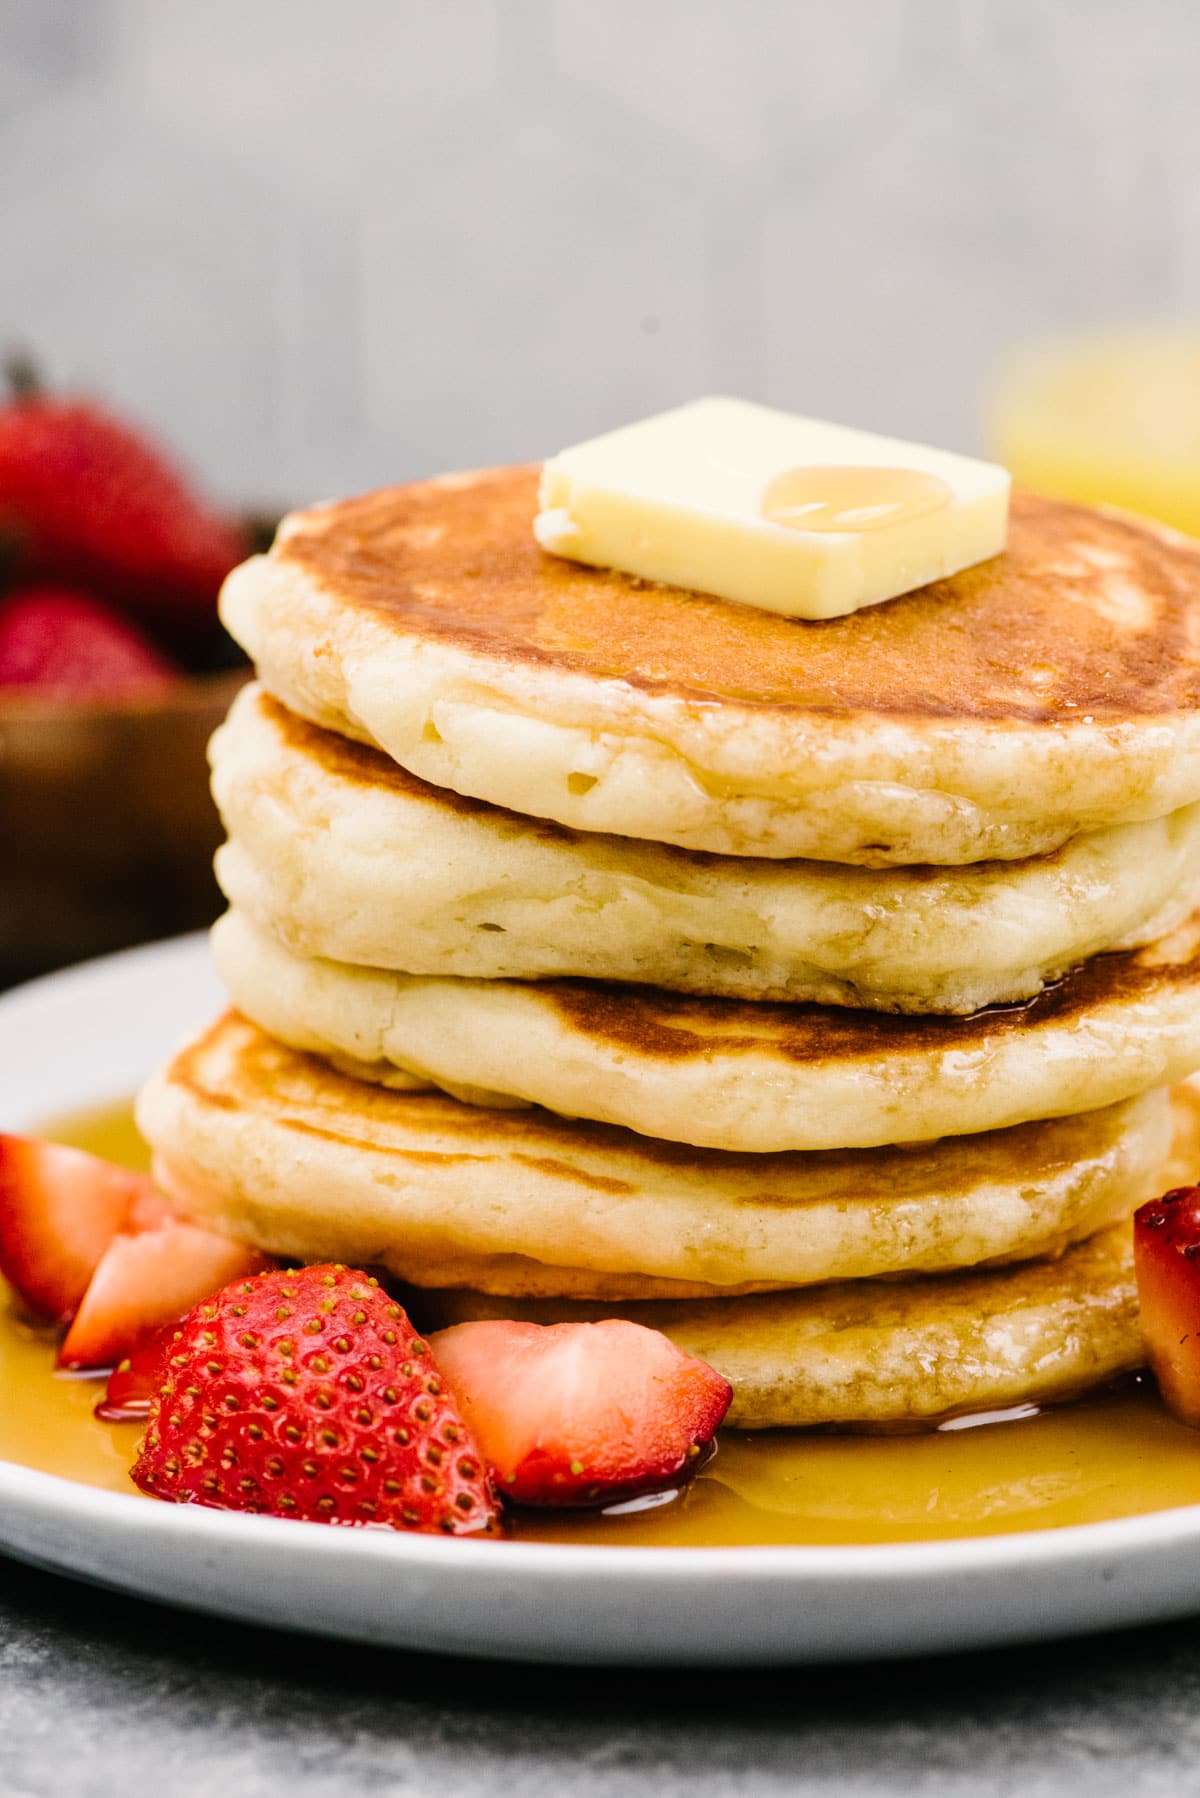
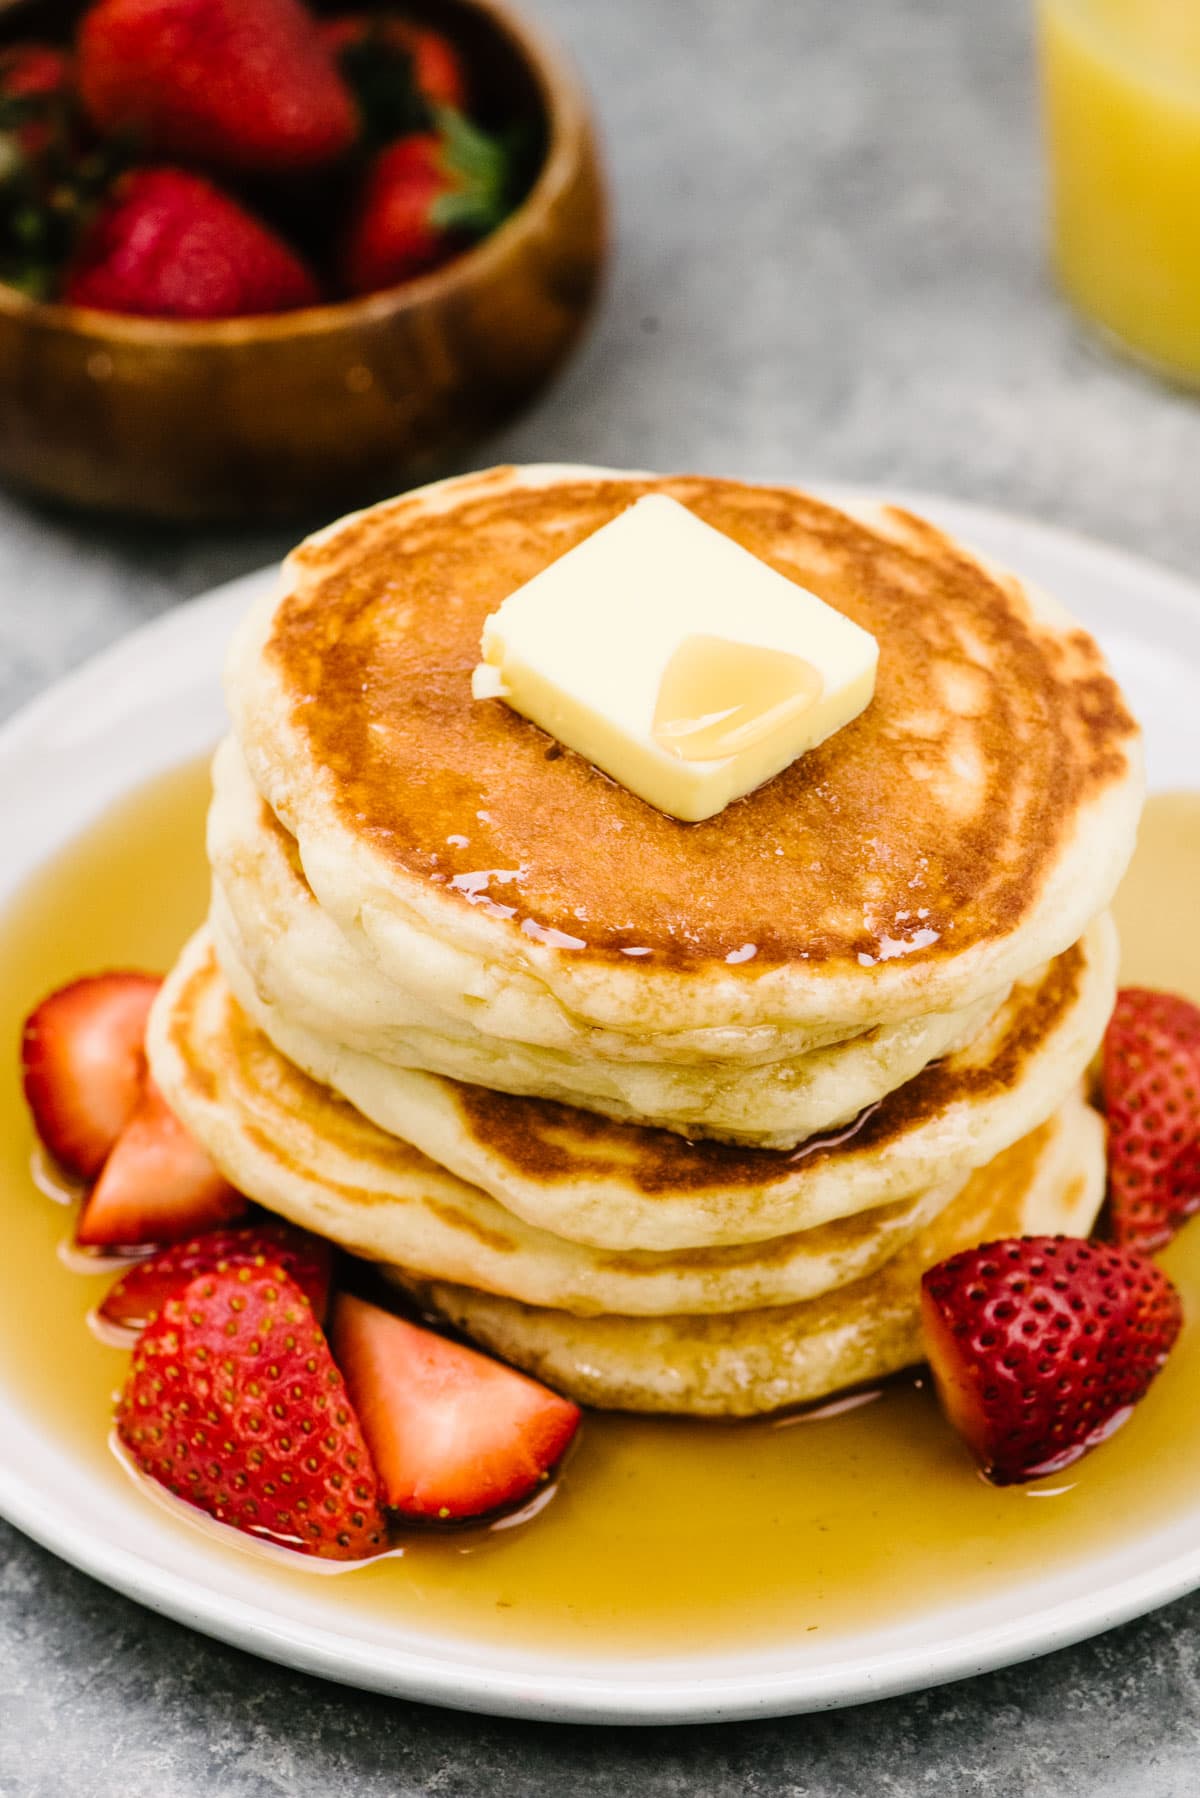
But as good as those homemade pancakes are, I'd trade them all in for a light, fluffy, classic buttermilk pancake. Any time, any place, any meal. And in about 30 minutes (including reading time) you will too.
Homemade Pancakes are the Best Pancakes
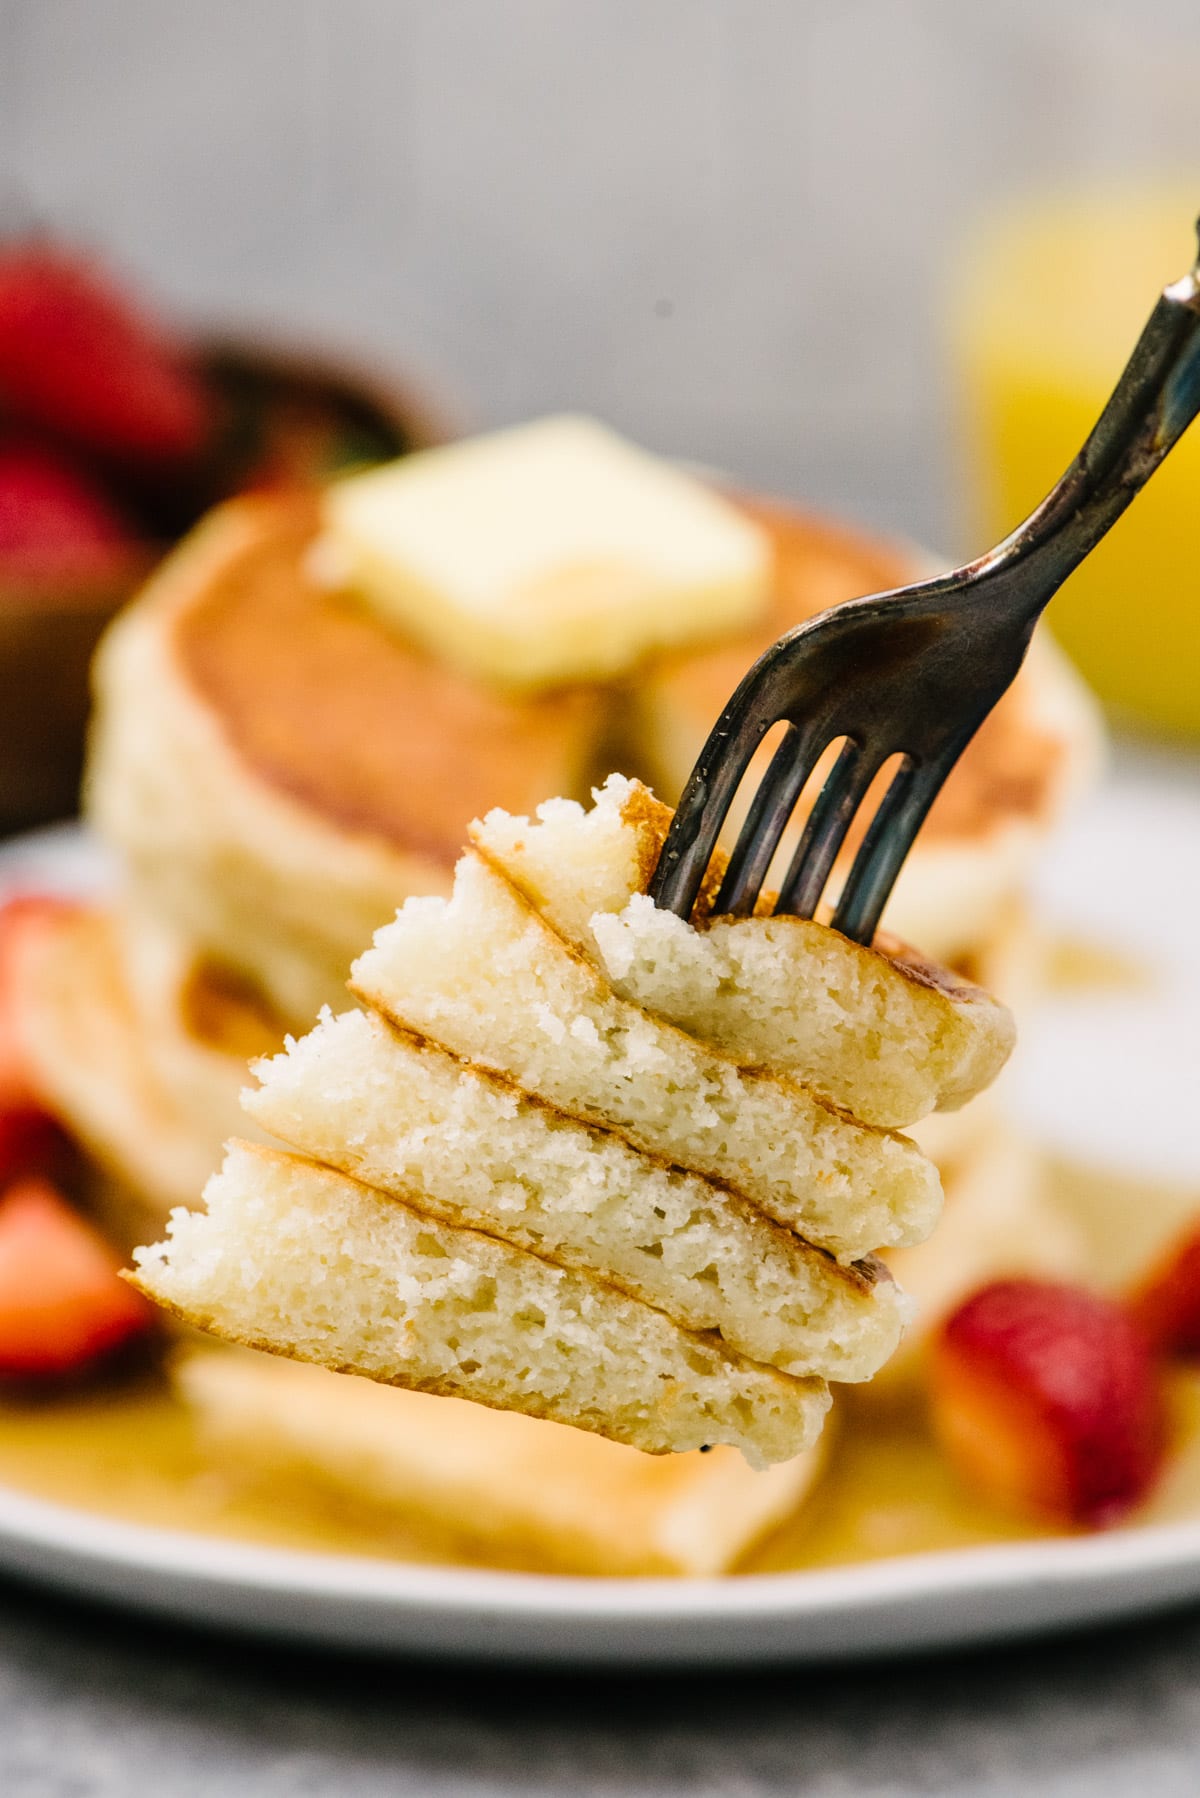
As someone who cooks for a living, I often joke that the best <<insert food here>> is one that someone else makes for me. But that's just not the case with pancakes.
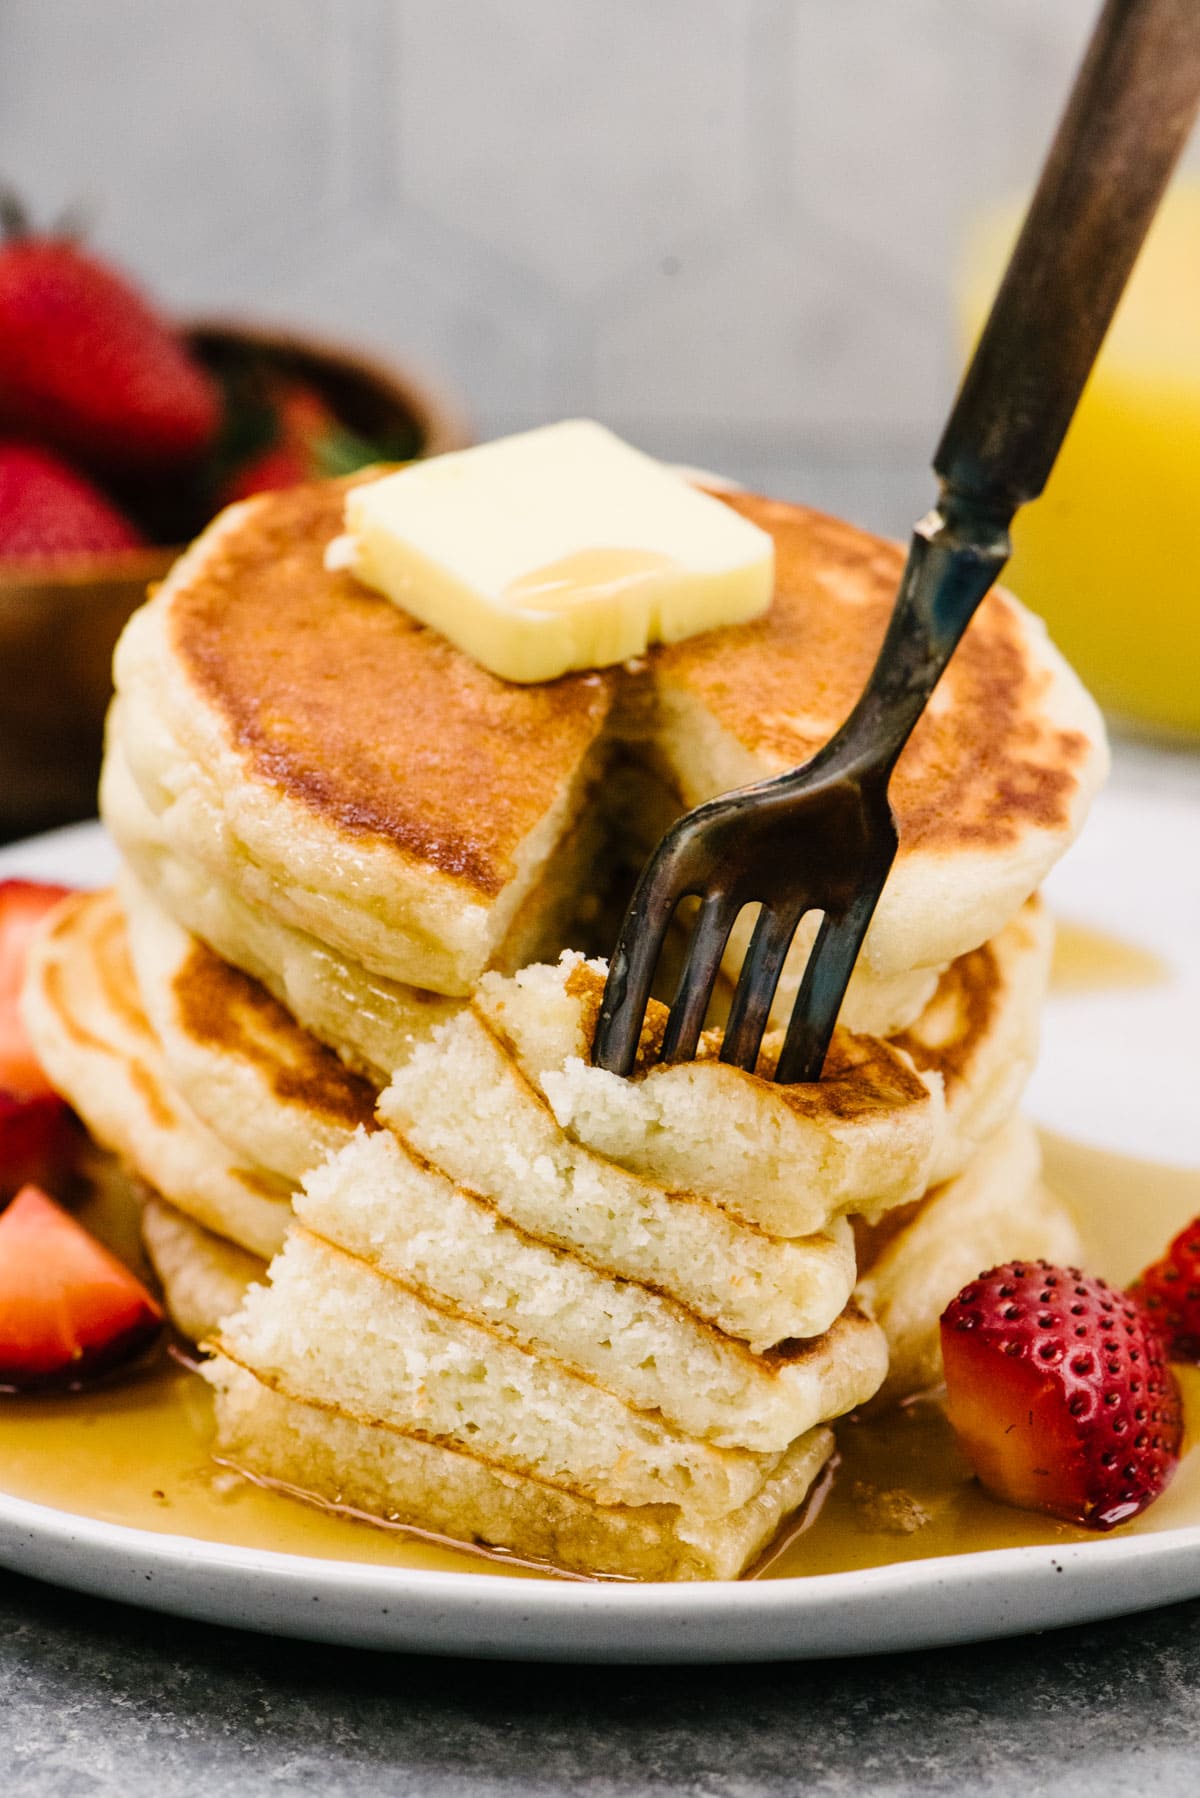
We've all had the craving for diner pancakes the size of your face at 2 o'clock in the morning, but you notice a few things in the light of day. They bounce back when poked; they squish, not melt, in your mouth; and boy, do they get absolutely sodden at the slightest drop of "syrup." No one's out there purposefully pedaling dense, spongy pancakes. We want 'em light, we want 'em fluffy, and we want 'em now!
Now, I know that some of you dread the thought of making pancakes from scratch because they wind up burned on one side and raw in the middle. (Been there). Or perhaps their shape usually resembles that of the horse's head in "that scene" from The Godfather, rather than a perfect Euclidean circle. (Done that.) Or maybe you think anything past adding water to Bisquick is a waste of time.
But I promise you, once you've mastered both the alchemy and the technique it'll be a lot easier - and tastier - to satisfy those 2 a.m. cravings.
Best Skillets for Pancakes
There are three practical options for most home cooks: non-stick, cast iron, and stainless steel. I’ve listed them here in order of personal preference.
- Non-stick: this is my go-to option for making pancakes. Because the batter has a relatively high amount of butter, you won’t need any grease or cooking spray when cooking pancakes in a non-stick skillet. Having owned many non-stick skillets, this one from All-Clad is by far my favorite!
- Cast Iron or Stovetop Griddle: cooking pancakes in cast iron is also a terrific choice. Cast iron retains heat very well, so it’s an ideal choice for a recipe like pancakes where you have a cool or room temperature batter hitting a hot surface every few minutes – the cast iron won’t lose heat, and you’ll have evenly cooked, extra crispy golden brown pancakes every time. We like to cook pancakes in butter when using cast iron, and we love our trusty Lodge cast iron skillet.
- Stainless Steel: we don’t recommend stainless steel for cooking pancakes unless you’re a very experienced home cook who is used to the nuance of cooking with stainless steel. Stainless steel can be tricky and pancakes are no exception – they tend to stick, plus the skillet loses heat each time a new pancake is added to the pan, extending the cooking process.
If you’re new to cooking - or frustrate easily - reach for non-stick or cast iron. That being said, if stainless steel is your only option, you gotta use what you have! Be sure to grease the pan thoroughly, make sure it reaches the right temperature before adding batter, and allow for a slightly longer cook time.
Milk vs Buttermilk
Buttermilk pancakes aren't buttermilk pancakes without buttermilk. And frankly, I find anything claiming to be a "buttermilk pancake" highly suspect unless I watched it get made. The good news is, both milk-milk and buttermilk work when you're making pancakes from scratch. You'll just need to tweak the recipe a bit.
Adjusting the amount of liquid:
- If you use regular milk, you'll need less liquid - start with 1 cup.
- If you use buttermilk, you'll need more liquid - start with 1 ¼ cup.
Batter consistency:
- Buttermilk is thicker than regular milk, so buttermilk batter is thicker. However it's also more airy, which yields fluffier pancakes.
Leavening agent:
Are you ready to get sciency? Because there's another catch - buttermilk is also more acidic than regular milk, and it will therefore interact differently with the leavening agent in the dry mixture.
In the standard recipe, we use baking POWDER. When using buttermilk, you'll want to substitute part of the baking powder for baking SODA.
Baking soda requires an acidic component for the batter to rise once it hits the skillet; baking powder does not require an acidic component (it's already built in). However, if you combine baking powder with TOO much acid, your pancakes won't rise properly. Check the notes in the recipe card for exact substitution amounts.
Overall, we absolutely love the flavor, texture, and fluff of buttermilk pancakes.
Got Buttermilk? Since its use in this pancake recipe goes beyond flavoring, I don't recommend using buttermilk substitutes. Not only can you easily balance the acidity with baking soda, no swap is going to replicate the texture and thickness (even powdered buttermilk). Personally, I think it's worth buying fresh buttermilk and making the most out of it while you have it - use it for fried green tomatoes, crispy chicken tenders, and buttermilk dressing.
Must-Know Tips for Fluffy Pancakes!
✔️ Make sure your baking powder (and/or soda) is fresh. Science says so. (See above.)
✔️ Don't over mix. Here's what I always tell my kids when they're helping me make pancakes: you can whisk the dry ingredients as long as you like. You can whisk the wet ingredients as long as you like. But once the two are combined, stop stirring as soon as the batter looks mostly mixed, then let it rest to allow any lumps to dissolve.
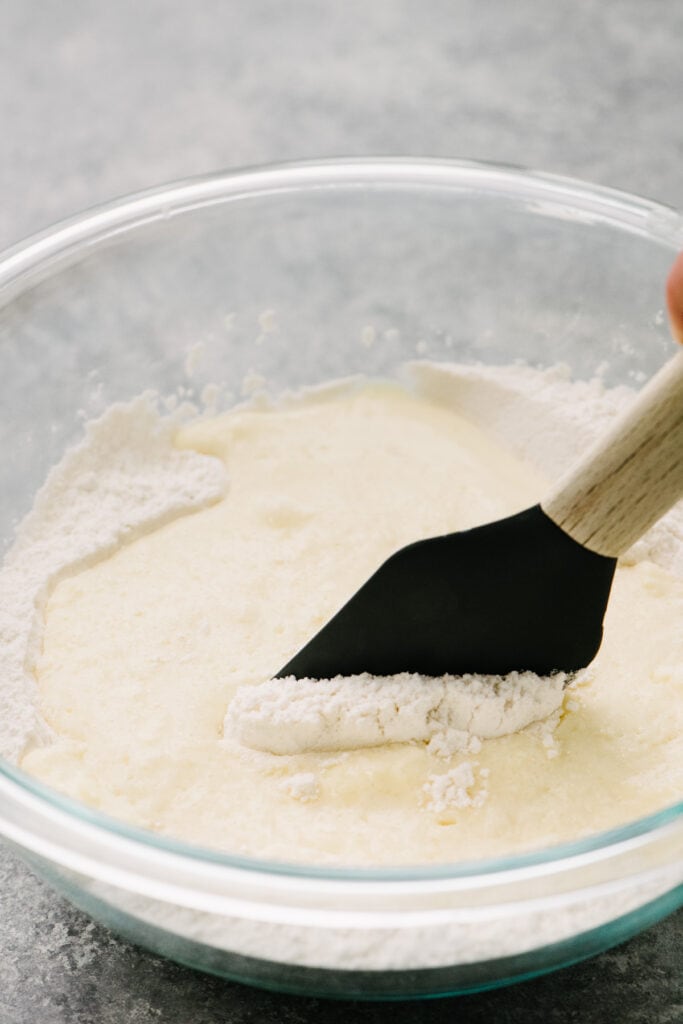
Generally, this method is called "folding" the batter. Schitt’s Creek jokes aside, slide a rubber spatula or spoon down the inside of your mixing bowl, then gently lift the dry ingredients and turn them over (i.e. “fold”) them into the wet. Repeat the process until the mixture is combined. Some lumps are ok at this stage.
✔️ Rest the batter. Resting the batter allows the flour to properly hydrate by absorbing the liquids. You’ll notice after resting that any remaining small lumps of flour will have been absorbed, or will quickly be absorbed with a brief stir after resting.
Resting also gives your leavening agent (baking powder and/or soda) time to activate. Overall, you’ll have lighter, fluffier pancakes if you give the batter time to rest for at least 10 minutes (and up to 30).
✔️ Nail the texture. The consistency of pancake batter should be between the consistency of brownie batter and cake batter – thick, but pourable. If it’s too thin, add flour one tablespoon at a time; if it’s too thick, add milk or buttermilk one tablespoon at a time.
✔️ Don't over flip. Pancakes only need to be flipped once. The more you flip them, the tougher they turn out.
Must-Know Tips for Cooking Pancakes
✔️ Temperature. I cook pancakes just below a medium flame on my gas stovetop – somewhere between medium-low and medium. The skillet is heated to the correct temperature once you can sprinkle a few drops of water over the pan, the droplets skid around the surface and then evaporate. You want them dancing, not sizzling!
✔️ Skillet. Use a large 12″ skillet – this will give you enough room to cook three quarter-cup pancakes without crowding, along with plenty of room for flipping.
✔️ Tools. An ice cream scooper is the perfect portion size for pancake batter – it's easy, (mostly) mess free, and creates a lovely round shape for each pancake. A fish spatula deftly manages the delicate art of flipping.
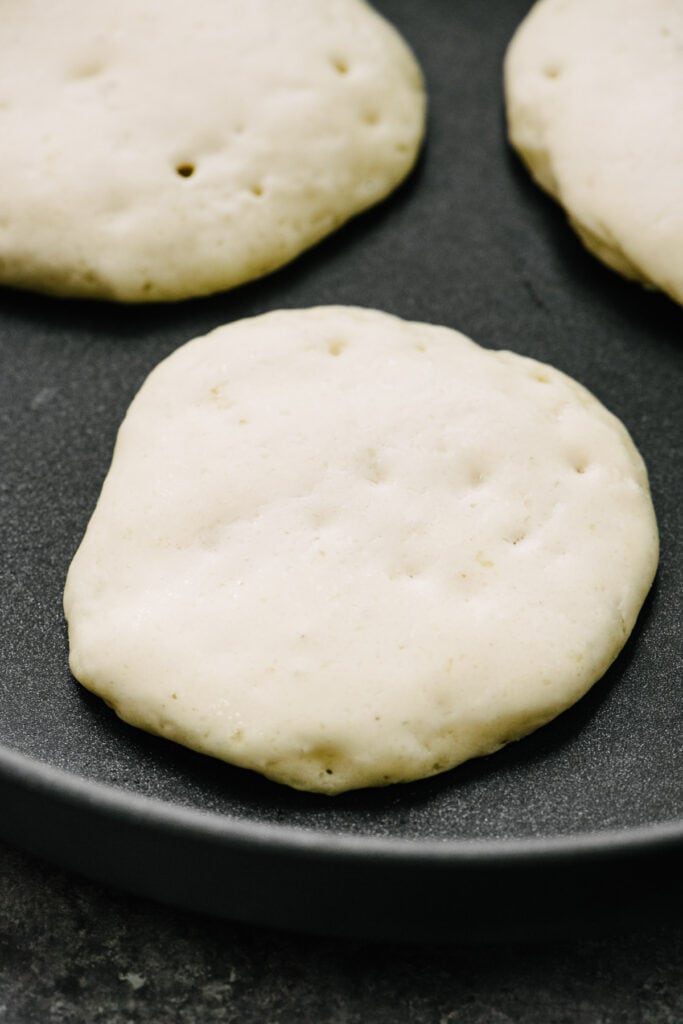
✔️ Flipping. Pancakes are ready to flip once the edges are set and bubbles rise to the surface of the pancake and remain after popping. Once bubbles rise to the surface, then pop, and a small hole remains, this is a visual cue that the center of the pancakes is mostly "set" and will be fully cooked through after flipping.
How to Make Pancakes: A Step-by-Step Photo Tutorial
Get back to basics with this classic pancake recipe. Learn how to make simple, fluffy pancakes from scratch the right way, starting with the best batter. Once you've got that down, turn up the heat on your hotcakes with tasty toppings and a medley of mix-ins.
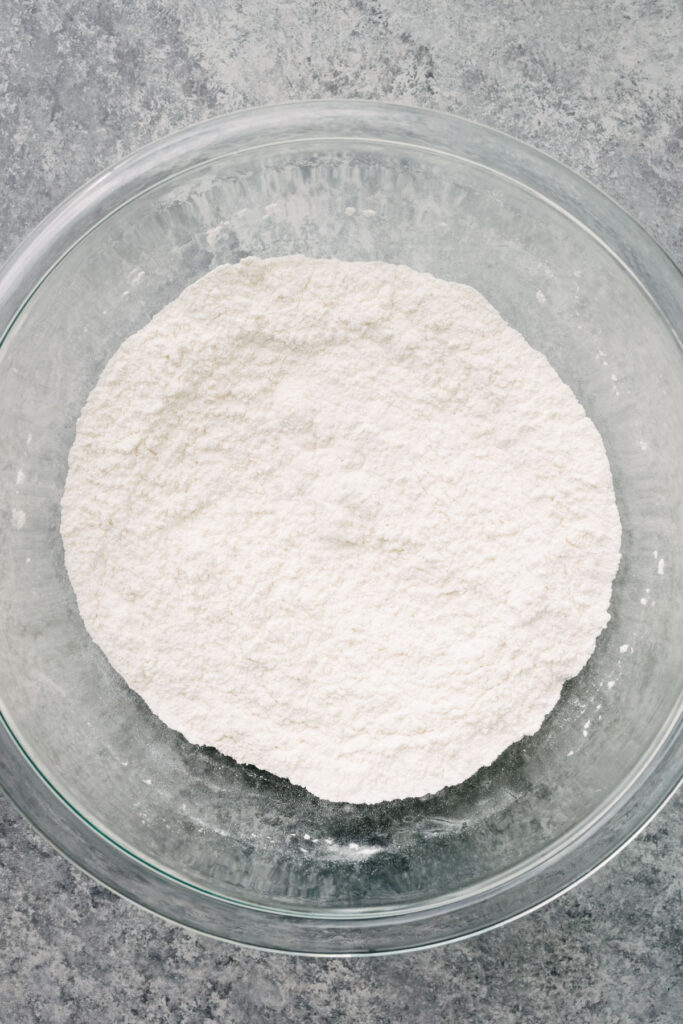

- Whisk the dry ingredients in a large mixing bowl until evenly combined - flour, sugar, salt, and baking powder.
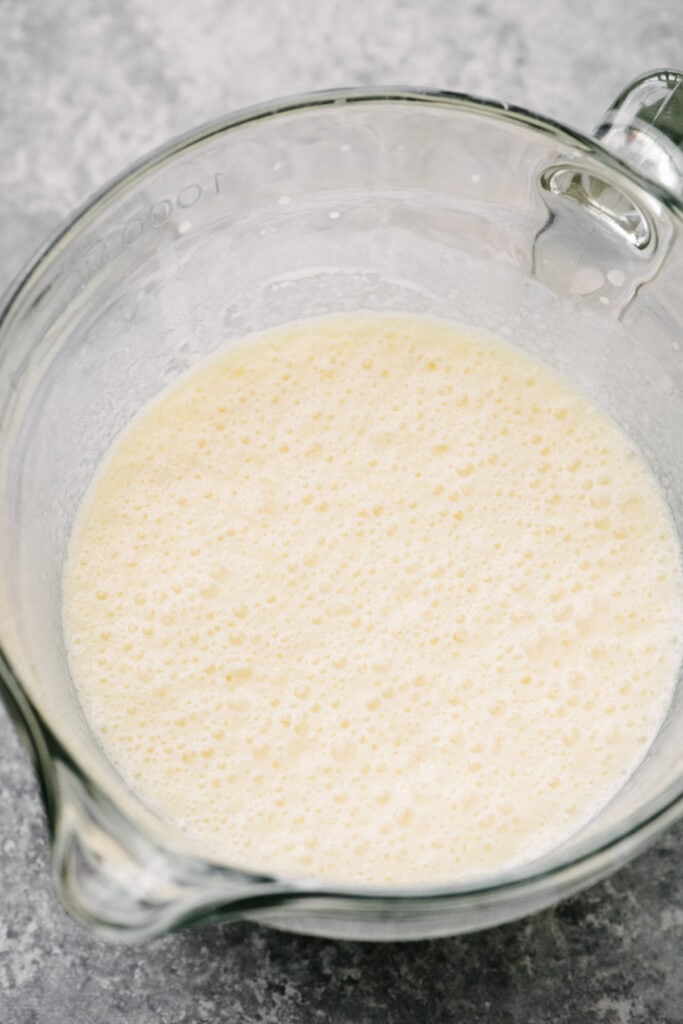
- Whisk the wet ingredients in a separate bowl until very well combined and frothy - melted butter, egg, milk or buttermilk, and vanilla extract.
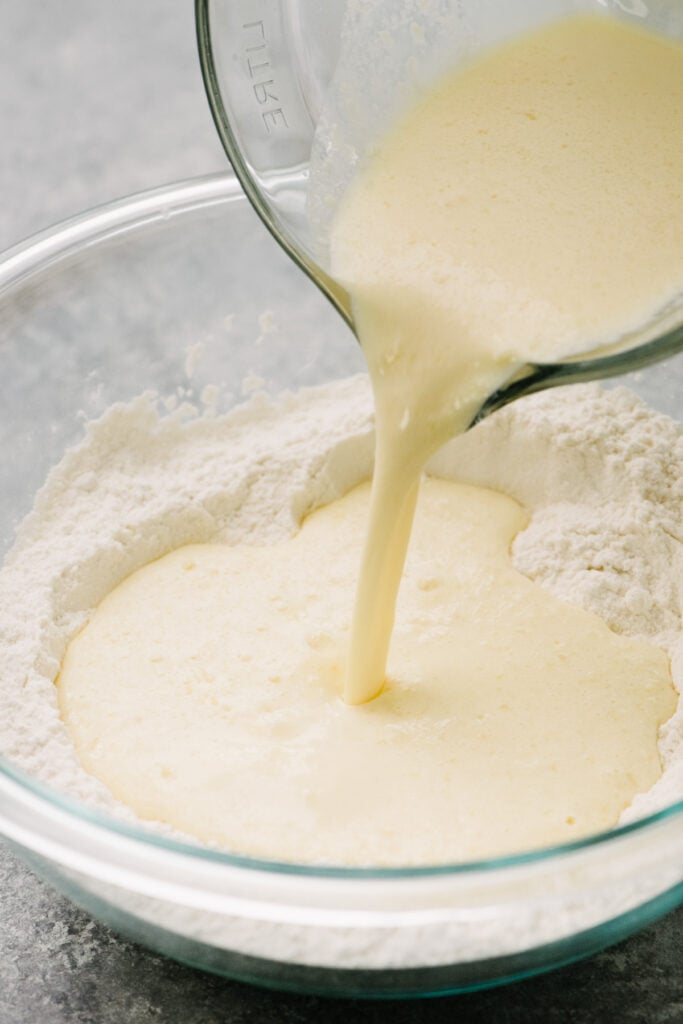
- Pour the wet ingredients into the dry ingredients.
- Gently fold the dry ingredients using a rubber spatula, mixing just until the batter is evenly moistened. If you are adding mix-ins to the batter, add them now.
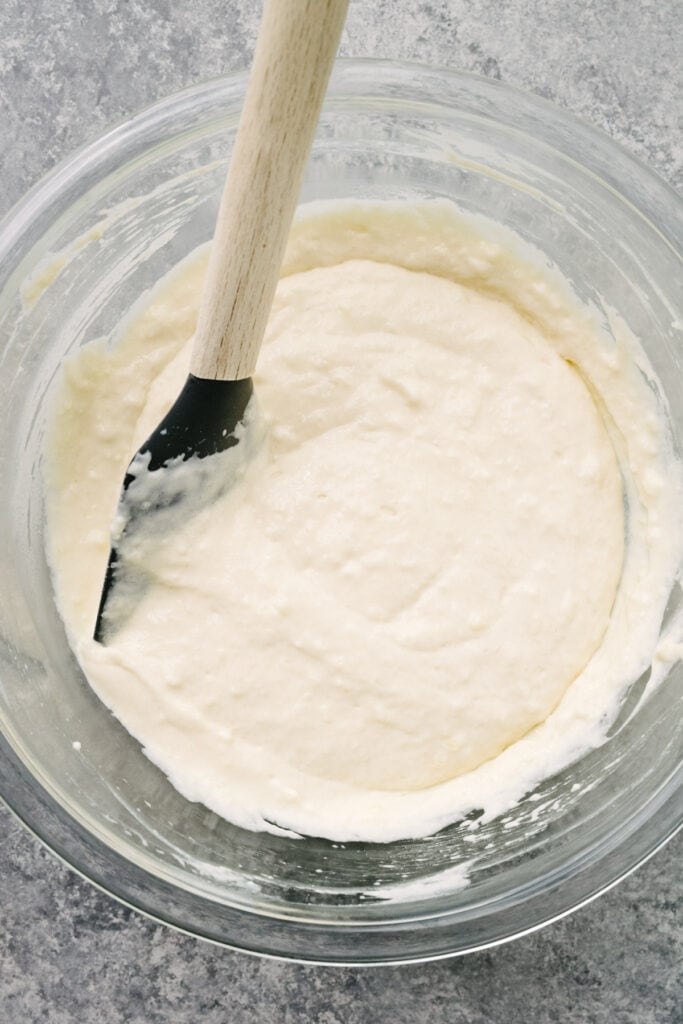
- Rest the batter for 10 minutes. Stir once more to break up any remaining small clumps.
- Heat a non-stick or cast iron skillet over medium to medium low heat.
- Pour three ¼ cup portions of batter into the heated skillet. Cook for 3-4 minutes until bubbles rise to the surface, then pop and remain. Also ensure the edges look set.
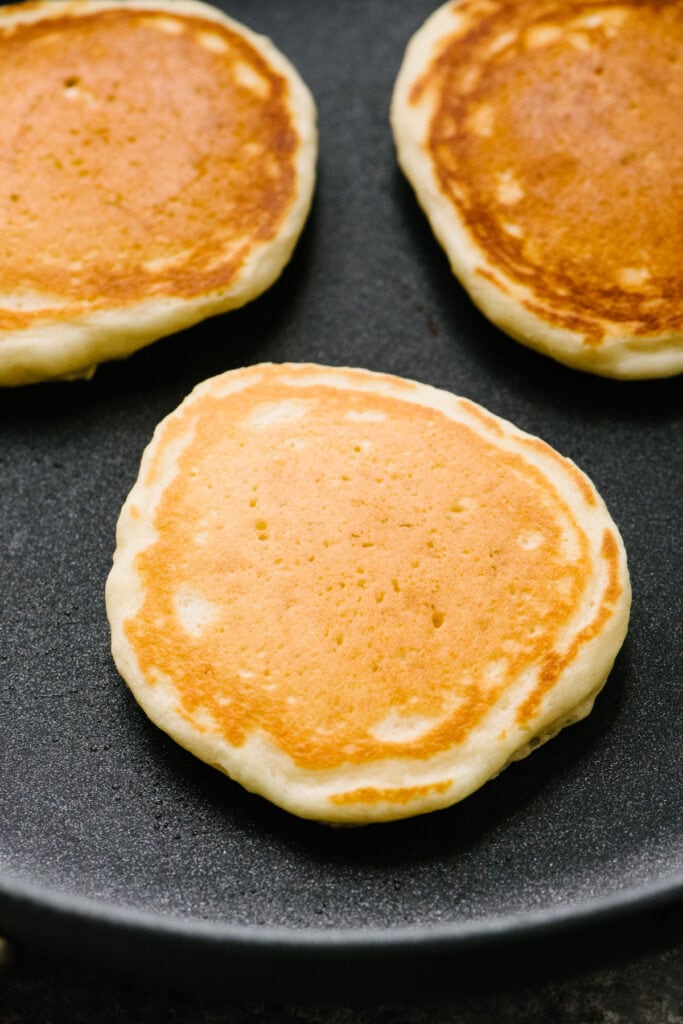
- Flip the pancakes and cook 2-3 minutes more, until cooked through./
- Remove the pancakes from the skillet and transfer to a 200°F oven to keep warm, or serve right away with your favorite toppings. Enjoy!
Adding Mix-Ins
Add one cup of mix-ins to your pancake batter after the first mix and before the first rest. Try the following:
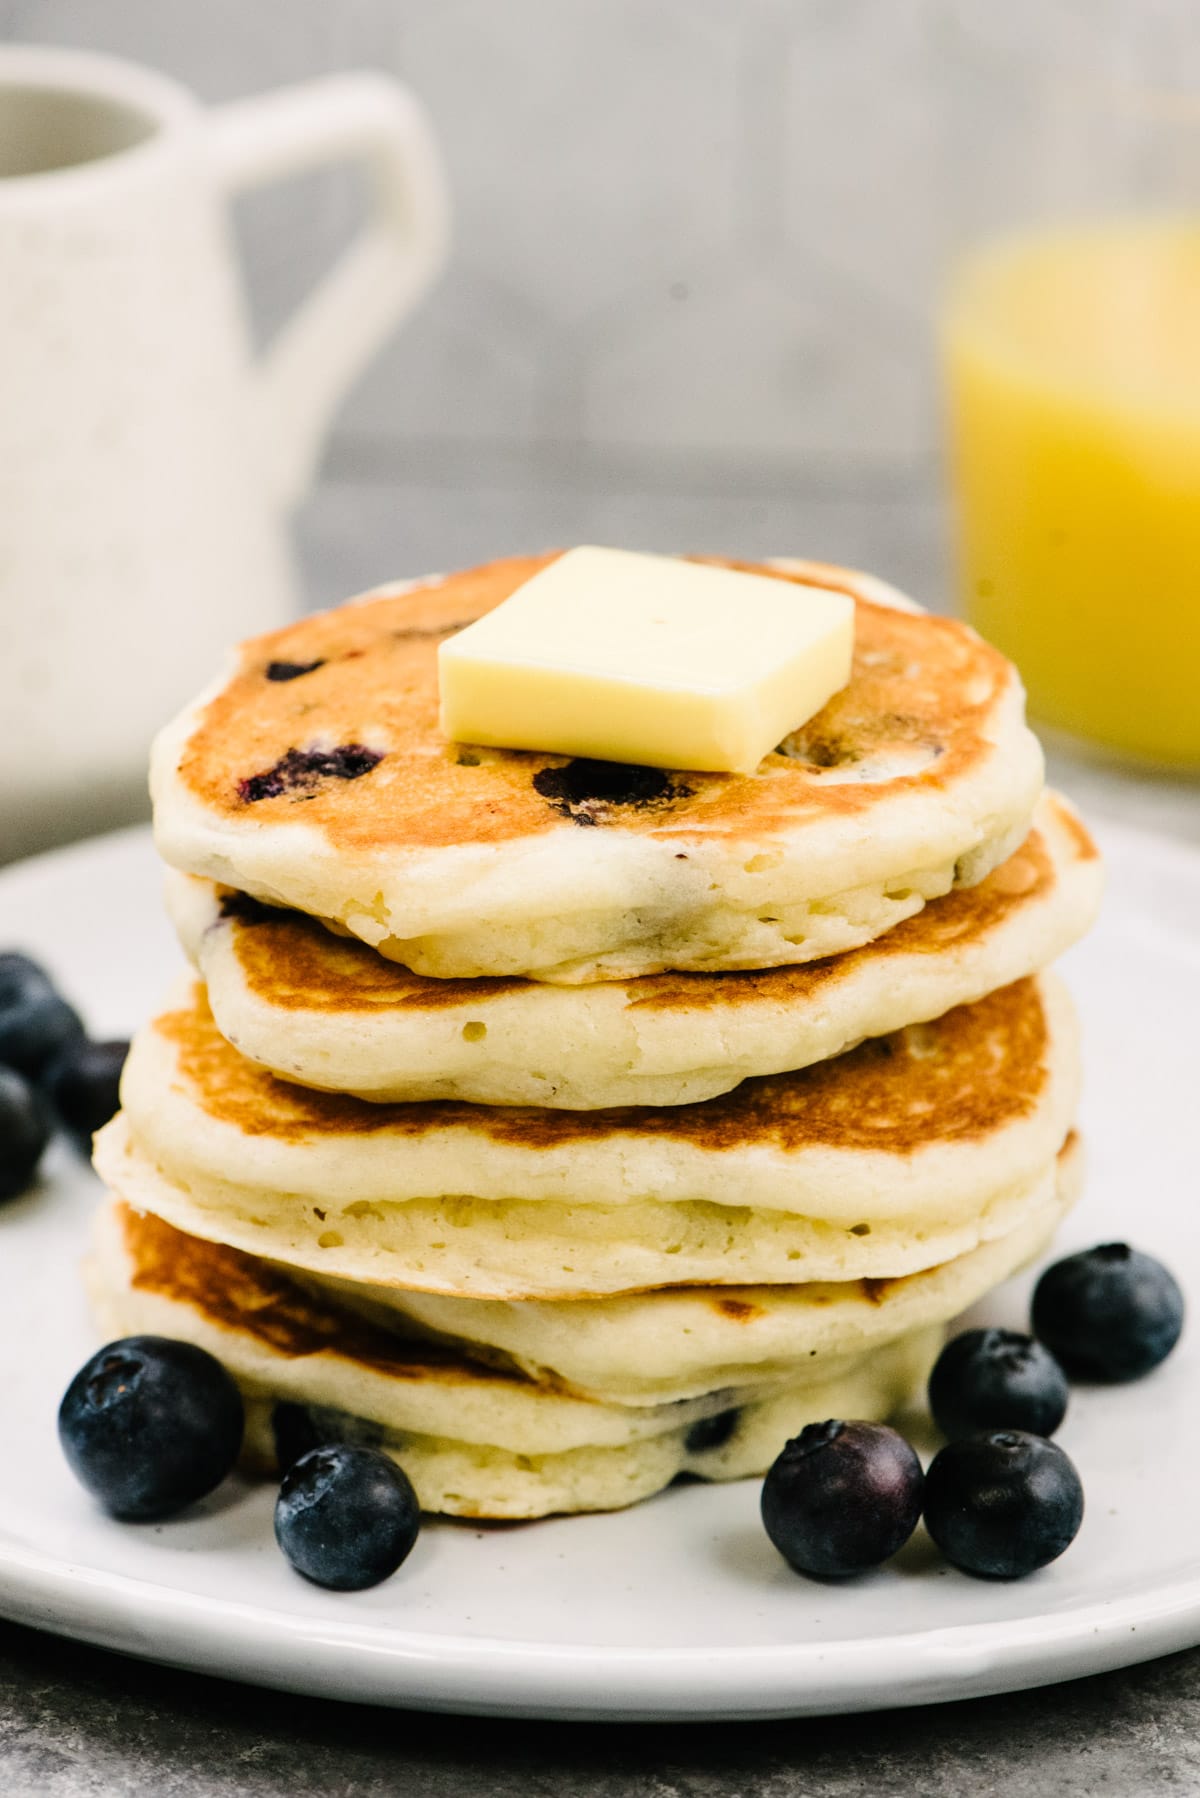
- Blueberry Pancakes: add 1 cup of fresh blueberries
- Chocolate Chip Pancakes: add 1 cup of mini chocolate chips
- Double Chocolate Pancakes: substitute ½ cup cocoa powder for ½ cup of the all purpose flour, then add 1 cup mini chocolate chips
- Cinnamon Pancakes: add 1 teaspoon cinnamon and substitute the white sugar for brown sugar
- Pecan Pancakes: add 1 cup chopped pecans and substitute the white sugar for brown sugar
- Savory Pancakes: omit the sugar and fold in 4 slices cooked chopped bacon
Toppings for Pancakes
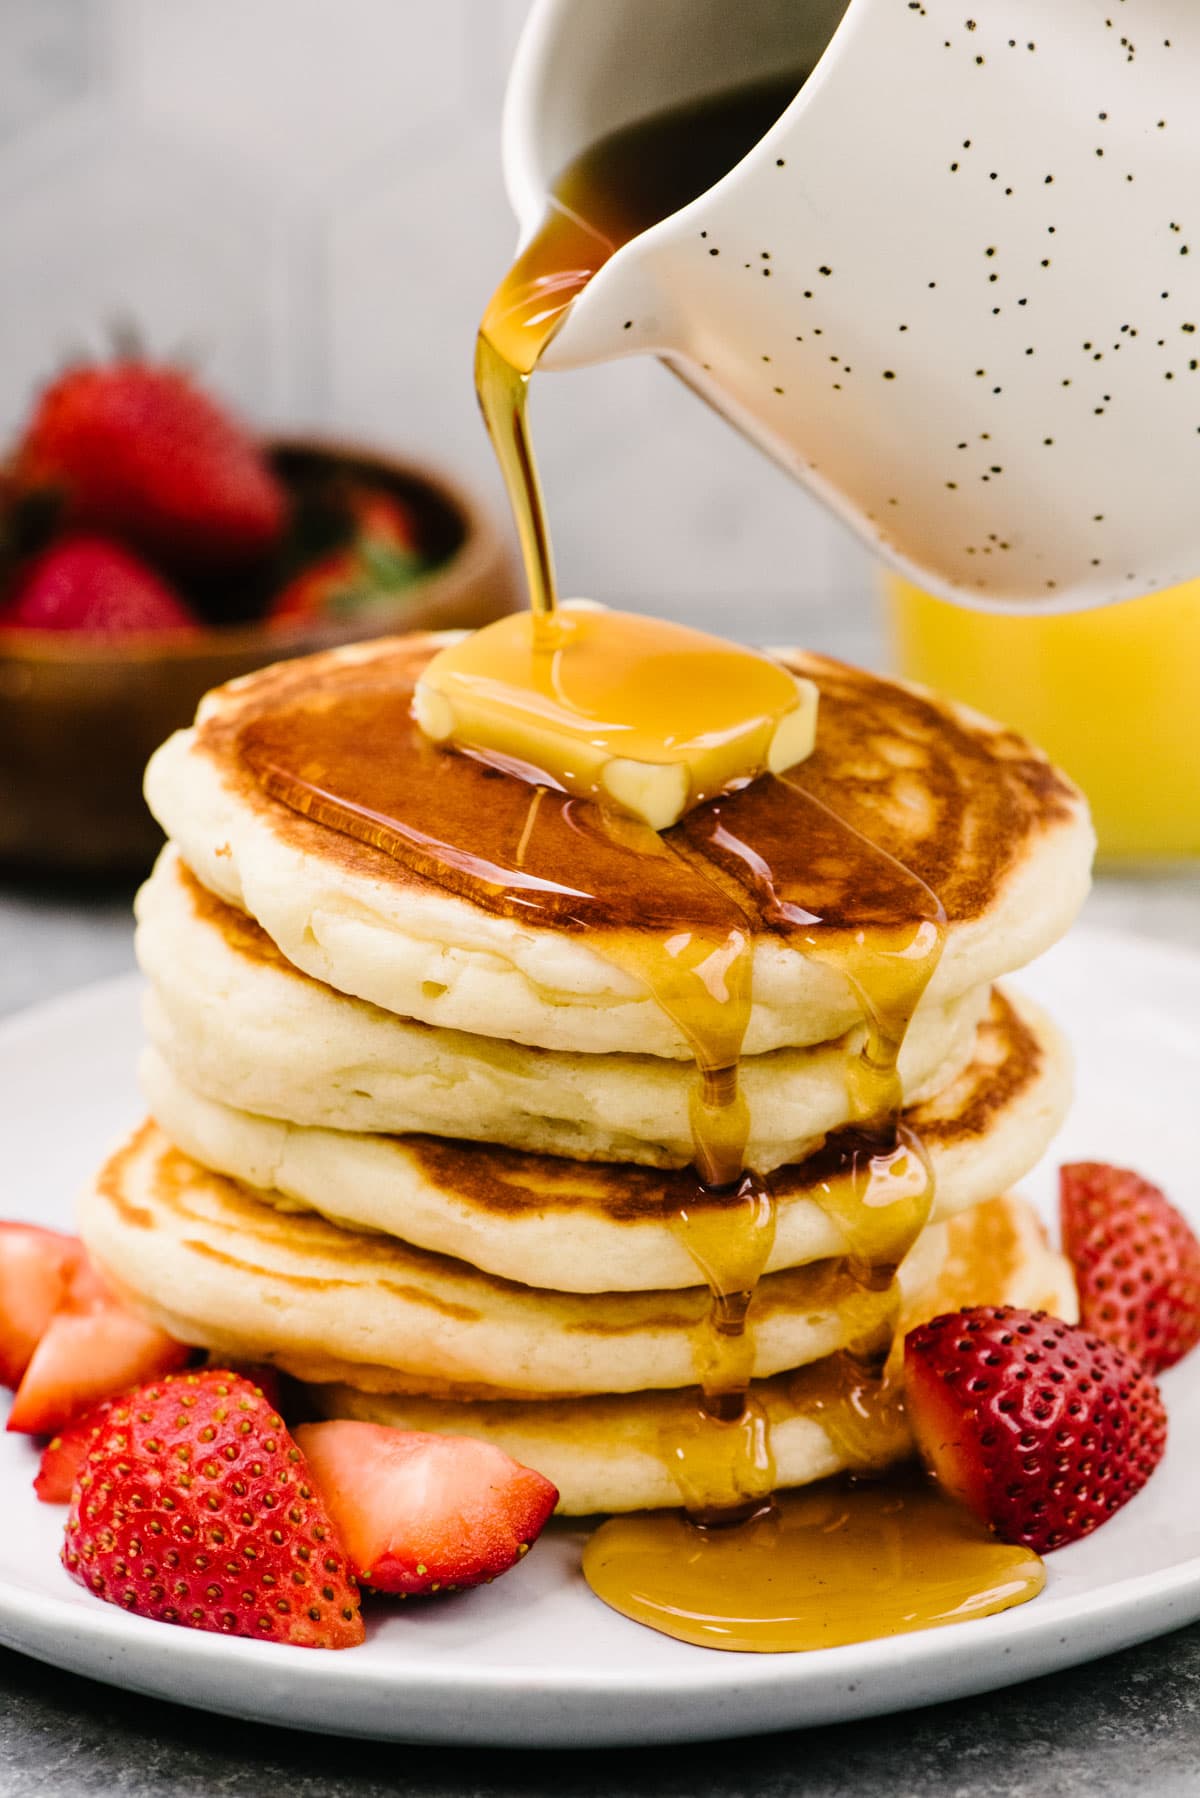
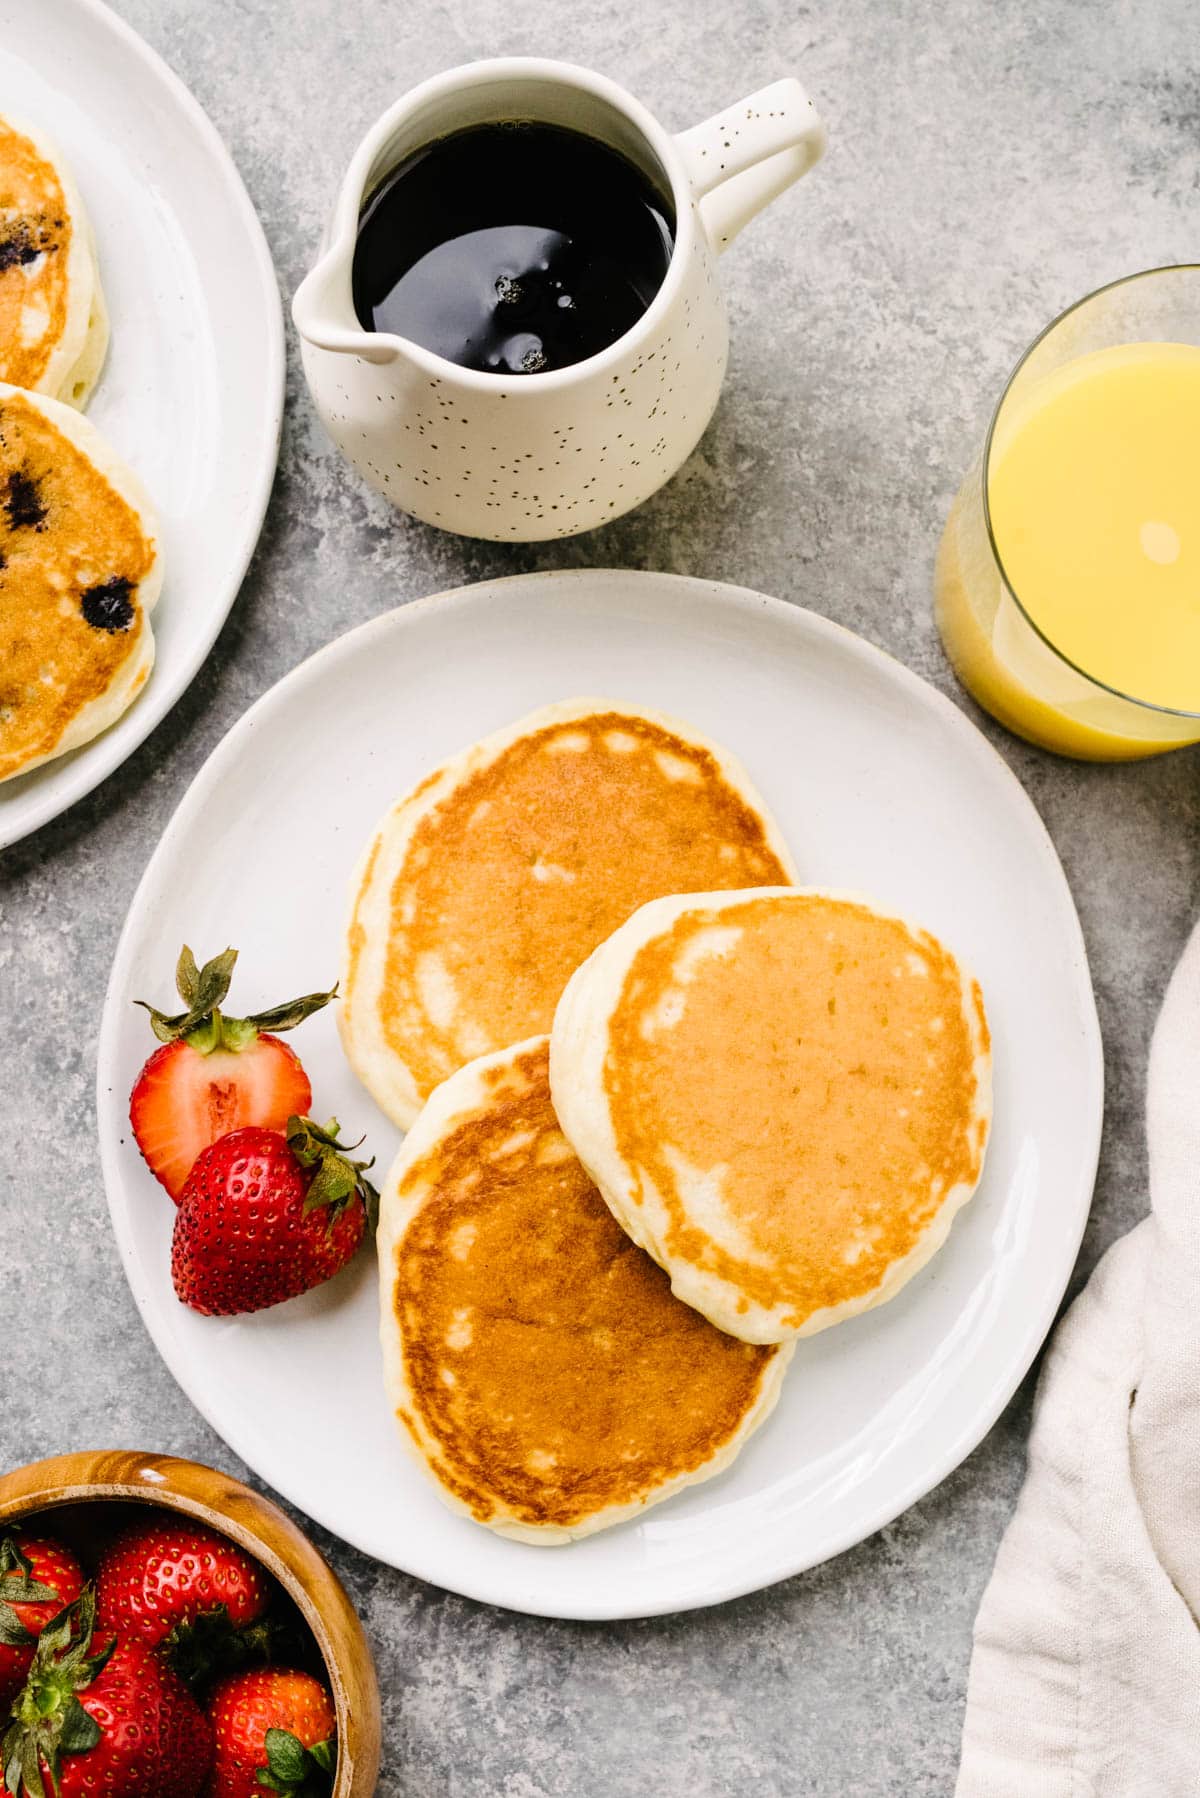
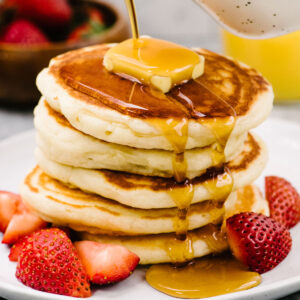
A classic buttermilk pancake calls for a classic topping. Keep it simple and drizzle real maple syrup on top. (This is great on savory pancakes with bacon for a sweet & salty mix.) But you don't need to stop there:
- Garnish with berries - blueberries, blackberries, sliced strawberries, or all of the above. Then go ahead and top those with whipped cream or maple syrup if you want!
- Add a dollop of berry compote and dust with powdered sugar for a grown-up brunch.
- Melt together peanut butter and honey in a 1:1 ratio and drizzle over homemade pancakes. Take that combo over the top with sliced bananas!
- Did you add mix-ins? Add syrup then top with even more blueberries, chocolate chips, nuts, etc.
- Schmear, don't pour! Top with your favorite spread - jams, nutella, nut butters, and fruit butters all work.
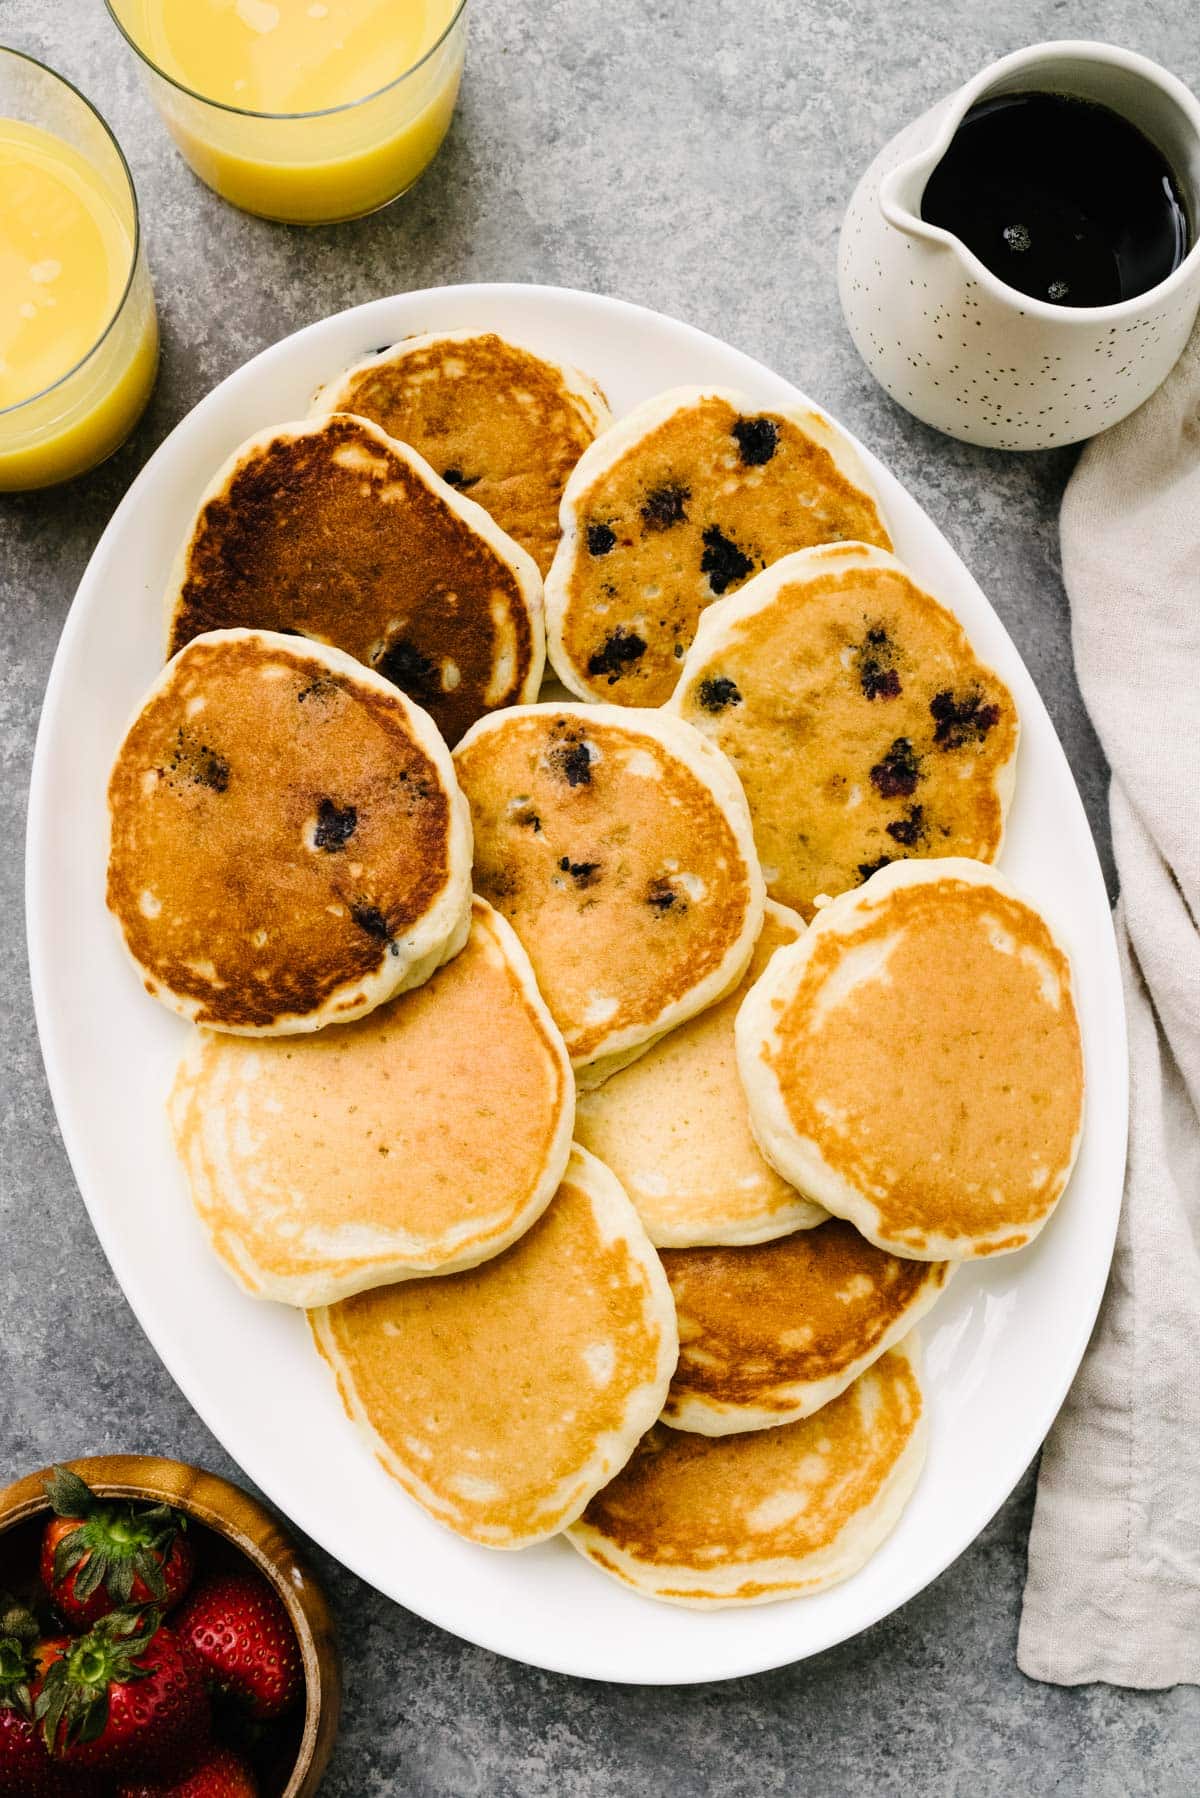
What to Serve With Pancakes
I frequently serve pancakes with crispy oven baked bacon and fruit salad for a complete meal, be it breakfast, brunch, or brinner! We switch up the salad based on the season, reaching for a berry salad in the early spring, cantaloupe salad through the summer, and citrus salad in the winter.
Make Pancakes Your Way
- For an extra dose of fiber, substitute up to half of the all-purpose flour with wheat flour.
- If you avoid processed sugars, substitute one tablespoon of honey for the sugar in this recipe.
- Make dairy-free pancakes. Substitute an equal amount of non-dairy milk for the cow's milk (including buttermilk). We prefer oat milk or cashew milk for their thicker texture. Use light olive oil in place of the butter, but reduce to 3 tablespoons instead of 4. Be sure to use baking powder, not soda, when substituting non-dairy milk.
Storing Pancake Batter
- Store pancake batter in the refrigerator for no more than 48 hours. After 24 hours, you'll definitely notice a loss in quality; after 48, it becomes a safety issue because of the raw eggs and dairy in the mixture.
- You can absolutely freeze unused pancake batter - though we highly recommend making and freezing for easier eating later. Scrape batter into a ziploc bag and press flat to carefully remove as much of the air as you can. Will keep for 1 month and is easily defrosted overnight in the fridge or by soaking the bag in lukewarm water.
Storing Pancakes
- In Between Batches: keep pancakes warm in-between batches by storing cooked pancakes on a baking sheet in a 200°F oven.
- In the Fridge: seal pancakes in a sealed container or ziploc bag for up to 5 days in the refrigerator. Reheat for 45 seconds in the microwave, until slightly steaming, or warm for 1-2 minutes in the toaster.
- In the Freezer: flash-freeze pancakes for best results. Arrange on a baking sheet in a single, even layer. Transfer pancakes to the freezer for 1 hour, on the baking sheet, until firm. Then, store frozen pancakes in a freezer bag for up to 3 months. Defrost in 30-second increments in the microwave - flip pancakes over in-between each interval. You can defrost larger batches overnight in the fridge. Reheat as noted above.
Did you make these fluffy homemade pancakes? I'd love to know how they turned out! Leave a comment and a rating below.
While you're at it, let's be friends - follow me on Pinterest and Instagram for the latest and greatest.
How to Make Pancakes
Description
Ingredients
- 4 tablespoon unsalted butter
- 1 c milk, cows or plant based; see Note 1
- 1 large egg
- 1 teaspoon vanilla extract
- 1½ c all-purpose flour
- 1 tablespoon baking powder
- 1 tablespoon sugar, or honey
- ½ teaspoon kosher salt
- 1 cup fresh blueberries or chocolate chips, optional
Instructions
- Place butter in a medium mixing bowl or large (4-cup) measuring cup. Heat in the microwave on 50% power for 30-45 seconds, until the butter melts.
- Add the milk, egg, and vanilla to the melted butter, then whisk until the ingredients are well combined and frothy.
- Combine the flour, baking powder, sugar, and kosher salt in a second, larger mixing bowl. Whisk until very well combined, then make a well in the center of the dry ingredients.
- Pour the wet ingredients into the dry ingredients. Use a rubber spatula to gently fold the wet ingredients into the dry ingredients until the batter just comes together; some small lumps are okay!
- If adding blueberries or chocolate chips, add them to the batter now and fold in gently.
- Rest the batter for 10 minutes, then give it one more stir. If the batter is too thick, add more milk 1-2 tablespoons at a time; if the batter is too thin, add flour 1 tablespoon at a time. The consistency should be between the consistency of brownie batter and cake batter - thick, but pourable.
- Heat a 12” skillet over medium low heat. The skillet is heated to the correct temperature once you can sprinkle a few drops of water over the pan, and the droplets skid around the surface, then evaporate. See Note 2.
- Pour three ¼ cup portions of batter into the skillet, evenly spaced. Cook 3-4 minutes, or until the edges are set and bubbles rise to the surface of the pancake and remain after popping. Flip the pancakes (we like using a fish spatula!) then cook 2-3 minutes more.
Recipe Notes
- Use 1.25 - 1.5 cups buttermilk in place of cows milk. Start with 1.25 cups and add more if needed.
- Substitute 1 teaspoon baking powder and ¾ teaspoon baking soda.
- Use half all-purpose and half whole wheat flour.
- Use an equivalent amount of honey or agave in place of the sugar.
- In place of butter, use 3 tablespoons of light olive oil.

Comments
No Comments