Move over sweet potatoes, sweet corn is coming back for an autumn encore! Homestyle Creamed Corn is right at home on your Thanksgiving table. It's super easy, super creamy, and super sweet - just like you remember from childhood, only way better. Use frozen corn for a quick and easy side dish.
Jump to:
Every year once autumn settles in, I try to scratch an old itch by recreating at least one of my (or my husband's) favorite holiday dishes from childhood. Just a little culinary easter egg to spark a cozy family memory or two as the weather turns cold.
By elevating flavors, upgrading ingredients, and even streamlining our cooking methods, we've wound up with quite a few creations that surpass Thanksgiving sides of yore. (Though we'd never admit to our parents or grandparents that's what we were attempting to do.)
Olive oil mashed potatoes that are still super fluffy without tons of dairy. Warm cinnamon apples that definitely didn't come in TV dinner tray. Sneaky squash hidden in macaroni and cheese. And green beans about a dozen different ways.
This year's "makeover" was a surprise to me because I really didn't think I was going to dig back in quite so hard now that my palate is more discerning than that of a 7 year old.
Not on purpose, but I tend to ignore corn recipes after "fresh" season is over and often wind up sleeping on frozen. But we turned to buttery skillet corn so many times this year - even when we didn't have fresh - that I wanted to zhuzh that up.
Maybe a pudding... maybe a casserole... but those just didn't cut it. I kept coming back to that sweet, soupy (pardon my French) slop that always felt like such a treat when mom cracked that can of bright yellow bits instead of peas and carrots.
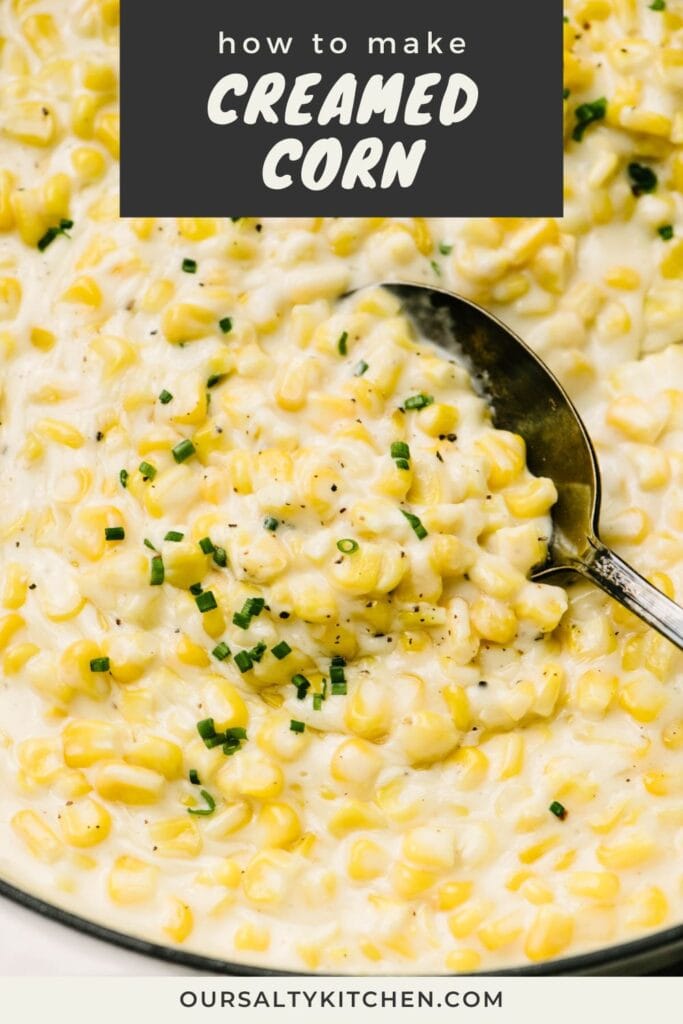
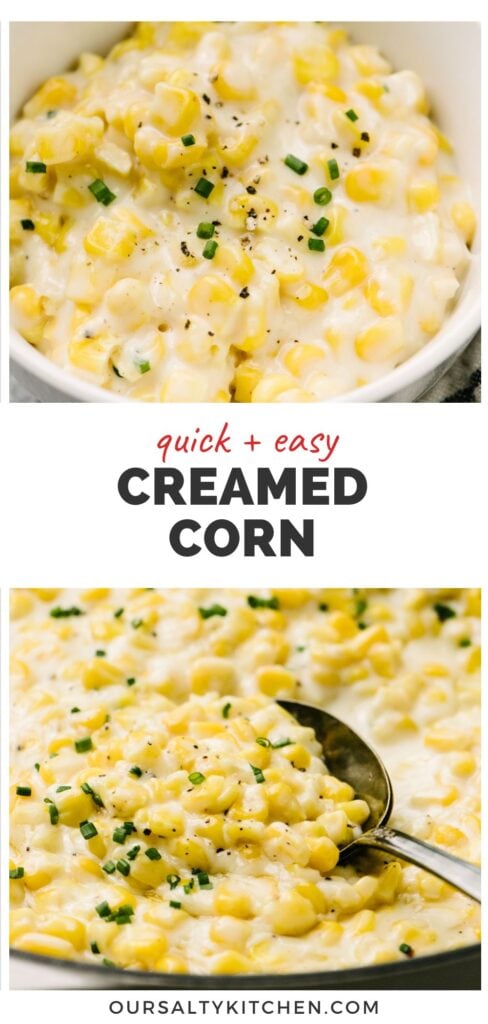
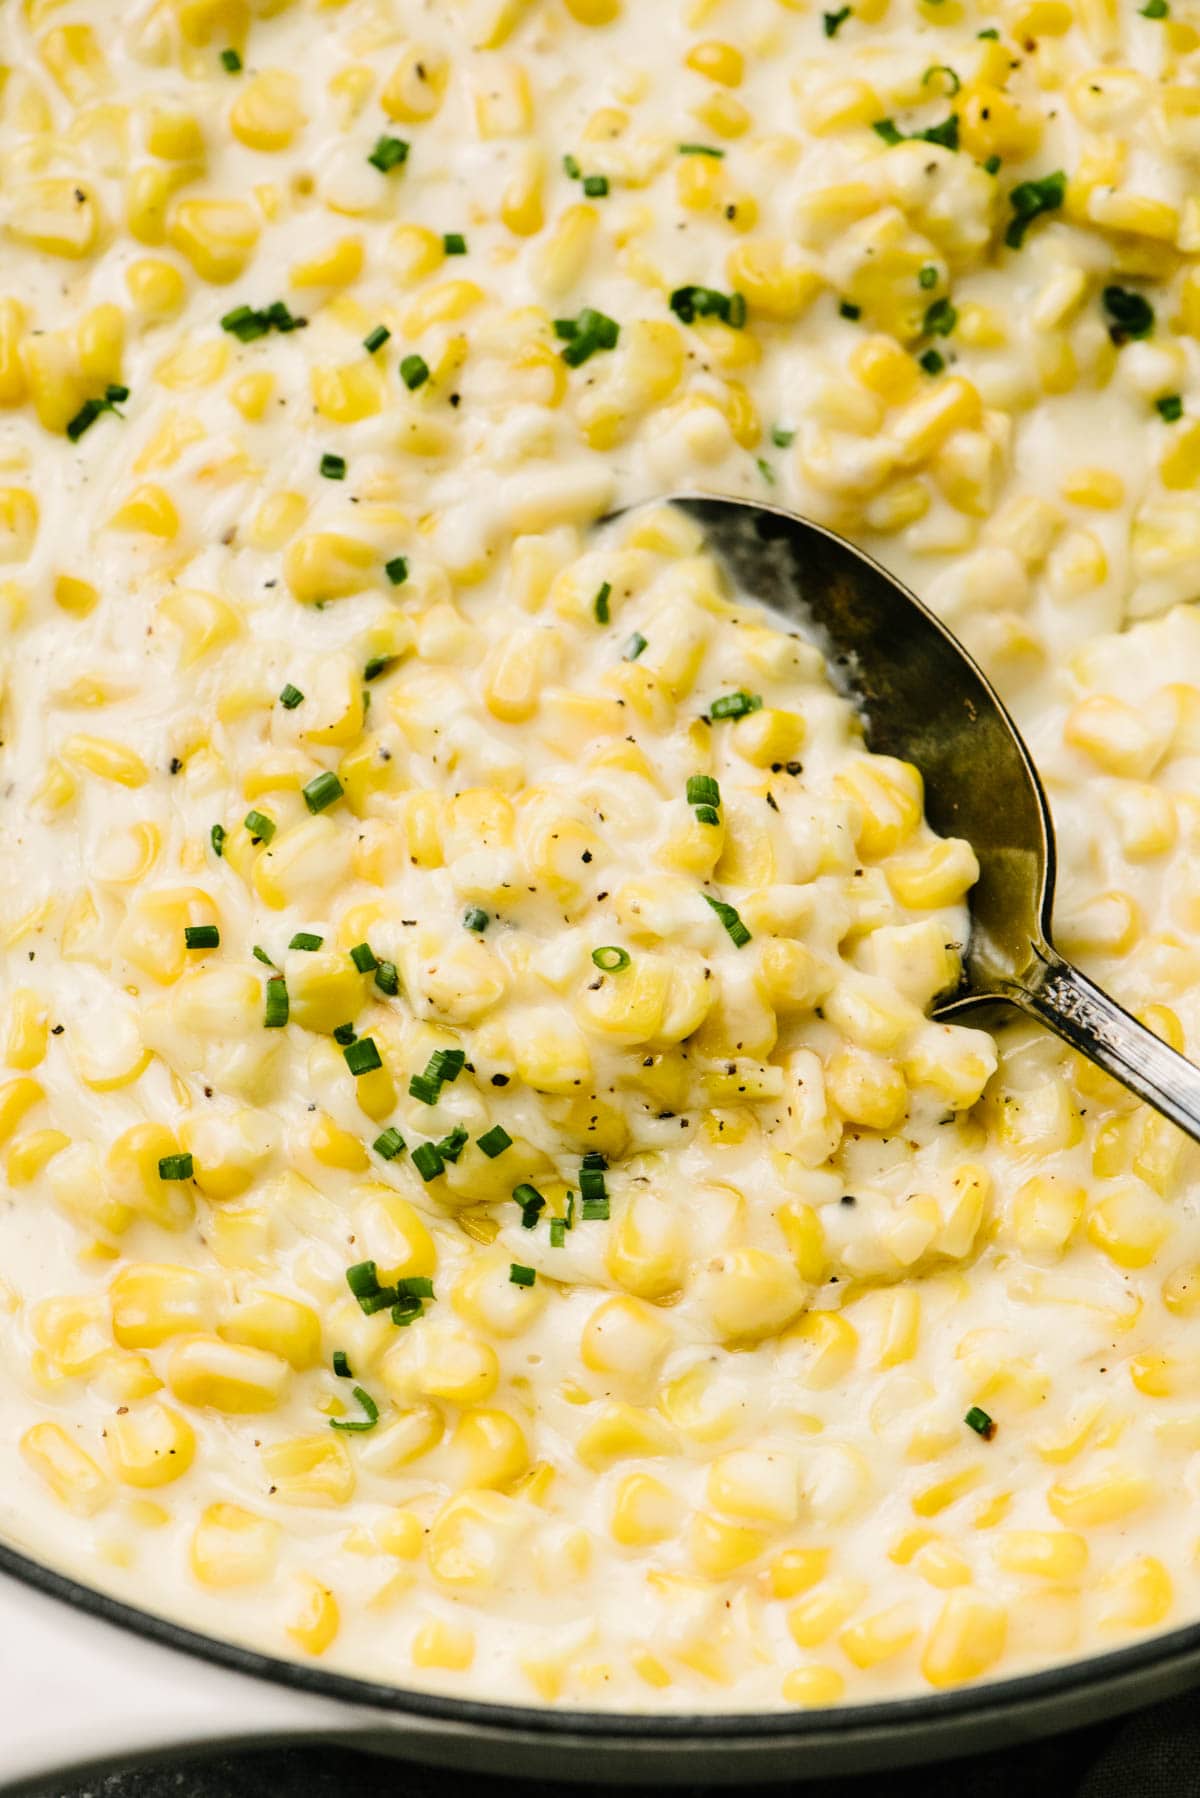
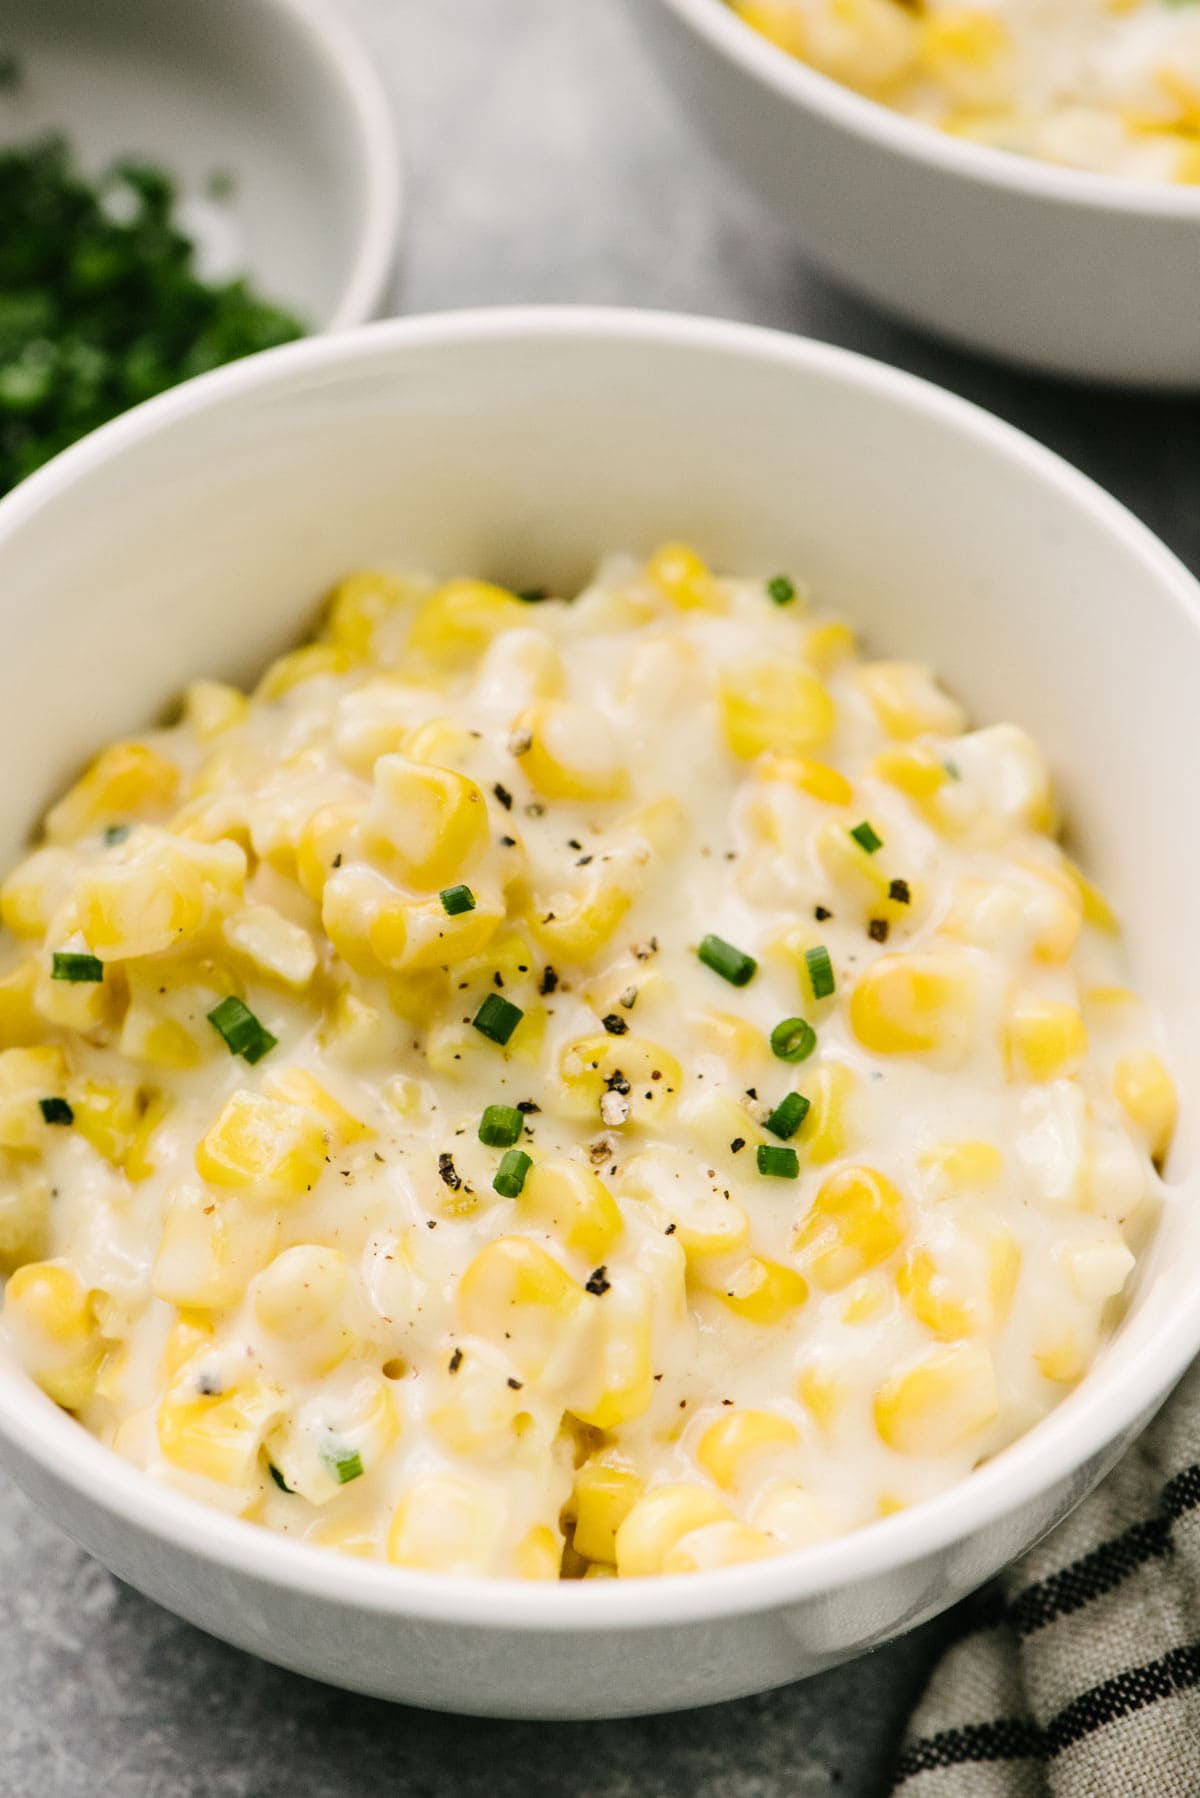
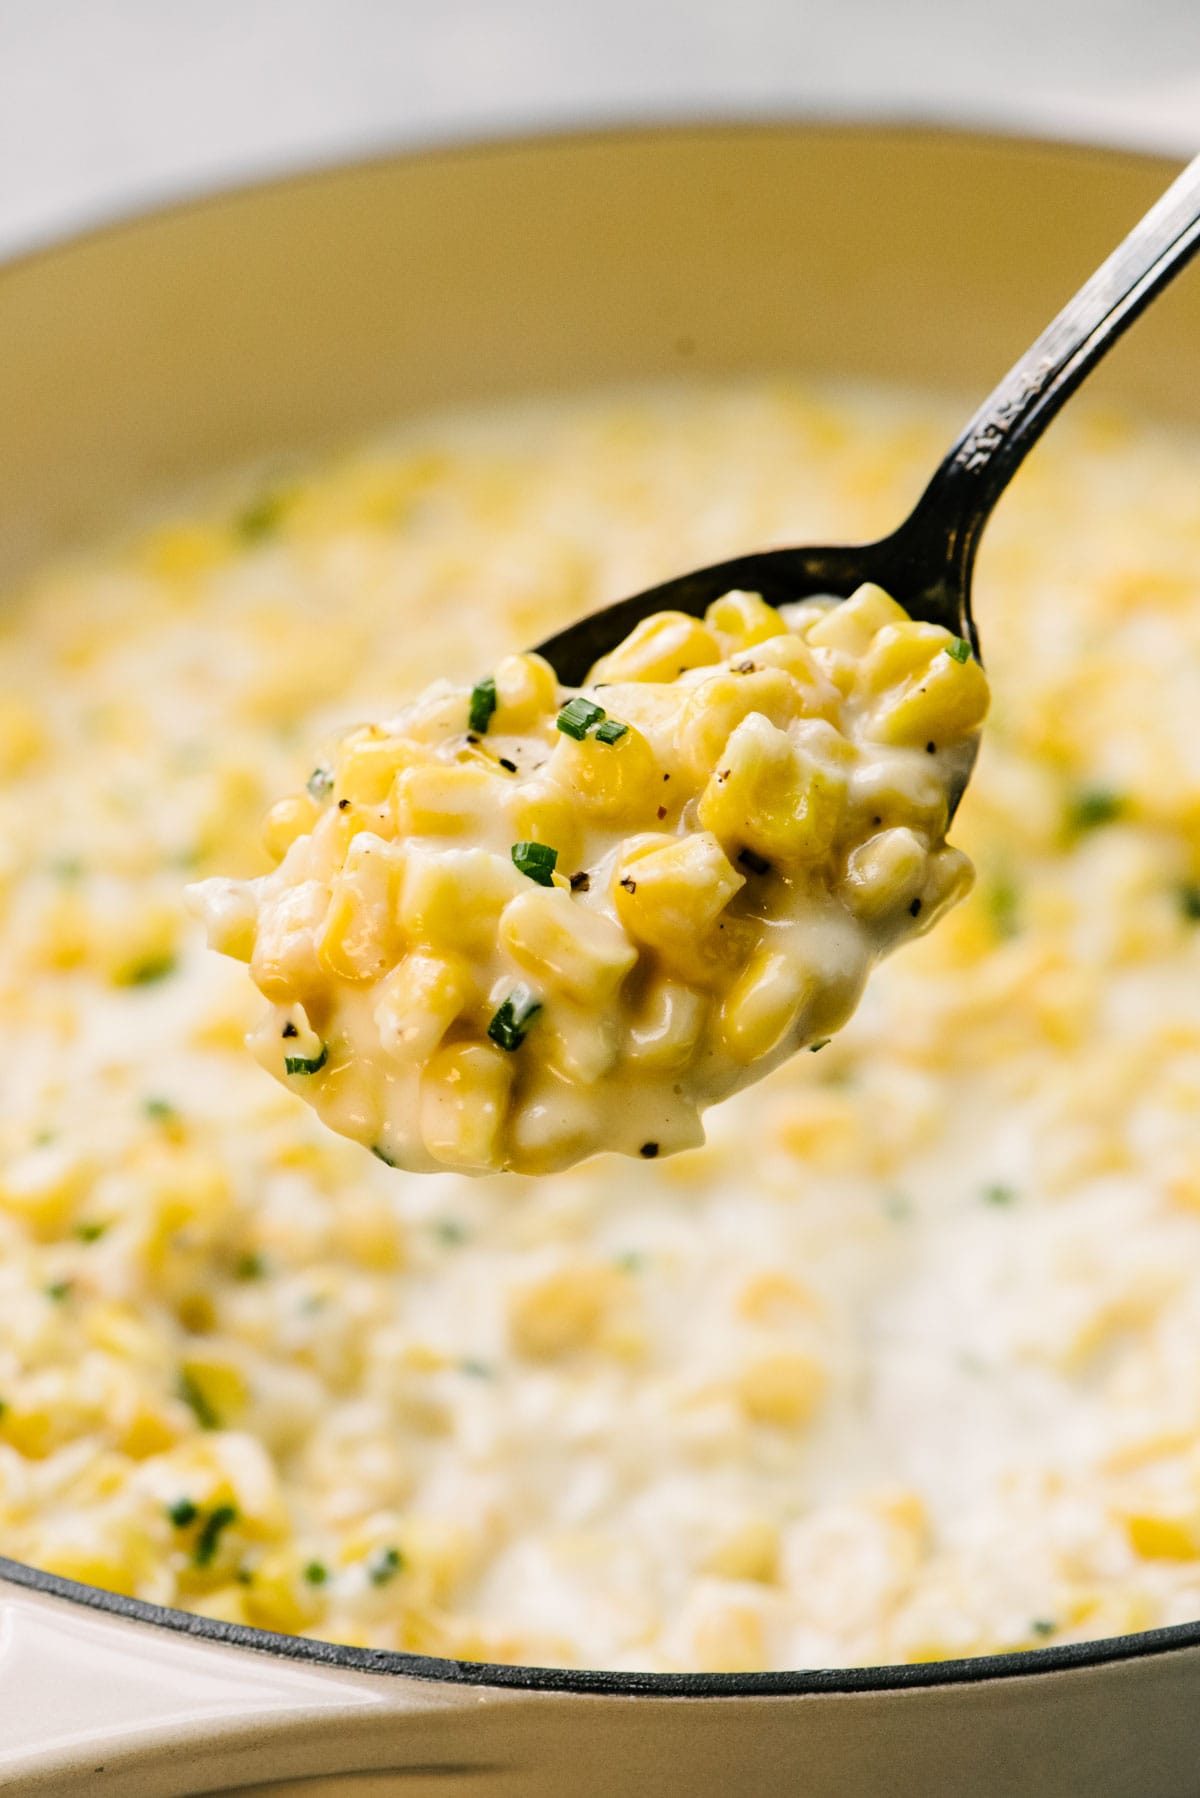
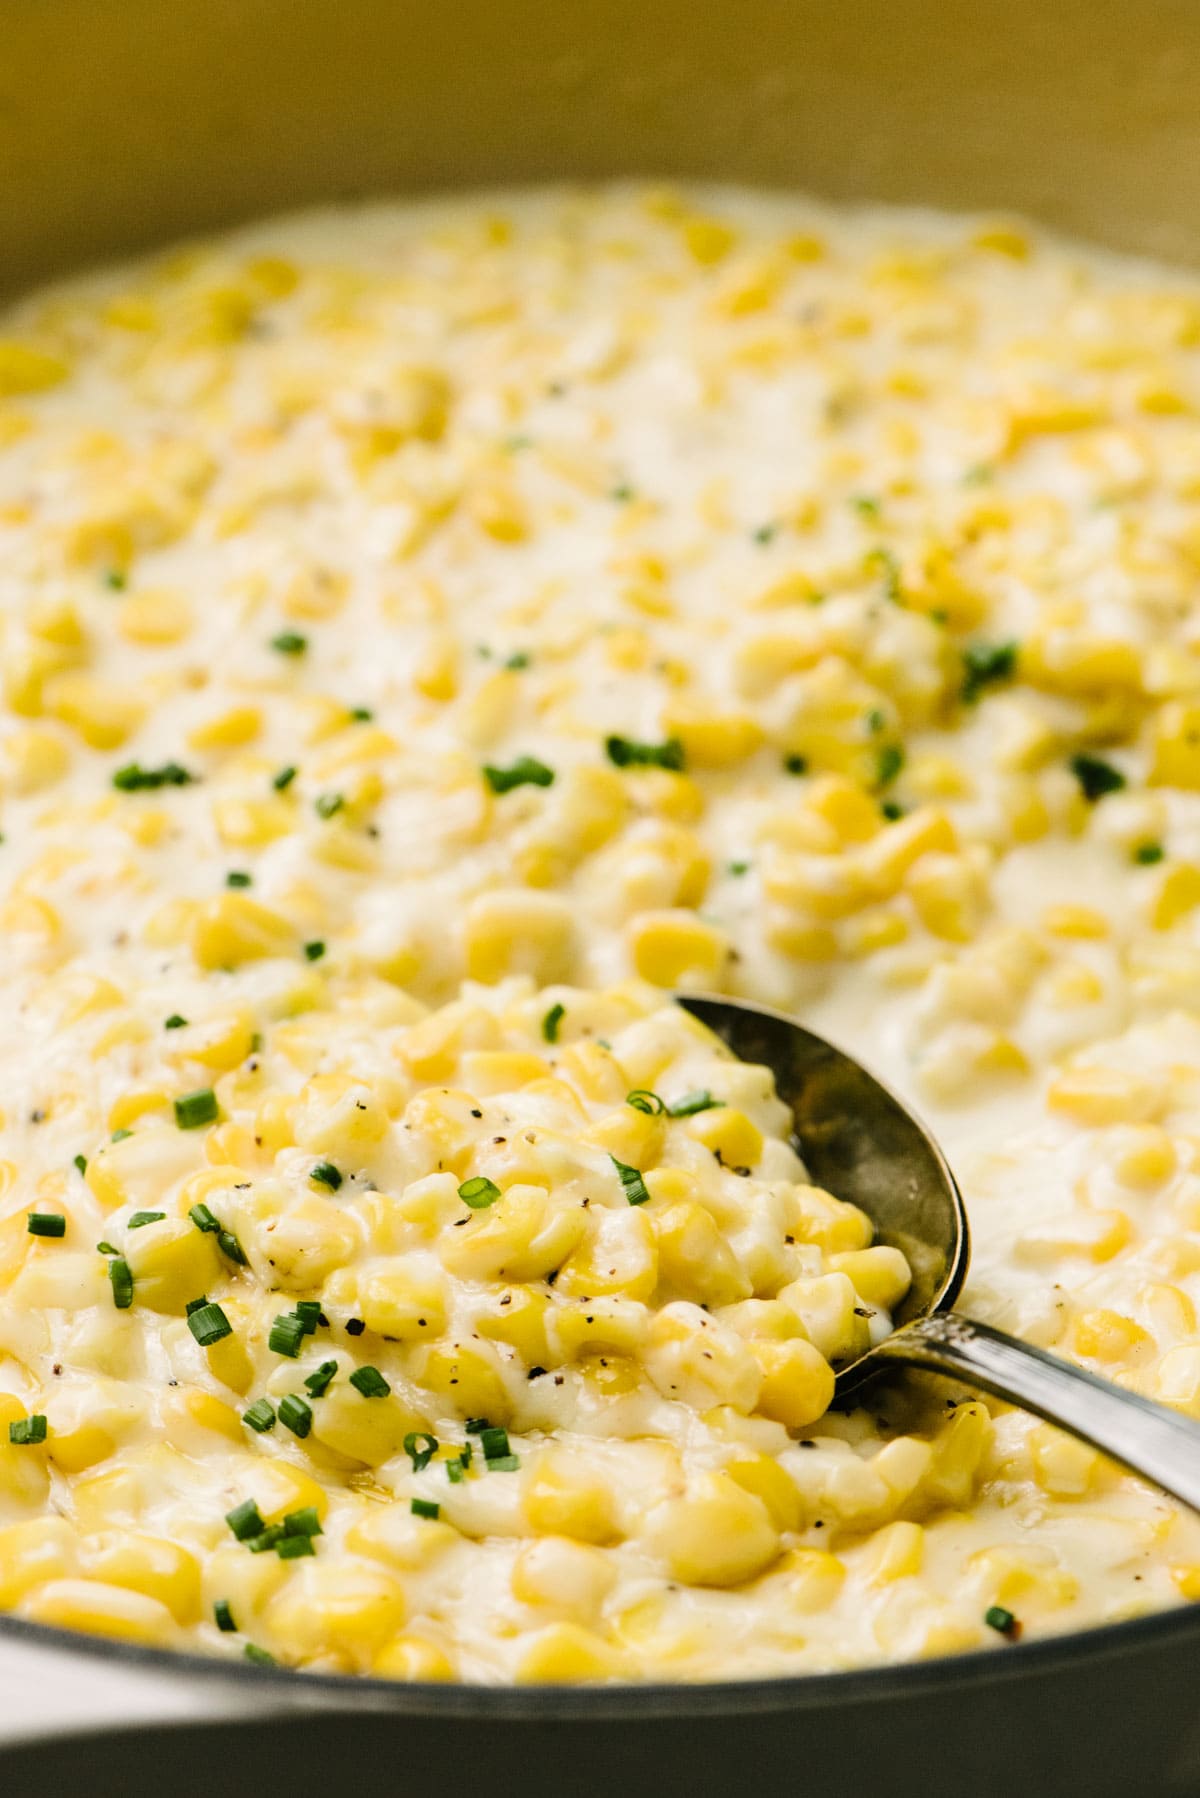
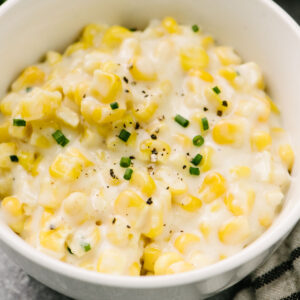
This homemade creamed corn (or cream style corn, if you must) is really rich and thick, and extra sweet thanks to an added touch of sugar or honey - I really wanted this cheesy corn recipe to capture that same canned creamed corn sensation, but with a less cloying taste and texture. This recipe not only delivers on that, but it is absolutely holiday spread-worthy.
Why You'll Love It
Food disappointment leaves a bitter taste. Nothing's worse than reaching for a nostalgic treat, only to be let down. On the flip side, nothing's sweeter than when it tastes even better than you remember. Case in point: homestyle creamed corn. But the flood of delicious memories isn't the only reason to cook this classic corn recipe:
- Quick: this recipe is ready in just 25 minutes, which makes it a convenient stovetop side dish to prepare while the turkey is resting on Thanksgiving day.
- Easy: this is one of the ultimate beginner-friendly Thanksgiving sides. You need few tools, and even fewer skills, to make cream style corn perfectly.
- Super Sweet: use extra sweet frozen for a recipe that's even better than the canned stuff from your childhood dreams. A touch of added sugar or honey really brings it over the edge.
- Make Ahead Friendly: if you need to make it in advance, you're in luck. Creamed corn easily reheats on the stovetop. If it's too thick, just add a tablespoon or two of milk to thin it out.
How to Make Cream Style Corn
Skip the can (and the cob) and head for the freezer to make the best homemade creamed corn. Allow the edges of the corn to turn just a bit golden for a sweeter bite that holds up beautifully in the thick and creamy sauce.
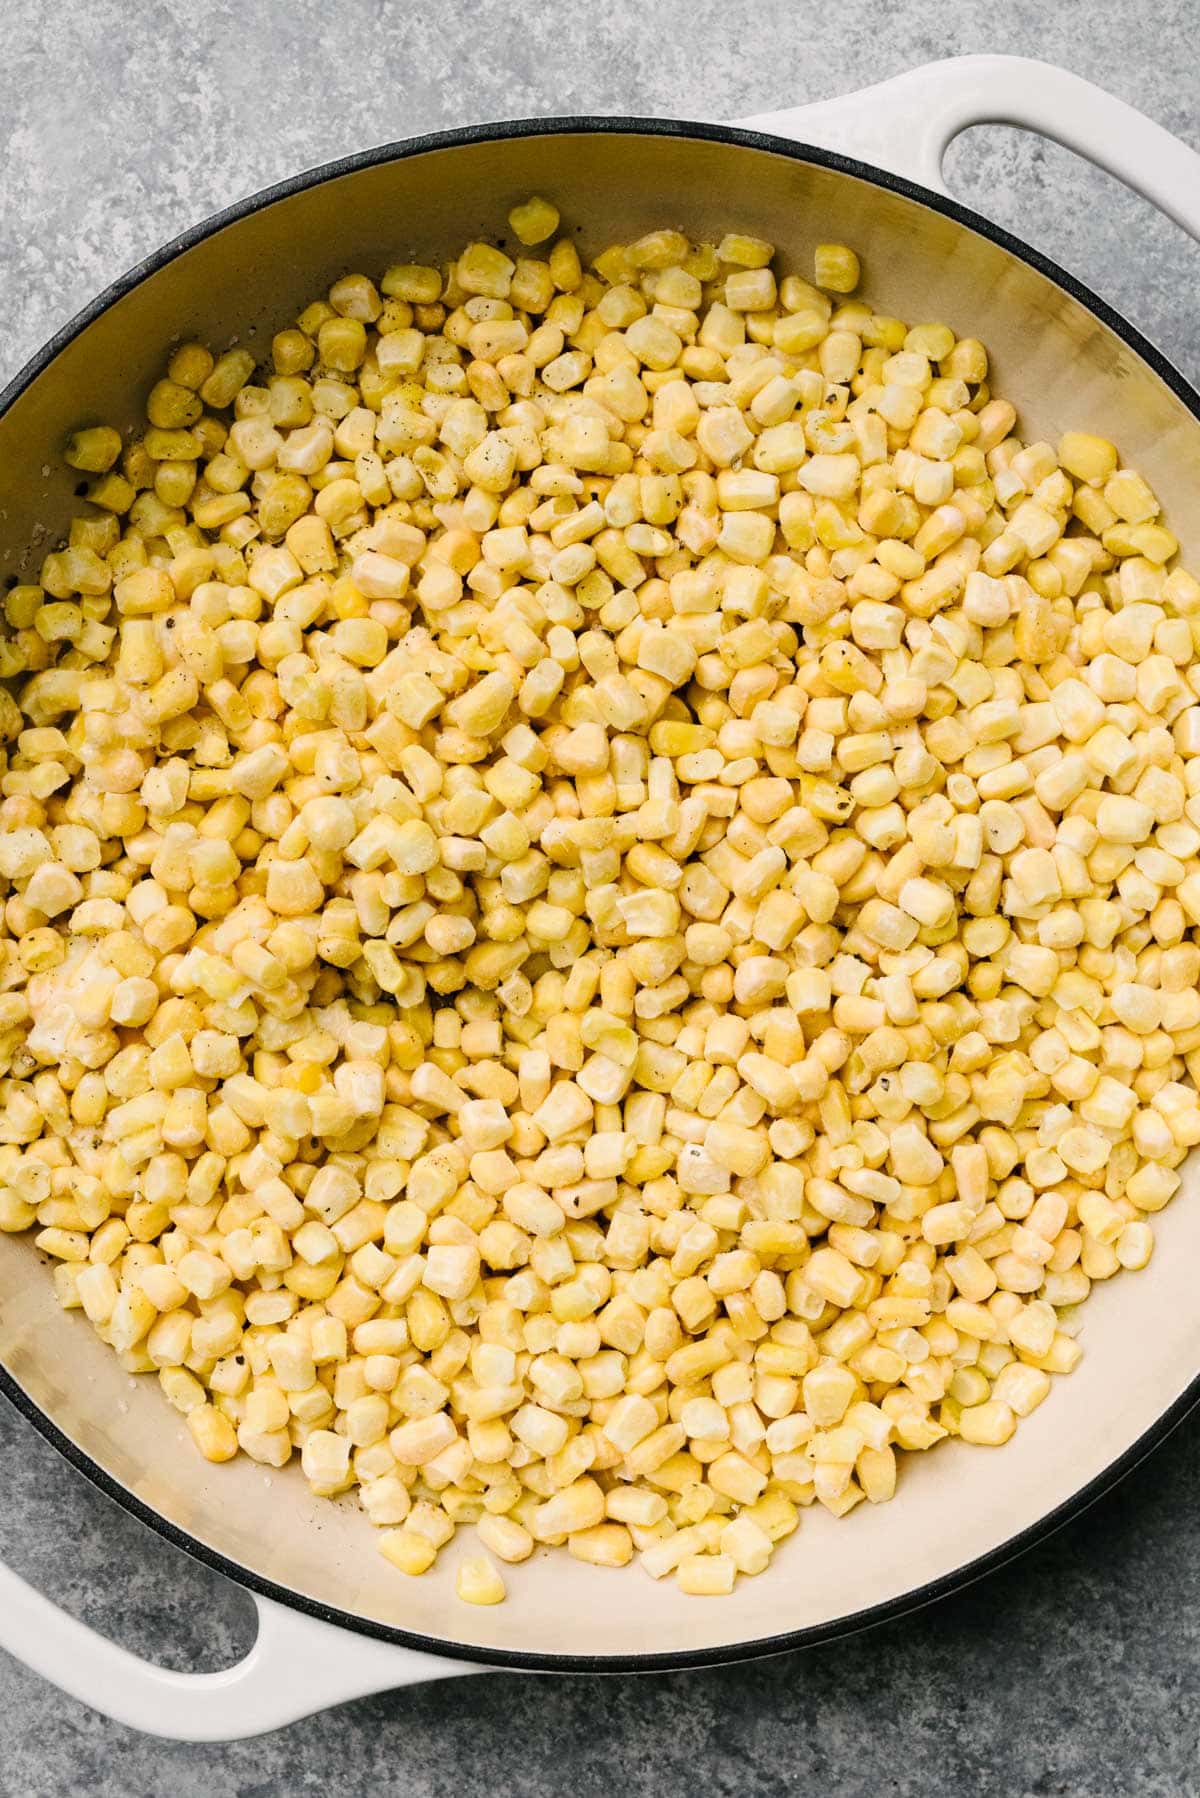

- Melt butter in a large, 12" skillet over medium heat. Add the frozen corn along with a pinch of salt and pepper and toss to coat in the butter.
- Saute until the corn defrosts, the released water evaporates, and the skillet appears dry.
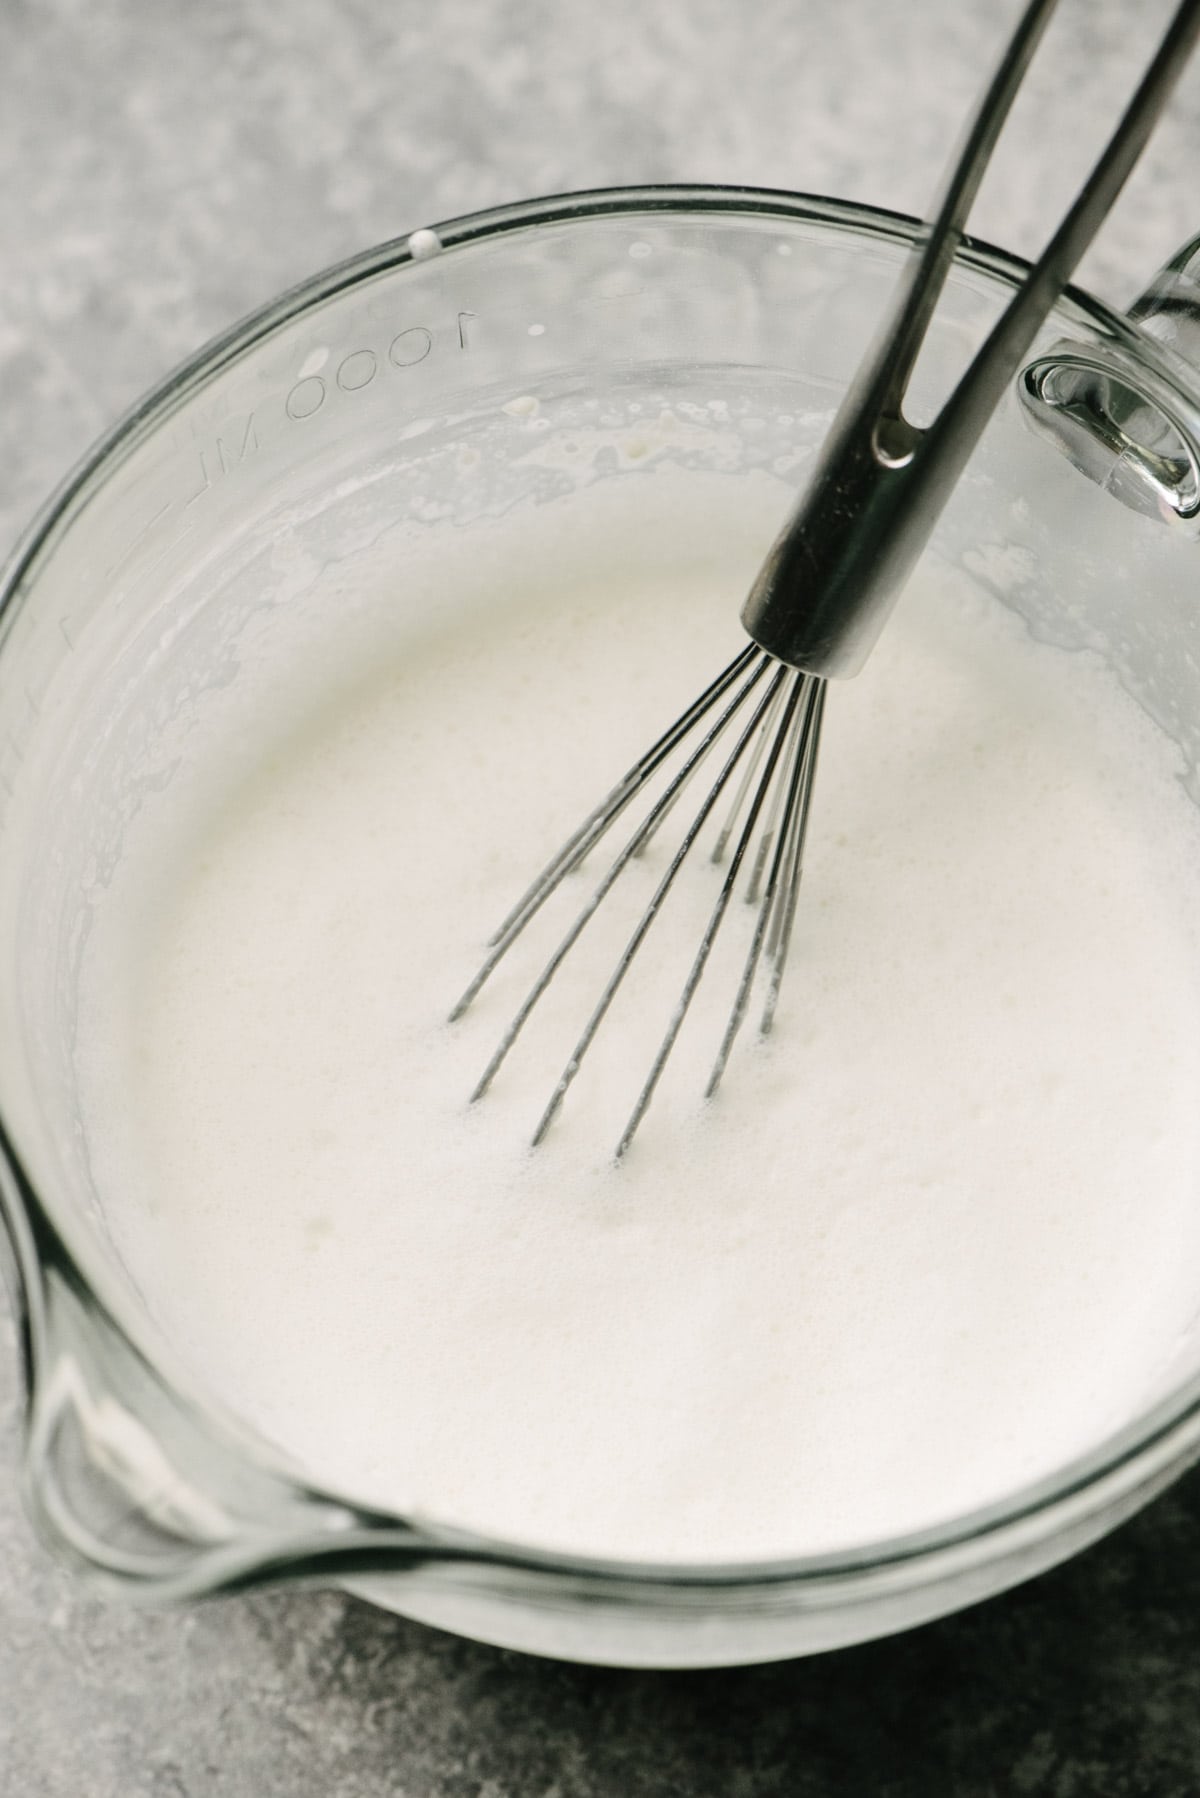
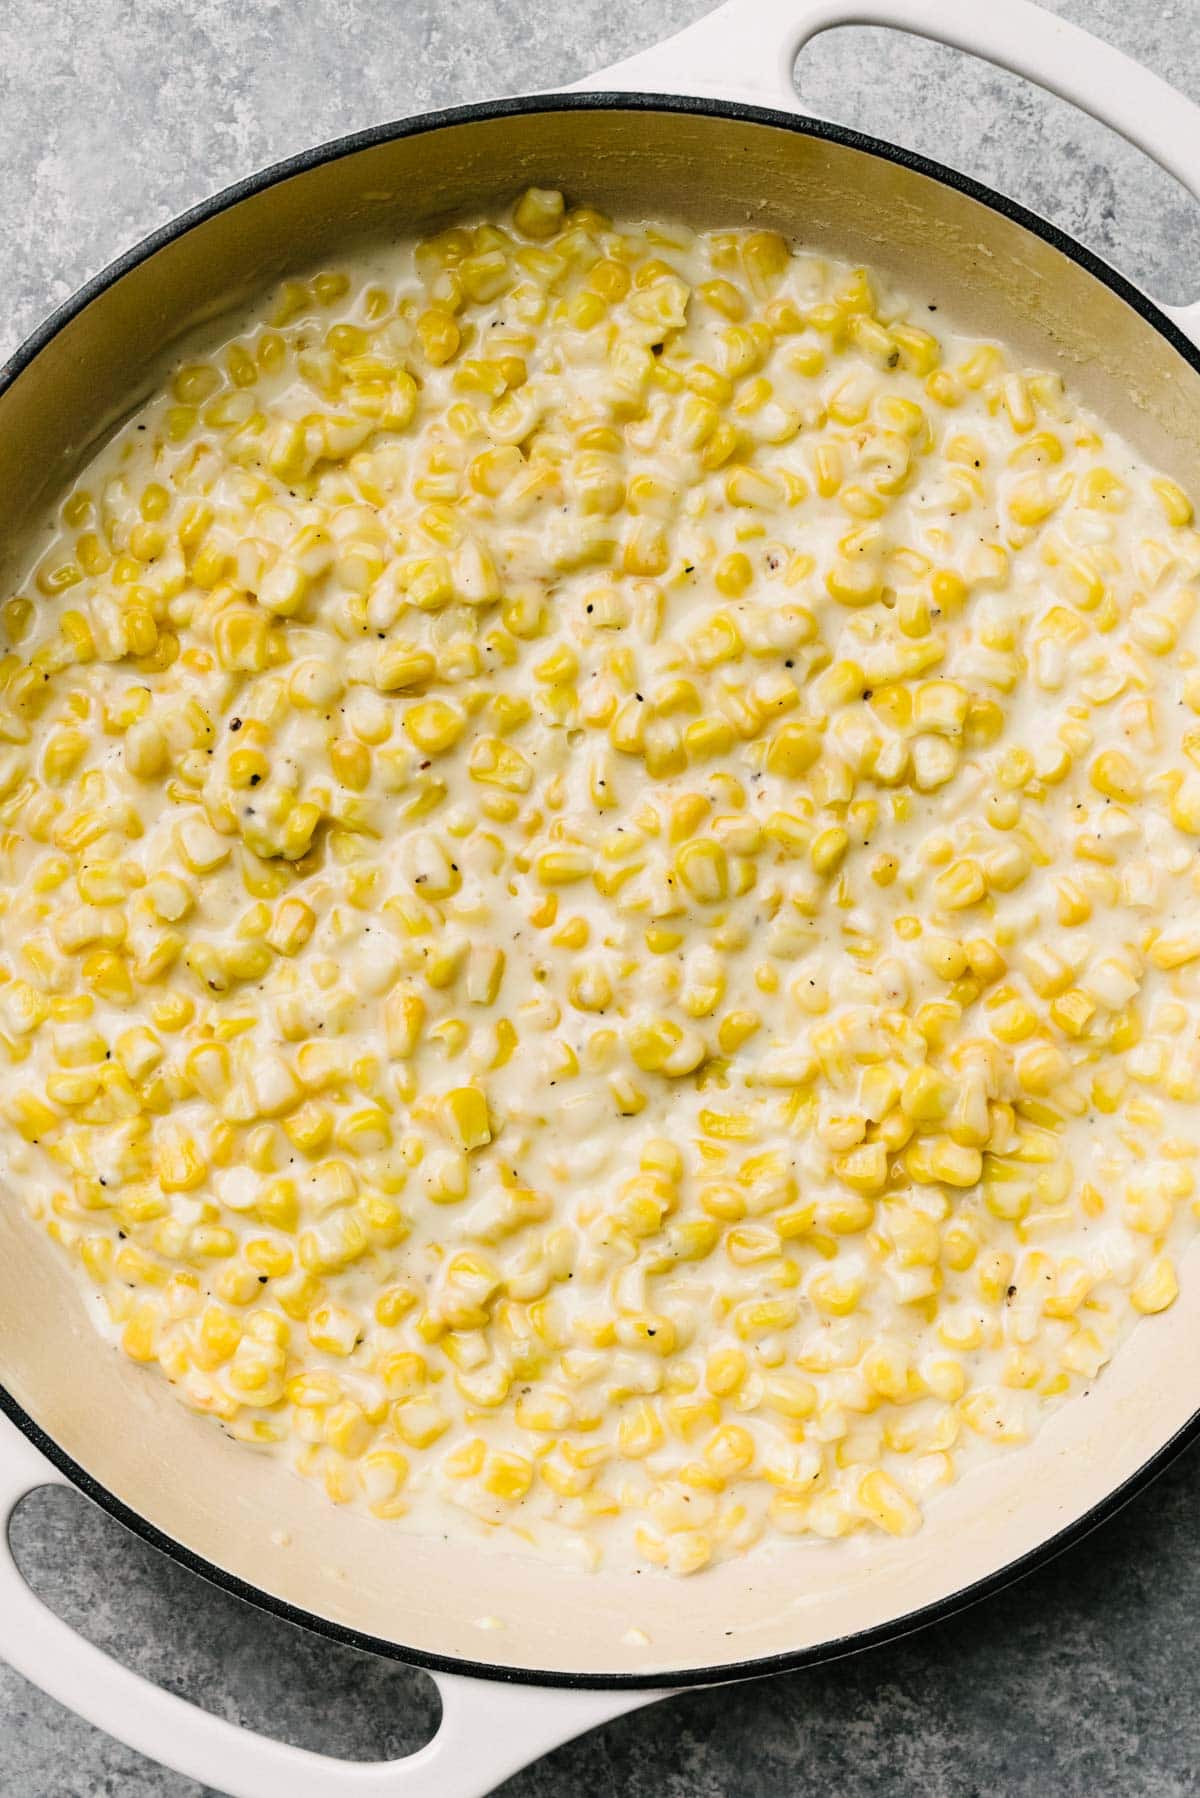
- Whisk flour, heavy cream, and milk until smooth and a bit foamy.
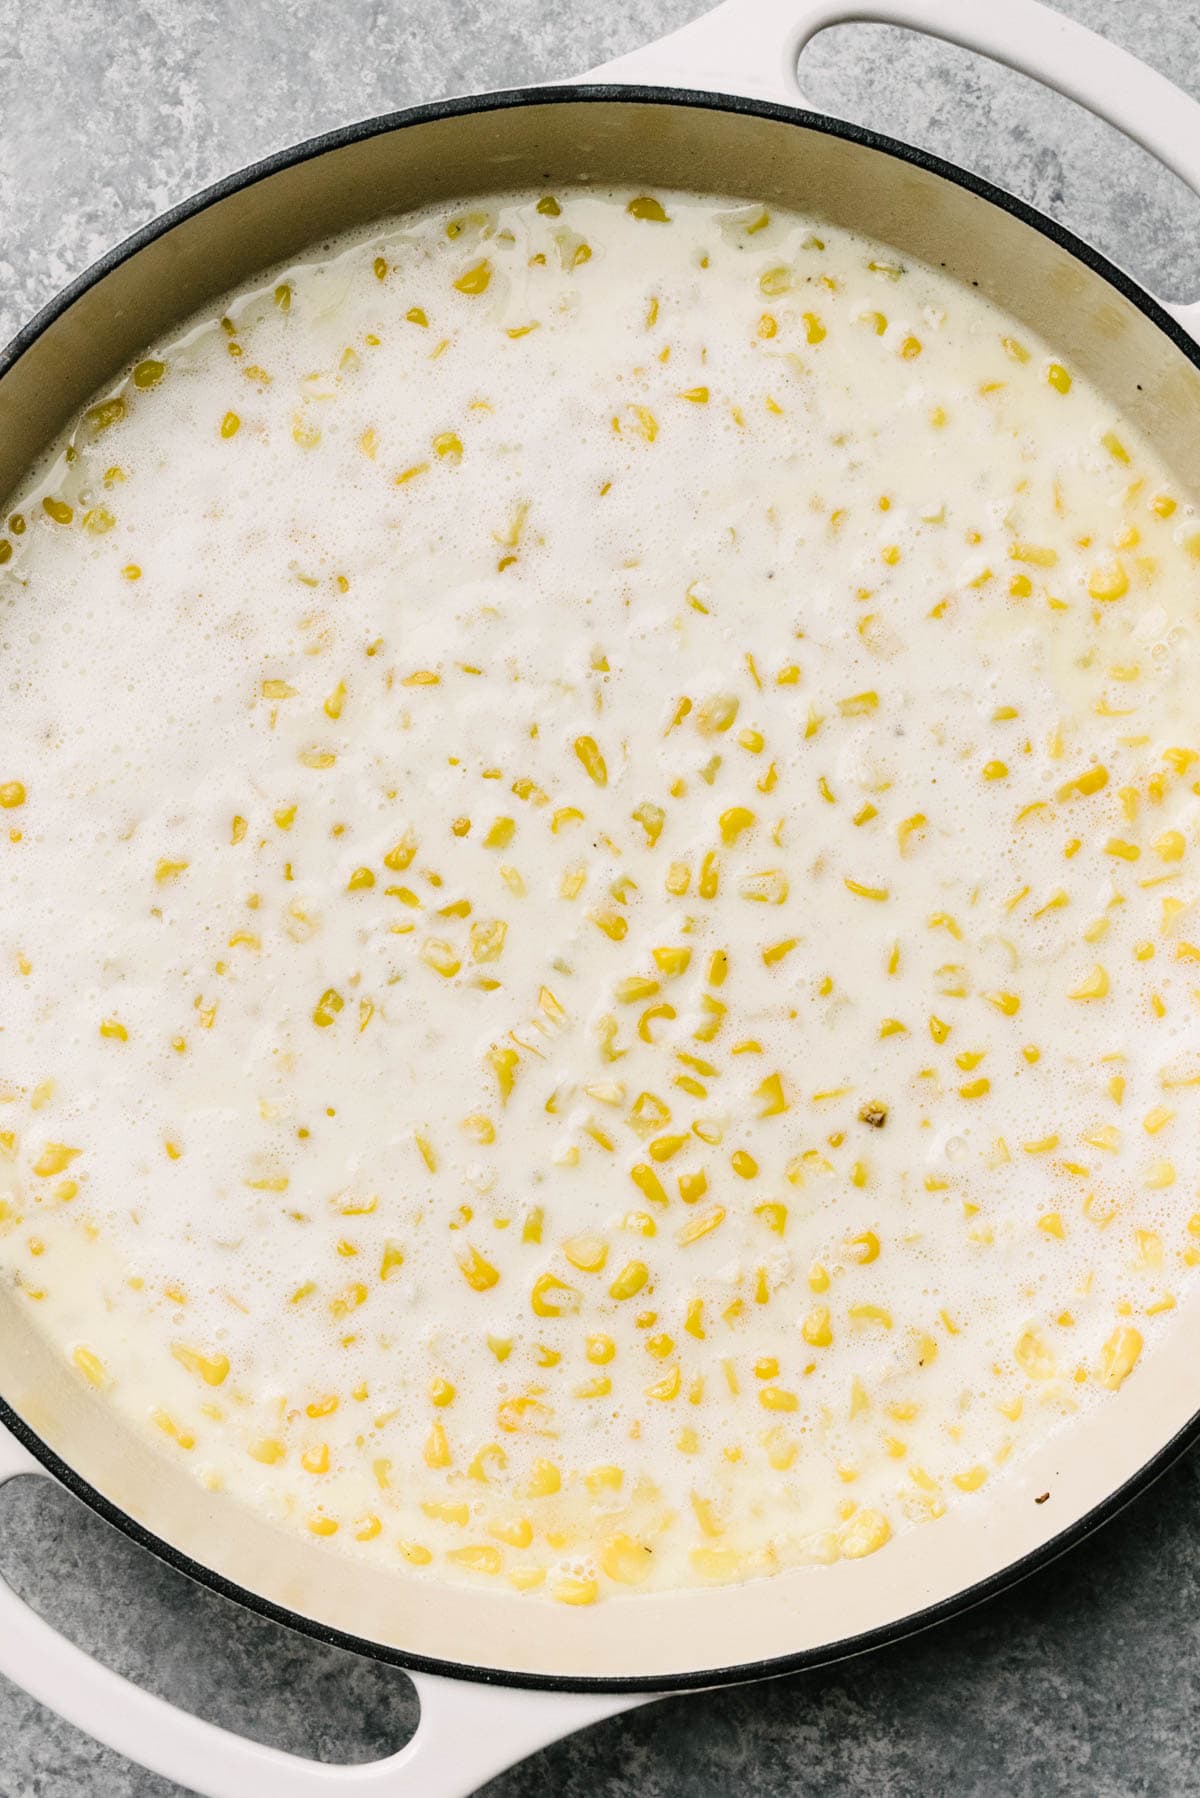
- Pour the liquids into the skillet, then add sugar or honey if desired.
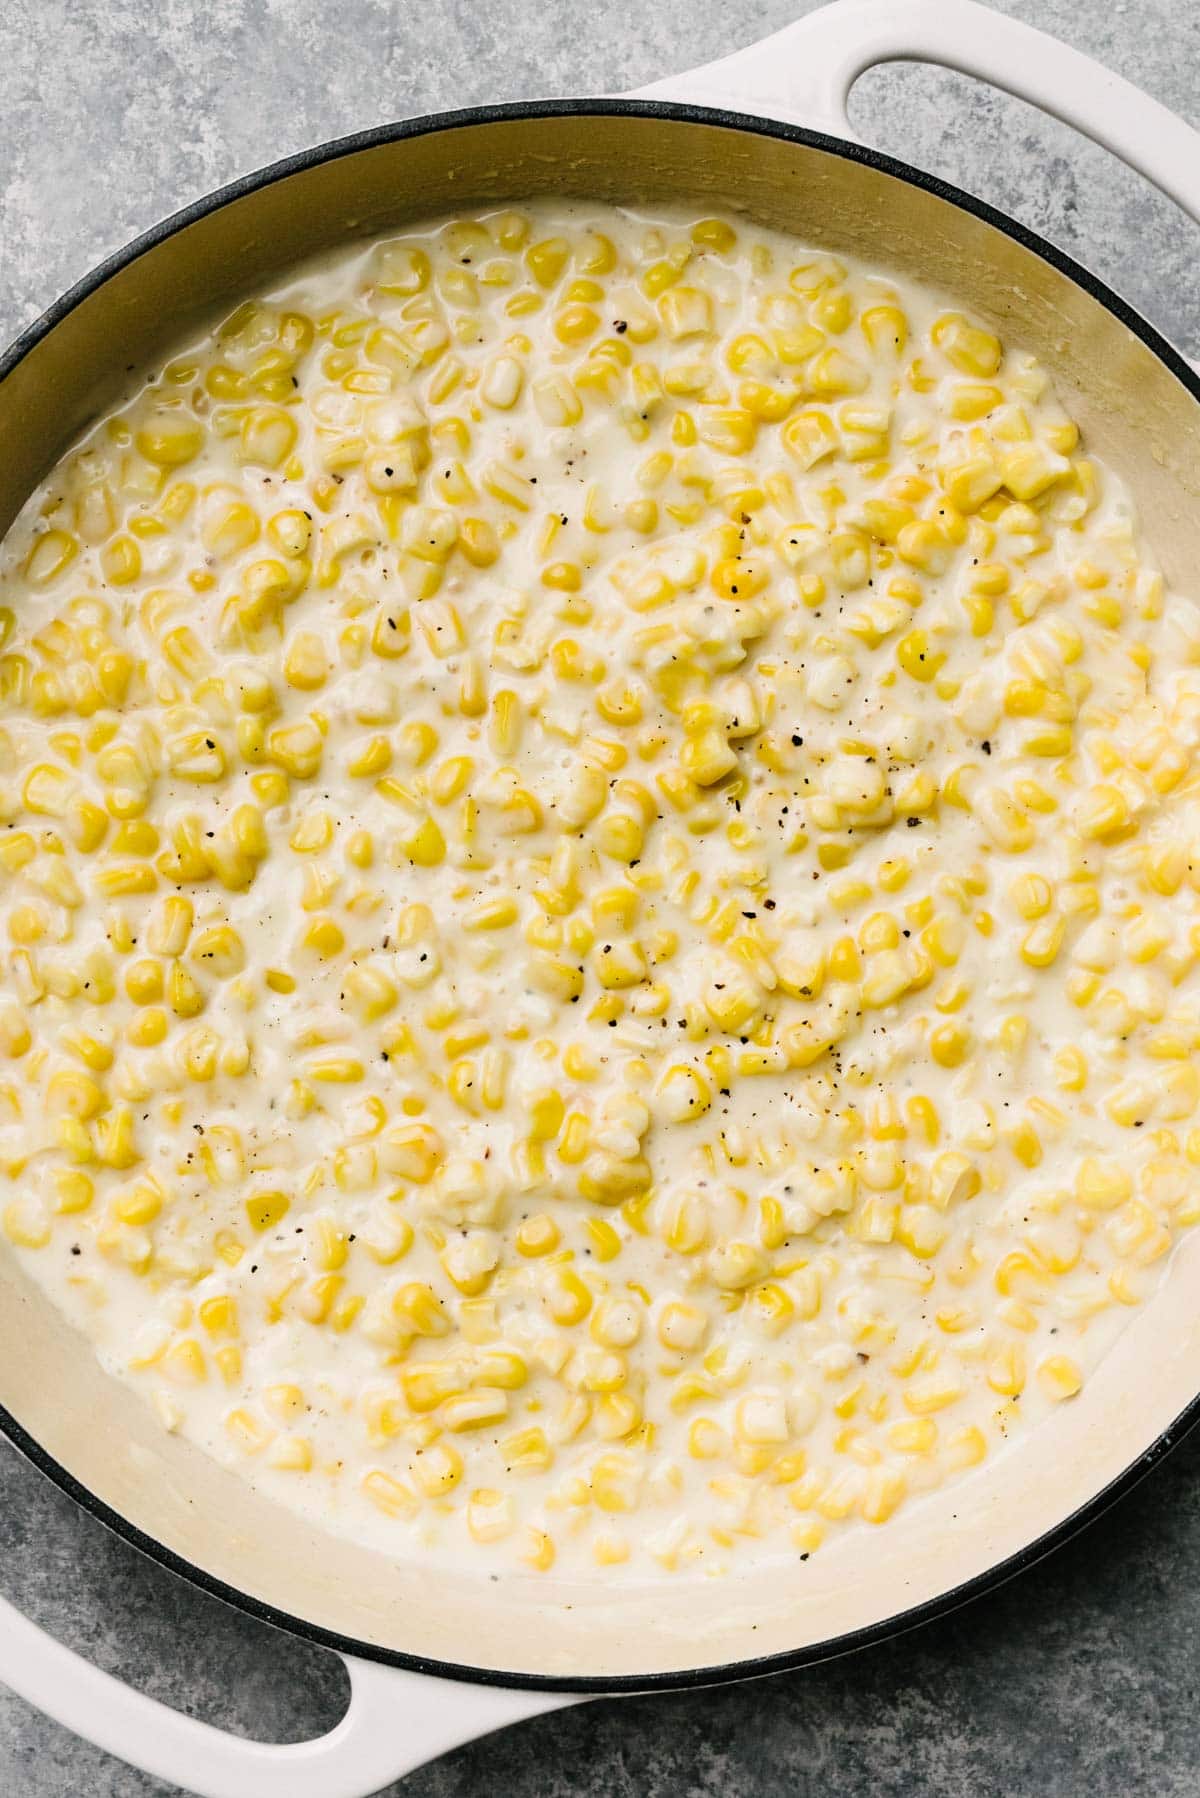
- Simmer 10 minutes, until the cream sauce is thick. Stir frequently to prevent scaling!
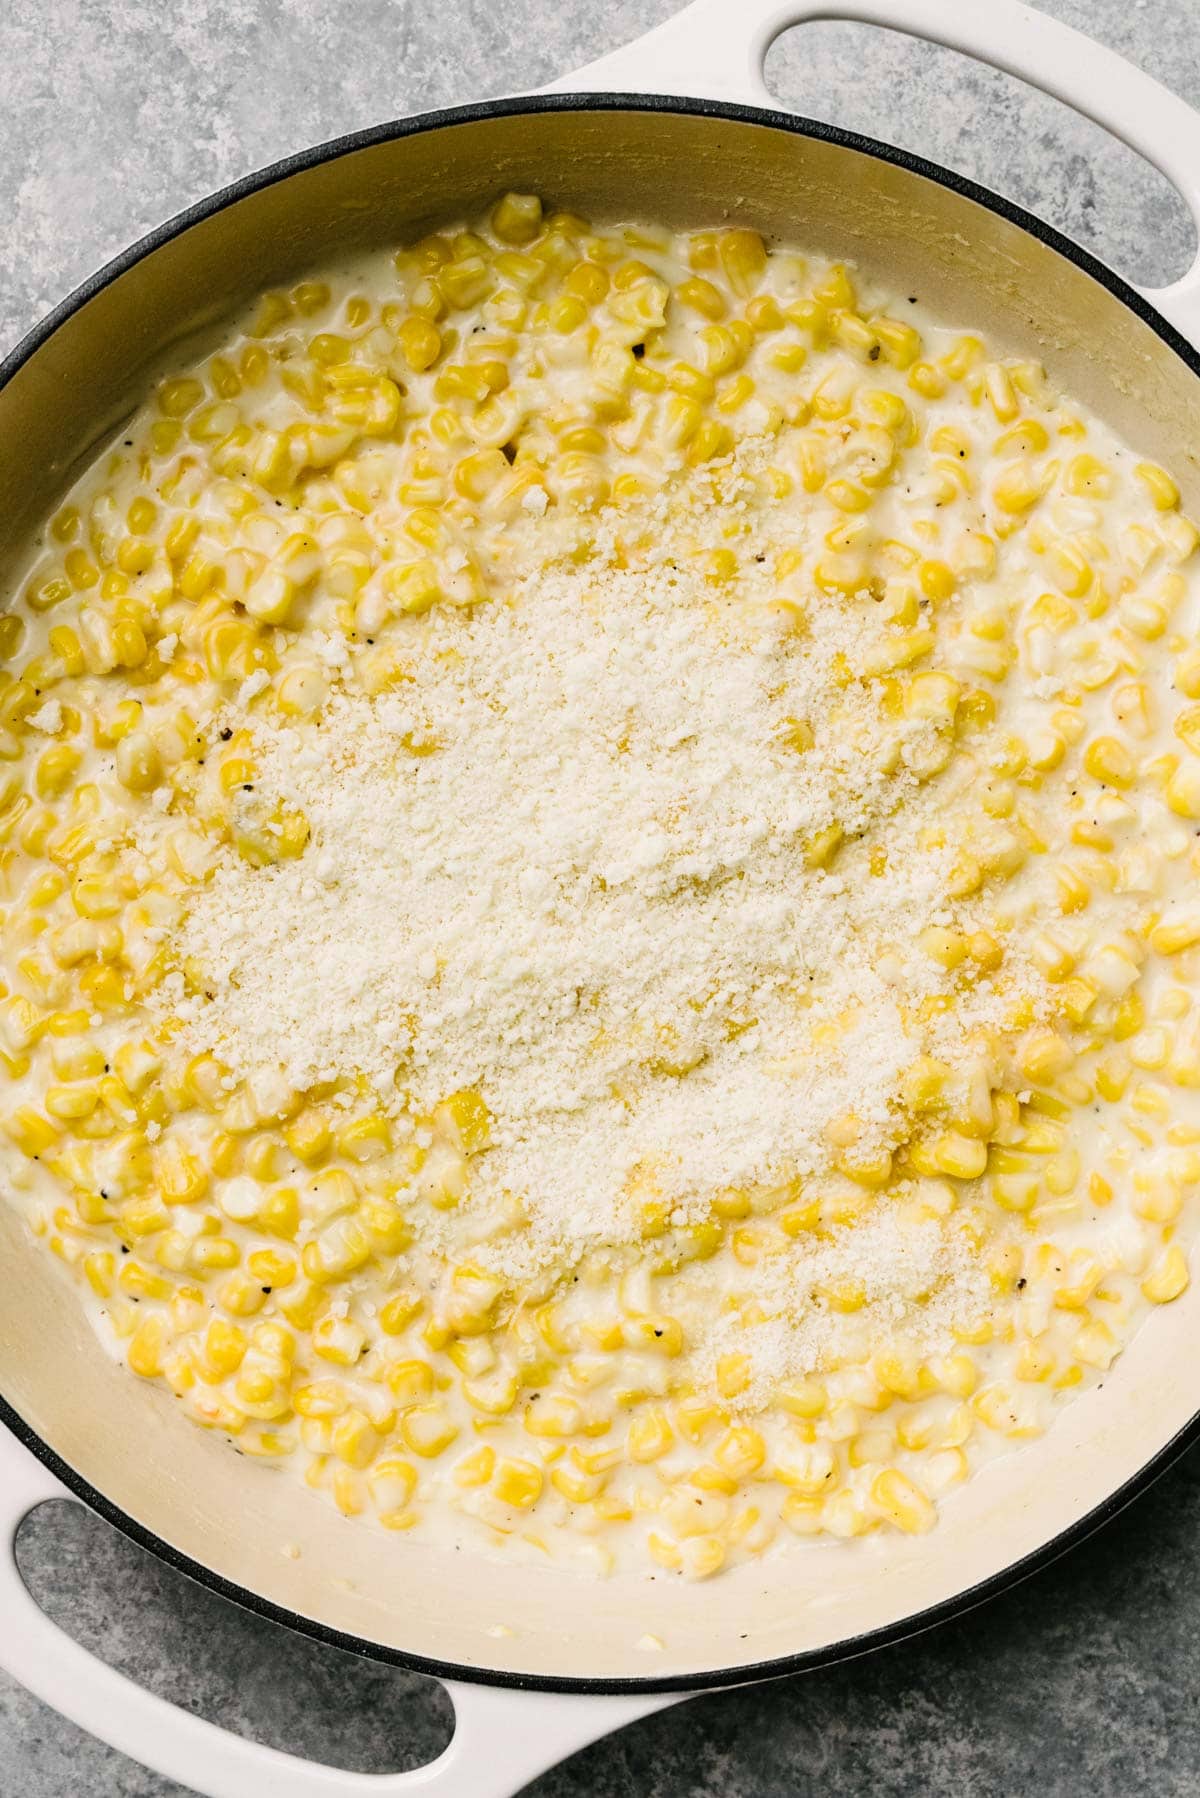
- Sprinkle parmesan cheese over the creamed corn, then stir until melted.
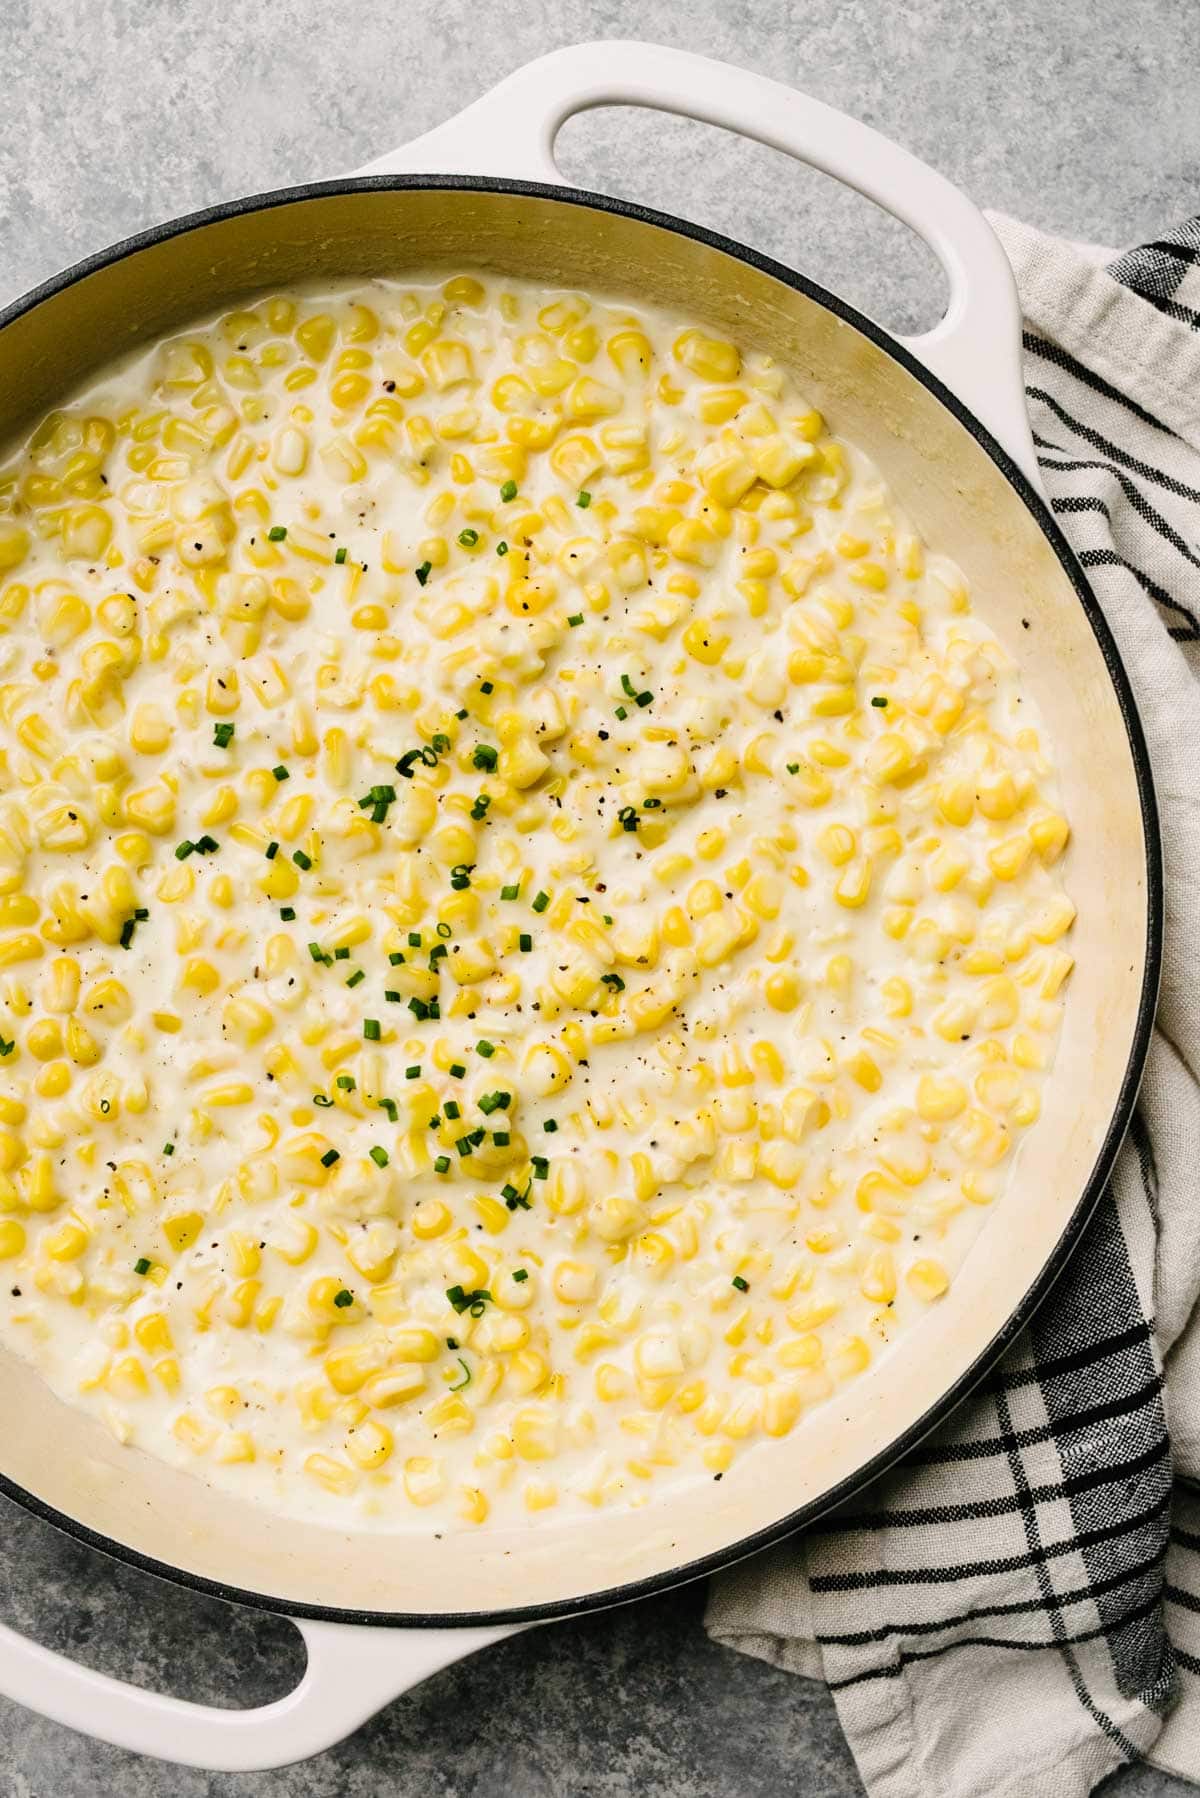
- Garnish with chives and ground pepper, and serve right away. Enjoy!
Essential Notes and Tips
- Use frozen corn for both convenience and flavor. We like to purchase the "extra sweet" frozen yellow corn.
- Defrost the corn kernels right in the skillet - the heat from the skillet will also cook off any water content, giving you the perfect "dry" blank slate for proper cooking.
- Allow the kernels to develop a very slight, golden brown sear around the edges - this signifies that the natural sugars have started to caramelize, which will enhance the flavor.
- Do simmer the corn for the full 10 minutes, even if the sauce thickens before then. This will give the flavors enough time to deepen.
- Sweeten with sugar, honey, or both. A little goes a long way, but this recipe can tolerate up to 2 tablespoons of either before it becomes too sweet.
- Chives and corn are flavor besties - don't skip this earthy garnish!
Using Fresh Corn
You can absolutely use fresh corn, but the process will take just a few minutes longer. Start with 6 ears of corn and strip the kernels from the cobs. Saute the fresh corn for 8-10 minutes, until the water content has been released and the kernels are bite tender. Follow the process outlined here in our post for skillet corn.
Storing and Reheating
Homemade creamed corn will last in the refrigerator up to 4 days sealed in an airtight container. This dish reheats beautifully in the microwave or on the stovetop - just add a splash of milk first to help loosen the sauce.
- In the Microwave: heat individual portions up to 2 minutes, stirring every 30 seconds until warm.
- On the Stovetop: heat leftover creamed corn in a pot on medium low. Stir occasionally, until bubbling around the edges.

Did you make this creamed corn recipe? We’d love to know how it turned out! Leave a comment and a rating below, or share with your friends and fam!
Homestyle Creamed Corn
Description
Ingredients
- 3 tablespoon all purpose flour
- ¾ cup heavy cream
- ¾ cup milk
- 3 tablespoon unsalted butter
- 6 cup frozen corn, 2 12-oz packages; see Note 1
- ½ teaspoon kosher salt
- ¼ teaspoon ground pepper
- 1-2 tablespoon sugar, or honey
- ¼ cup finely grated parmesan cheese
- 1 tablespoon chopped fresh chives
Instructions
- Whisk the flour, heavy cream, and milk in a large measuring cup or medium mixing bowl until foamy and very well combined. Set aside.
- Heat a 12” skillet over medium heat. Add the butter and heat until it melts, then foams.
- Add the frozen corn, salt, and pepper. Saute, stirring occasionally, until the corn is defrosted, the released water content cooks off, and the skillet appears dry, about 5 minutes. Optional - continue sautéing an additional 3-5 minutes, until the edges of the corn turn golden brown. See Notes 2 and 3.
- Pour the flour, cream, and milk mixture into the skillet, then add 1 tablespoon of sugar or honey. Saute, stirring occasionally, for 10 minutes. The sauce will thicken significantly and reduce by about a third. Stir frequently to prevent scalding. See Note 4.
- Sprinkle the cheese over the corn and stir until the cheese melts into the sauce.
- Taste for seasoning and adjust the salt, pepper, and/or sugar. Garnish with chives and serve right away.
Recipe Notes
- Note 1. We prefer frozen corn for cost and convenience; look for "extra sweet" frozen yellow corn.
- Note 2. There's no need to defrost the corn ahead of time - simply defrost right in the skillet! Be sure any released liquid cooks off so that it doesn't dilute the cream sauce.
- Note 3. If time permits, allow the kernels to develop a very slight, golden brown sear around the edges - this signifies that the natural sugars have started to caramelize, which will enhance the flavor.
- Note 4. Do simmer the corn for the full 10 minutes, even if the sauce thickens before then. This will give the flavors enough time to deepen.

Comments
No Comments