
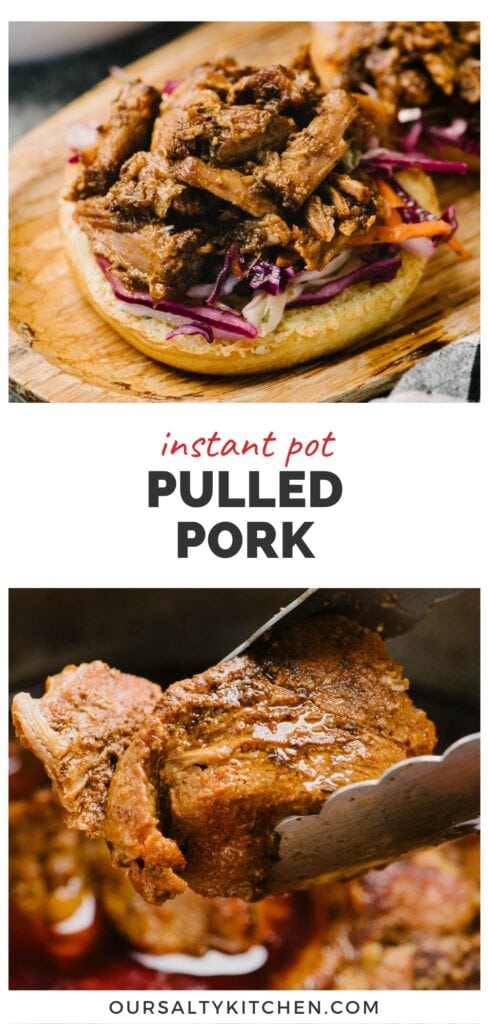
Want that deep, slow-braised flavor fast? Pulled pork has never been quicker thanks to the magic of the Instant Pot. Instant Pot Pulled Pork is super easy and amazingly flavorful. A simple dry rub seasoning reduces into a rich and savory sauce enveloping tender shreds of pork. It's melt-in-your-mouth perfect, and ready in just 90 minutes!
Jump to:
It's time for a new round of "asked and answered"!
Our oven pulled pork is one of our most popular recipes, and for good reason - it's truly perfect. A versatile dry rub cooks down into a rich sauce enveloping crispy-but-tender shreds of pork. The sole drawback? It takes time - at least four hours from start to finish.
Y'all have been clamoring for an Instant Pot version, and since I love saying "yes!", I'm delivering the goods today. After seeking the assistance of an Instant Pot pro and lots of testing, I've finally converted our classic dutch oven recipe into the perfect pressure cooker recipe.
Why the Instant Pot?
Instant Pot Pulled Pork is nearly identical to the original, with that same crispy-but-tender texture and rich sauce - but with two key upgrades!
✔️ Time: achieve that low and slow tender flavor in just a fraction of the time. Instant Pot pulled pork is ready in just 90 minutes, including time for searing and for the pot to come to pressure. Woot!
✔️ Easy clean-up: if you've ever made pulled pork in the oven, you know that scouring your dutch oven is a chore you won't be looking forward to. But the Instant Pot makes for easy breezy clean-up with no scouring or soaking!
Which Cut of Meat Should I Use for Instant Pot Pulled Pork?
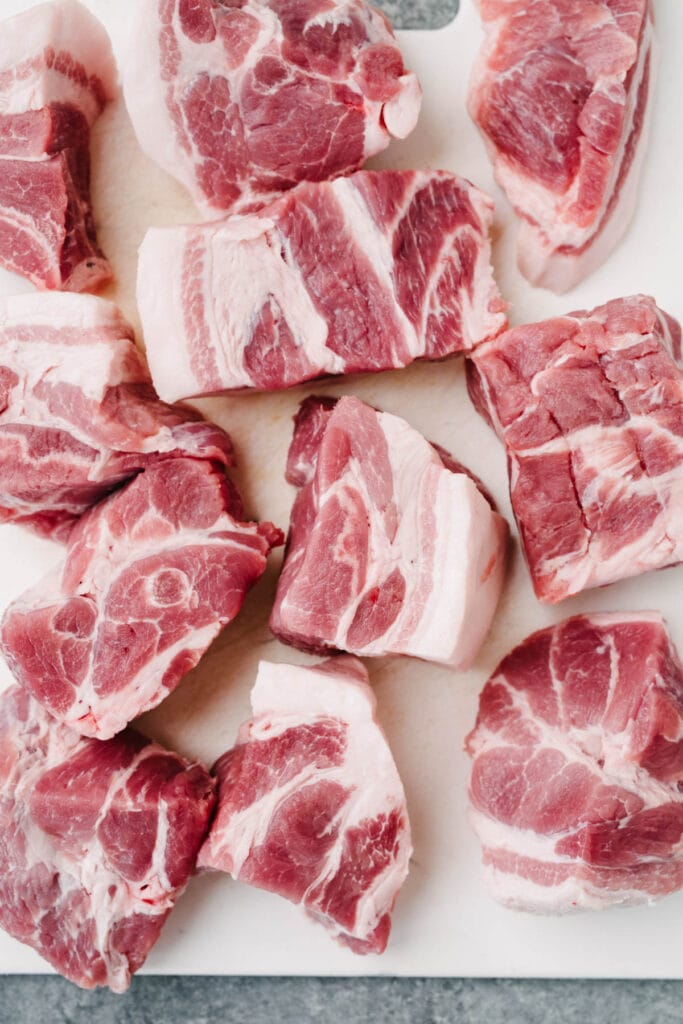
This recipe was designed for a boneless cut, as the meat is first divided into chunks, coated in dry rub, then seared. As with our hack for Instant Pot pot roast, dividing the meat into small chunks serves several purposes:
- One, more surface area is available for searing, which means more flavor!
- Two, small chunks cook more quickly.
- Three, it's easier to shred.
While traditional pulled pork can be made with either a Pork Butt (aka "Boston butt") or a Pork Shoulder (aka "picnic shoulder"), the most common boneless cut available in supermarkets is a boneless Boston butt.
The Boston butt is not, in fact, from the rear of the animal - it comes from the area behind the pig’s neck and head. This cut generally has a fat cap attached with beautiful marbling throughout - it's perfect for slow cooker pulled pork!
On that note, avoid using a pork loin. It does not have enough fat or connective tissue to create succulent, shreddable pulled pork. Using pork loin will result in pulled pork that is dry, tough, and much less flavorful. If you're looking to trim the fat content in this recipe, we recommend trimming off the fat cap instead of using a leaner cut of pork.
Pro-tip: if you only have access to a bone-in pork shoulder, use our slow cooker pulled pork recipe instead!
How to Make Instant Pot Pulled Pork
Pulled pork has never been quicker thanks to the magic of the Instant Pot. If you've been sitting on the skeptic bench, I'll happily extend a hand and welcome you to the wonderful world of 90-minute pressure cooker pulled pork. With just a few simple tricks you'll be making Instant Pot Pulled Pork that will rival even the best slow braised recipes.
Learn More: for servings suggestions, pulled pork side dishes, and even more tips and resources, check our our comprehensive guide How to Make Pulled Pork!
- Prep the pork. Pat a boneless cut of Boston butt dry, then divide into 3-4″ pieces.
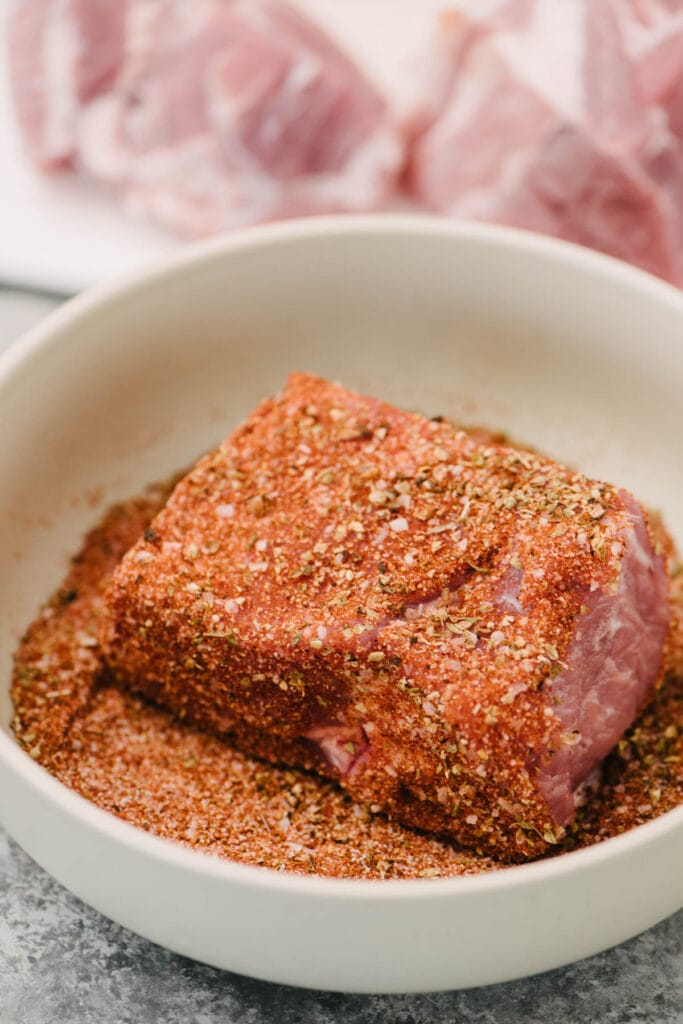
- Coat in dry rub. Combine the dry rub ingredients in a bowl and mix until well combined. Coat each piece of pork in the dry rub.
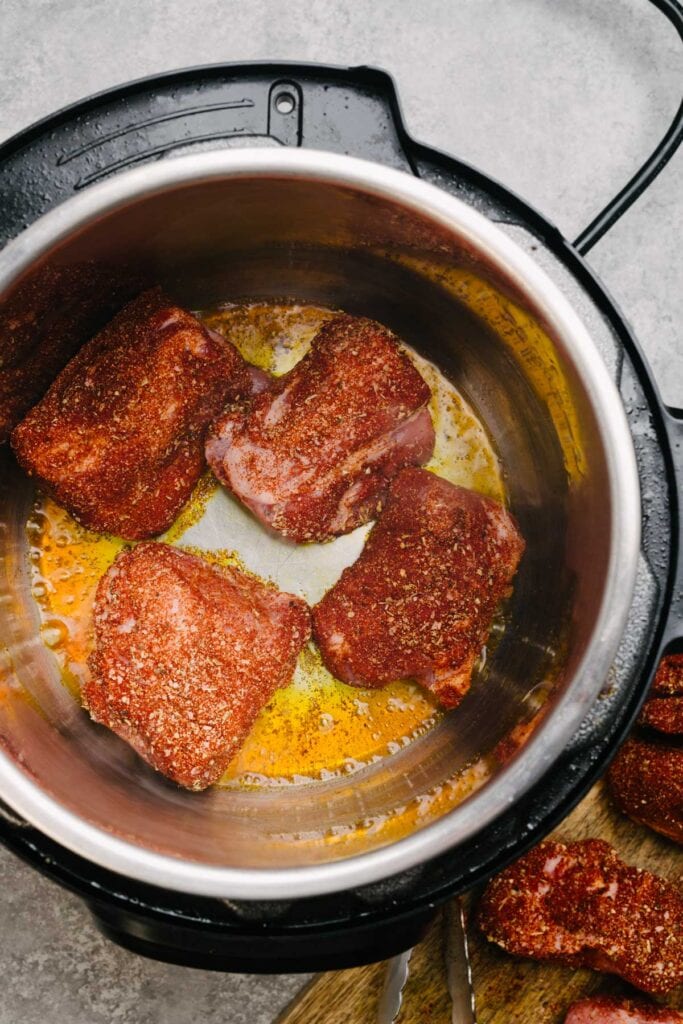
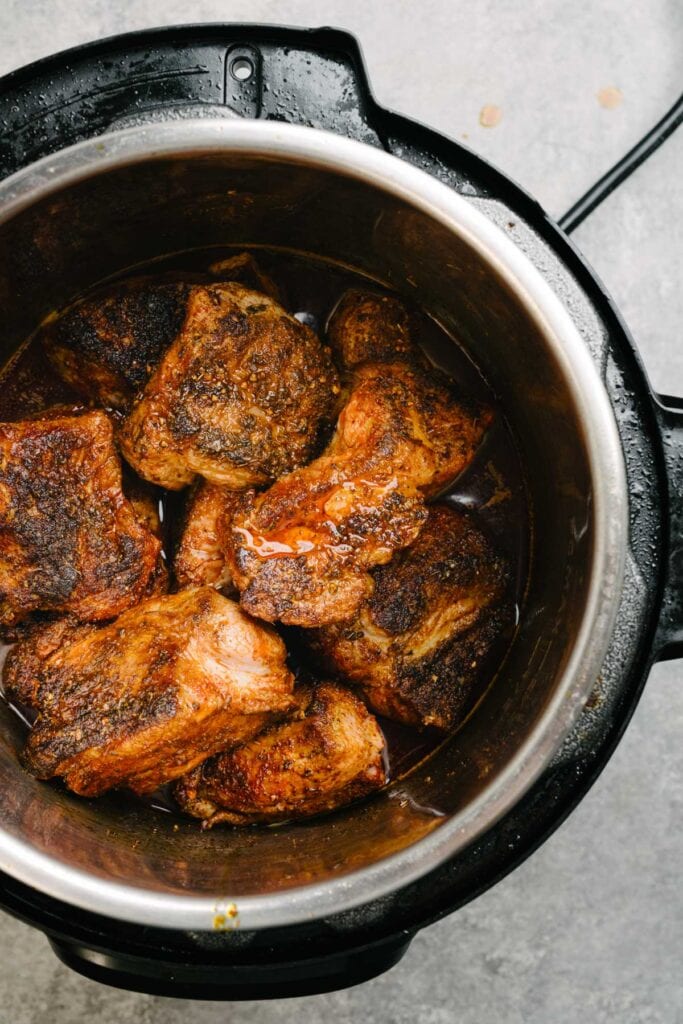
- Sear the pork. Add olive oil to the inner pot then press the “Saute” button. Once the oil is hot, add the pork pieces in single layer batches. Sear on at least two sides until a deep golden brown crust forms. Remove all the pork once seared.
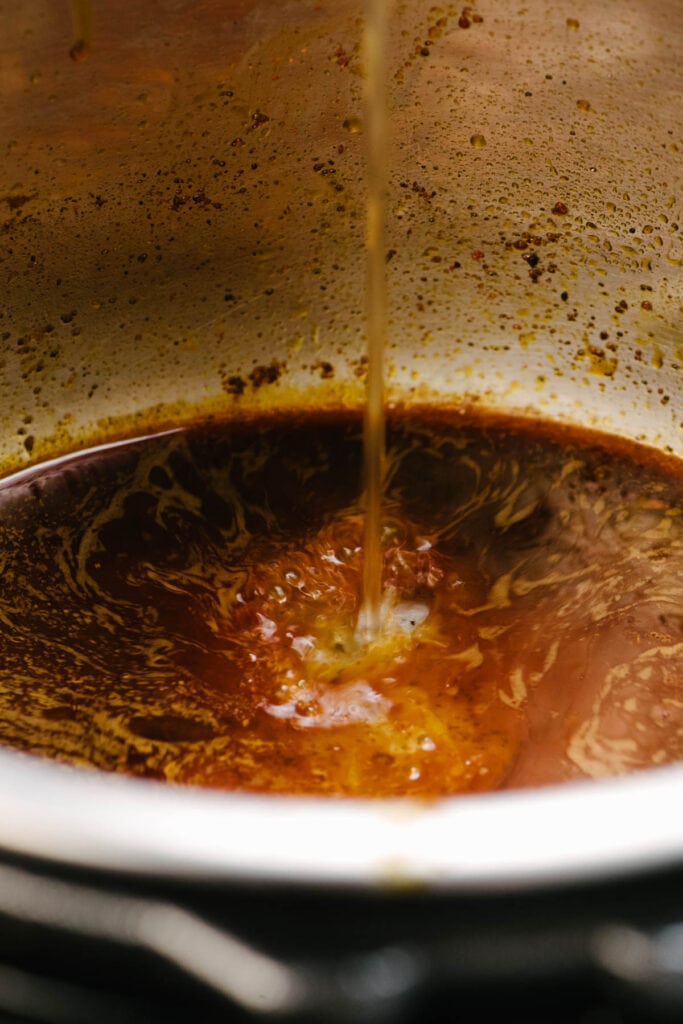
- Deglaze. Pour in one cup of chicken broth to deglaze the bottom of the pot – stir and scrape with a wood spoon until the bottom of the pot is clean. Any clinging bits may set off the “Burn” notice while pressure cooking.
- Return the pork. Press the “Cancel” button to disable the “Saute” function and return all the seared pork pieces back to the pot.
- Pressure cook. Seal the Instant Pot, then program to “High Pressure” for 35 minutes, followed by a 15 minute natural pressure release.
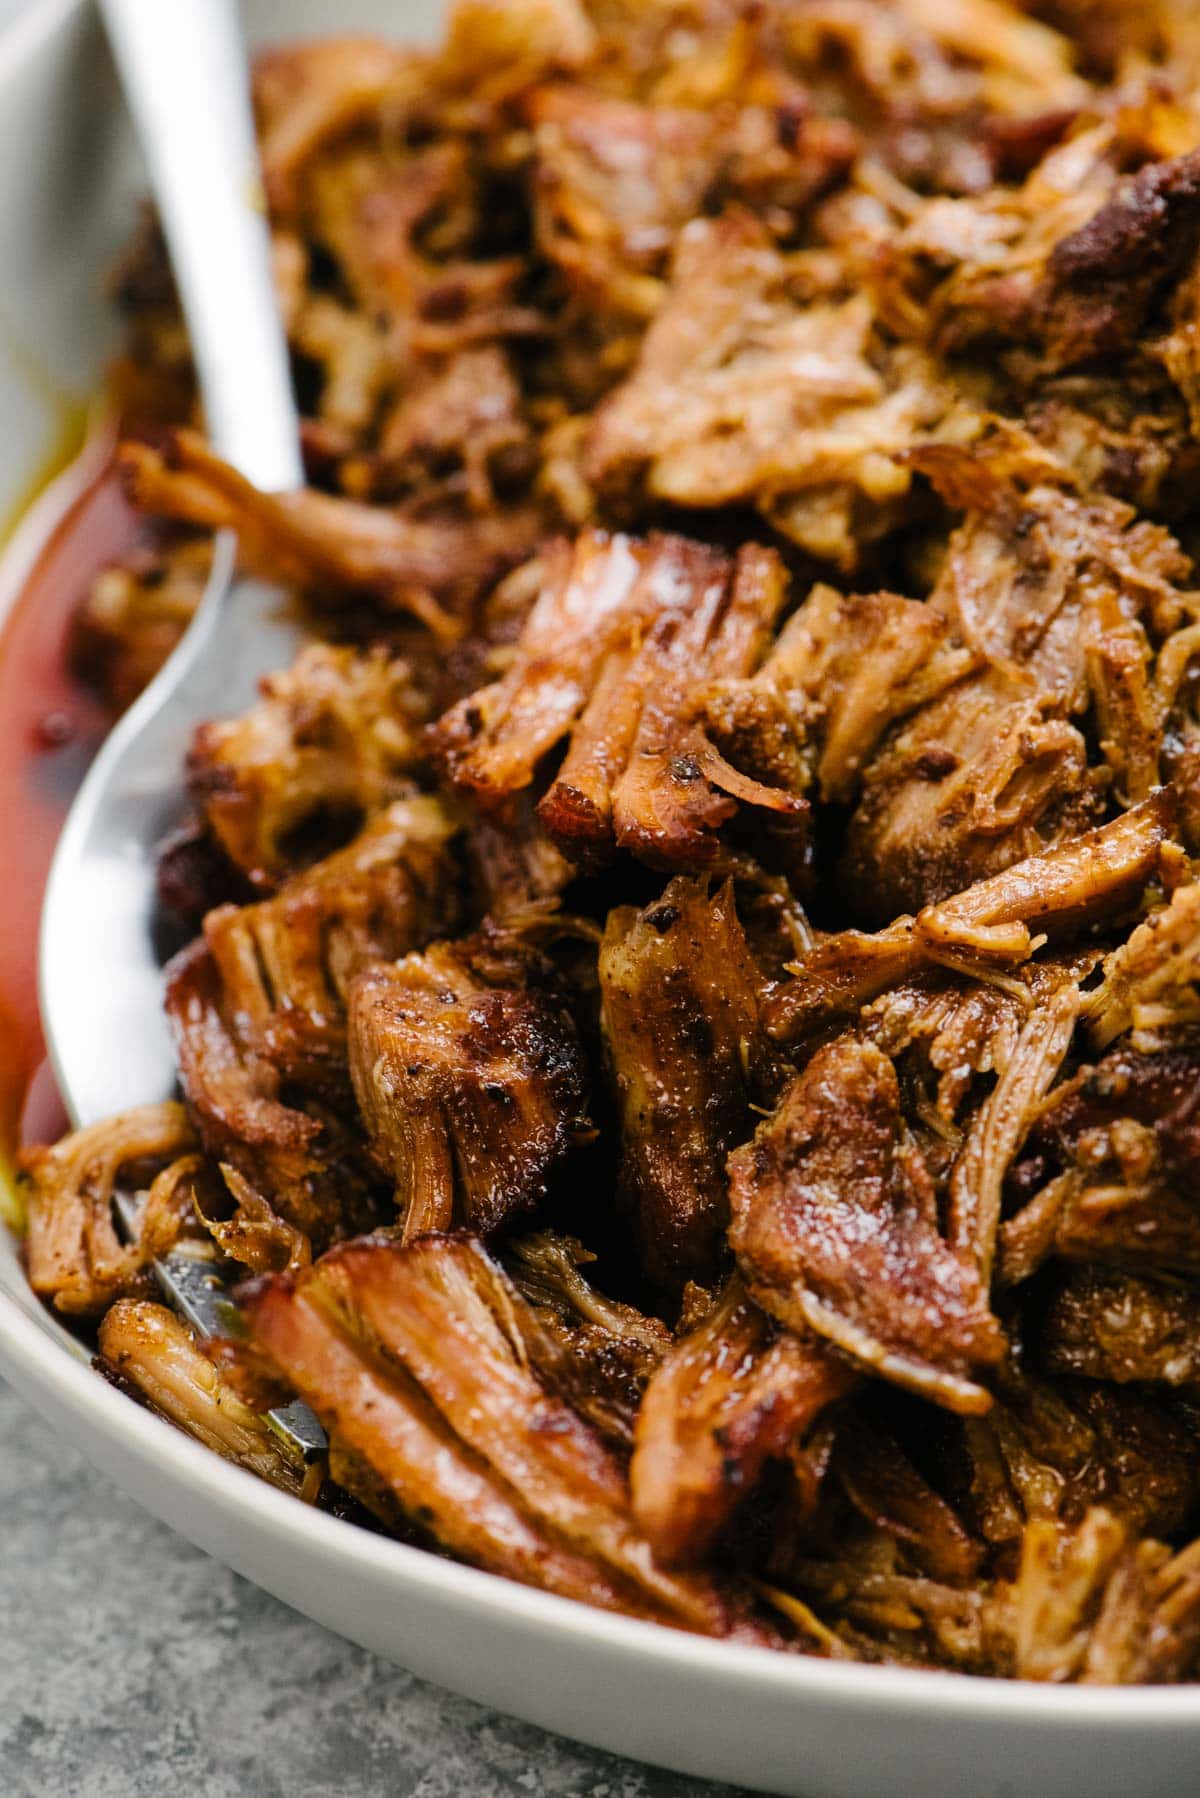
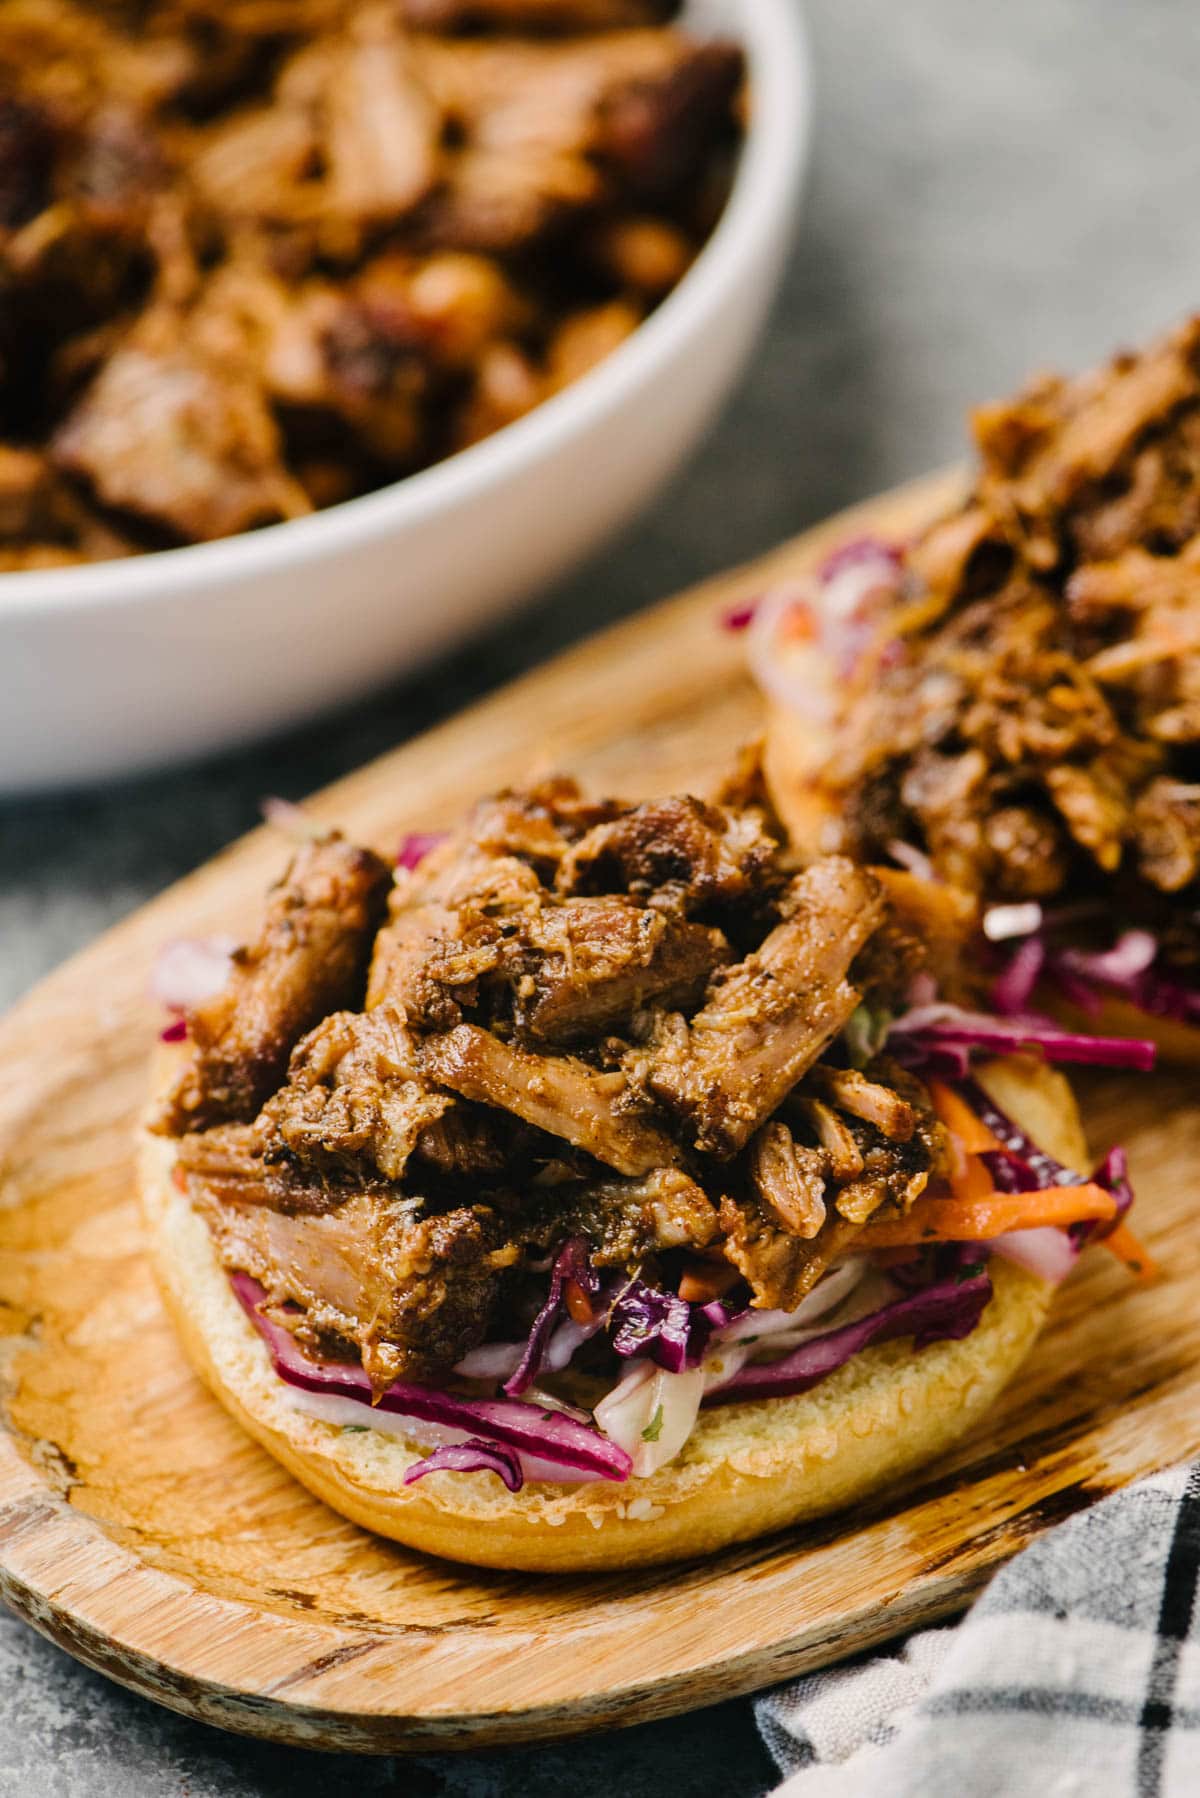
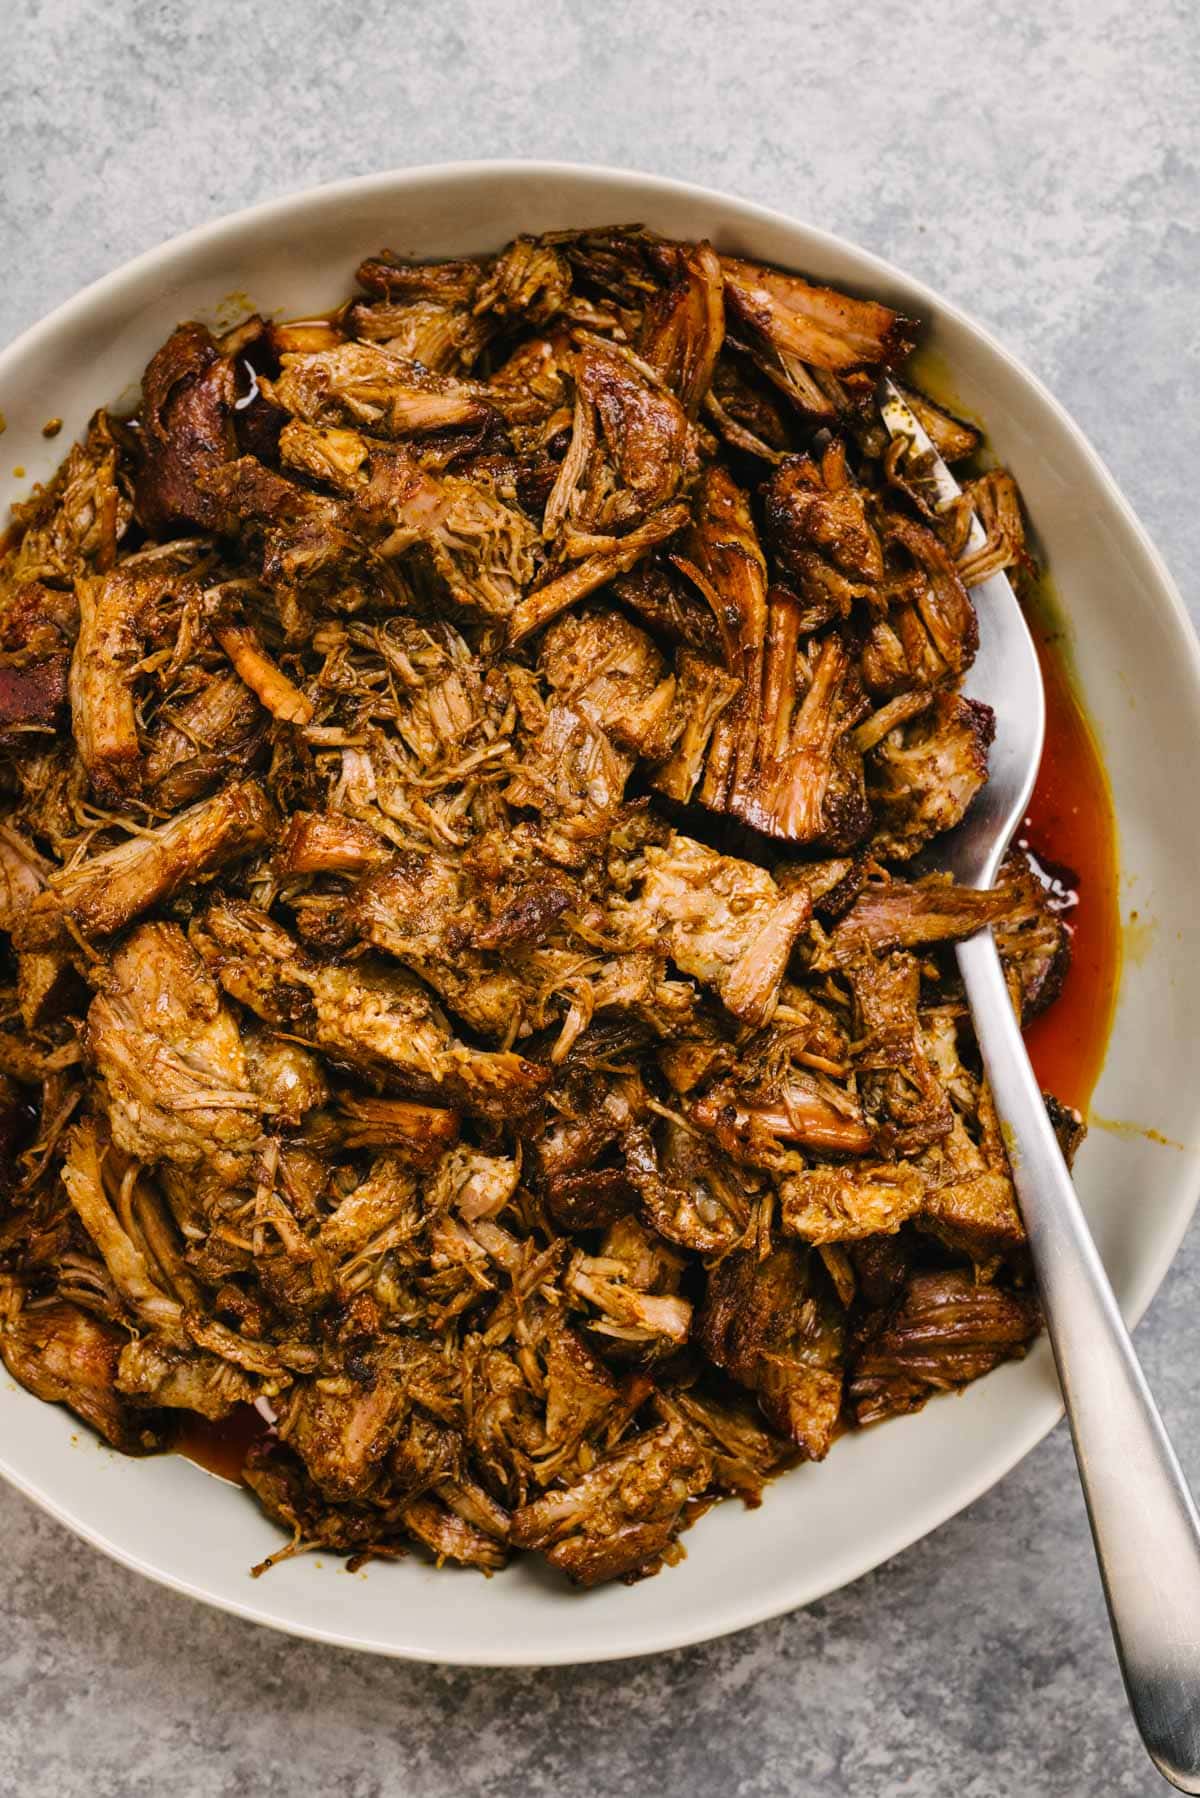
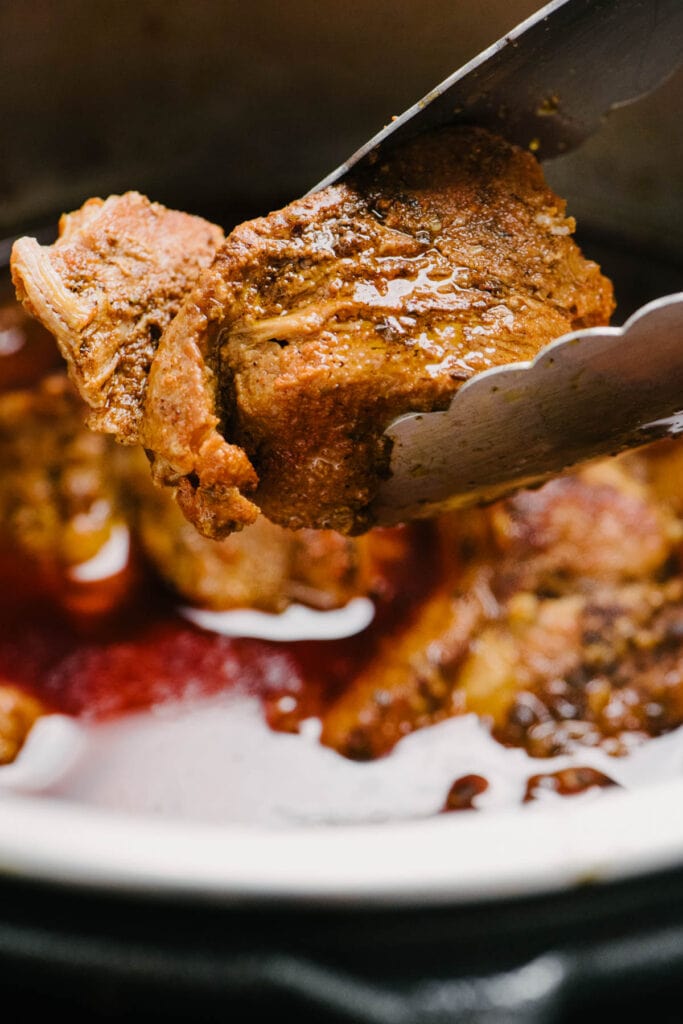
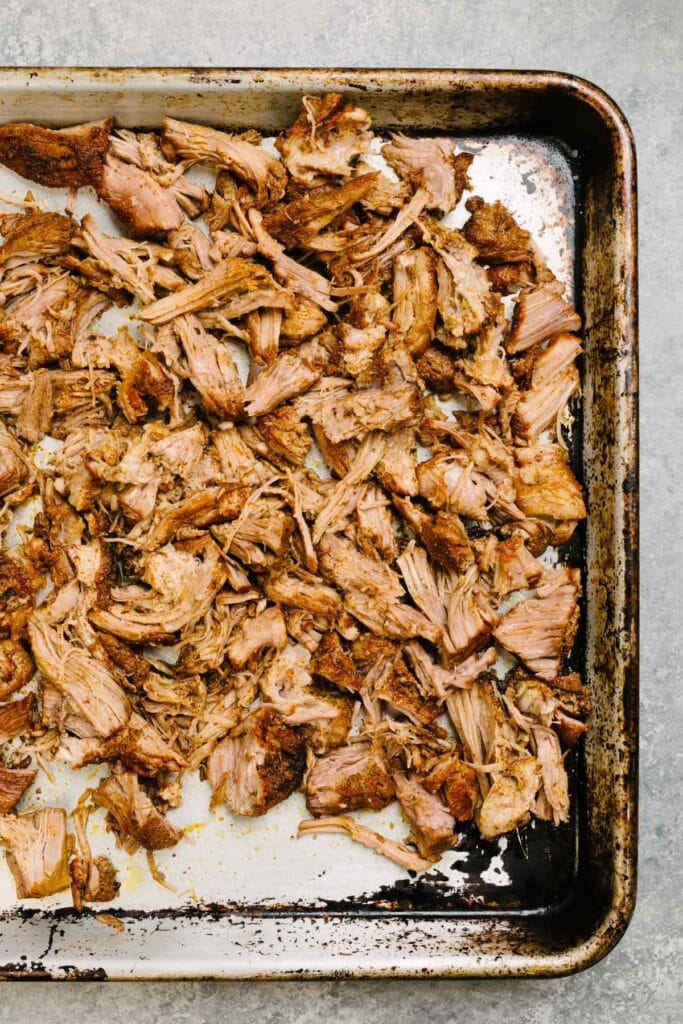
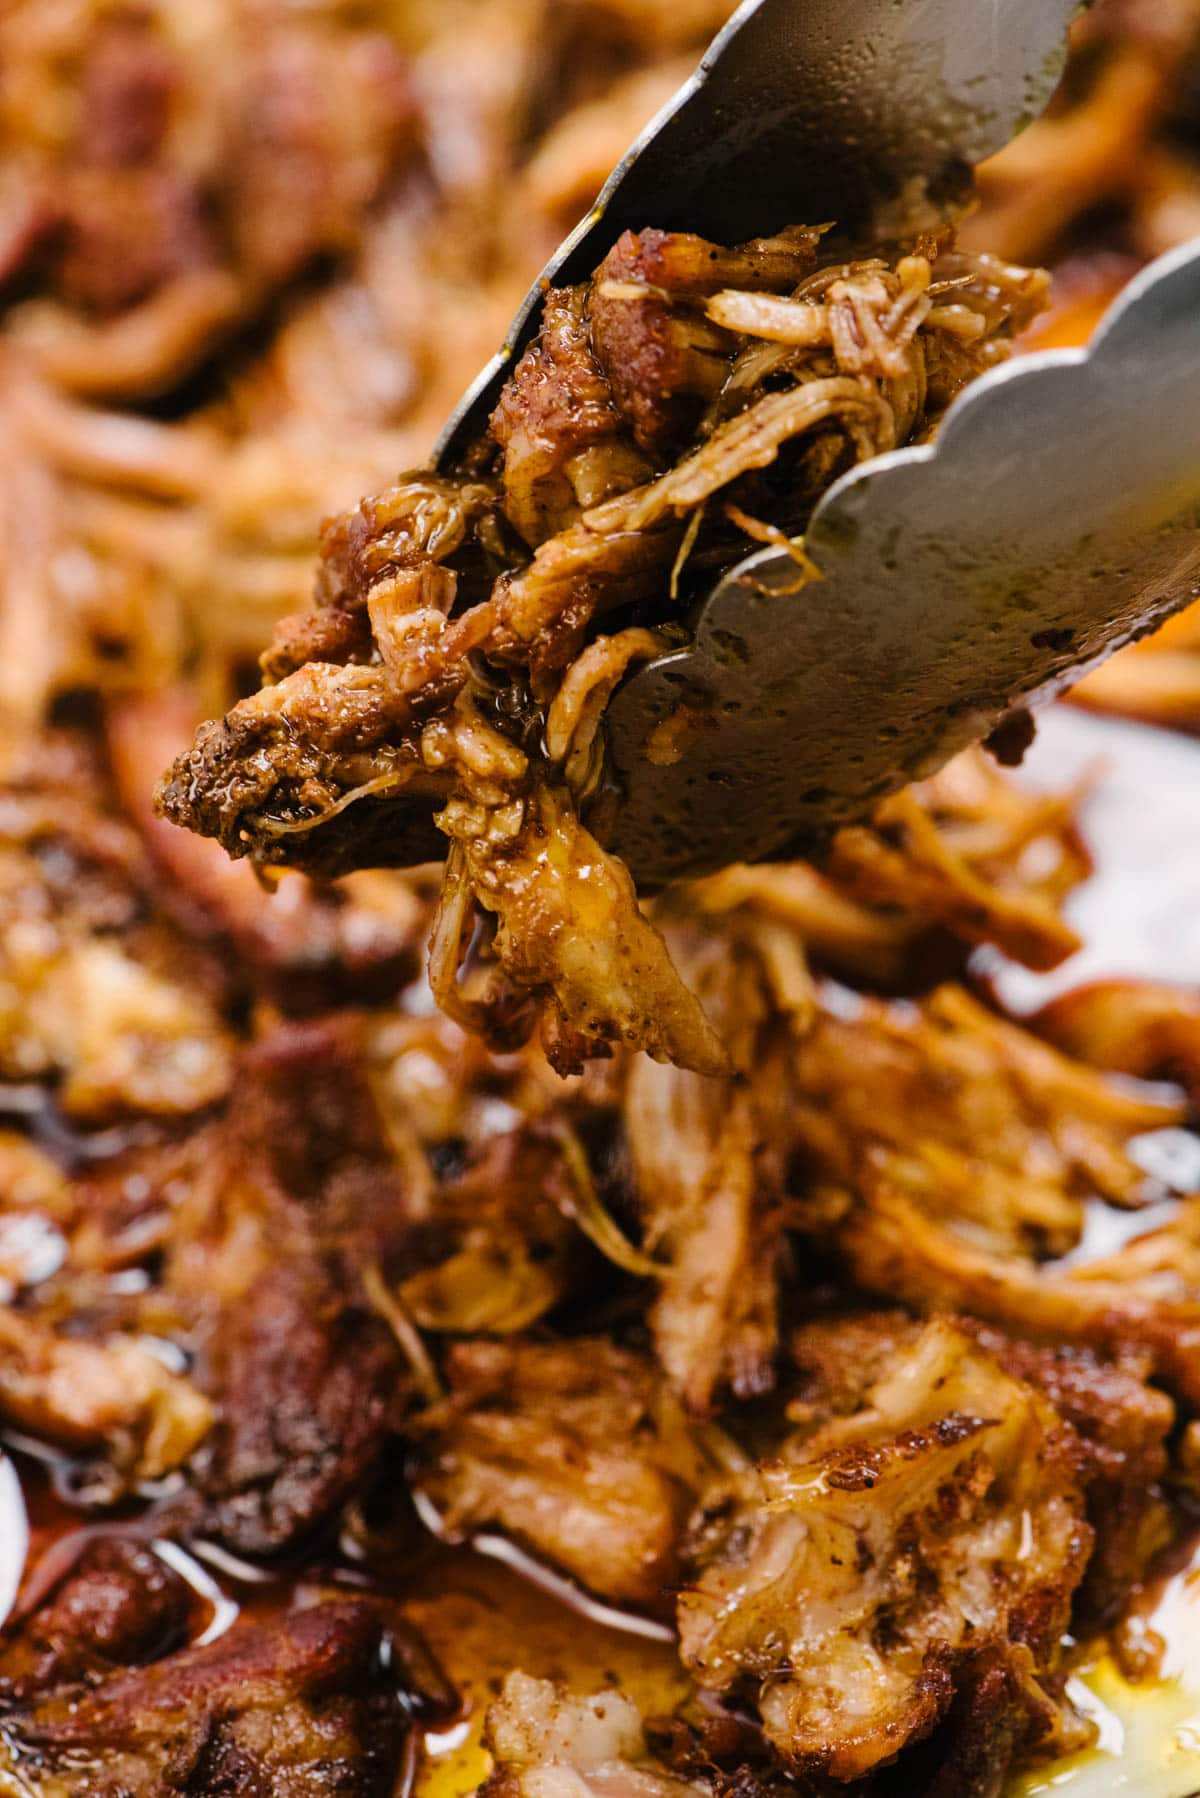
- Shred, then crisp. Remove the pork pieces using tongs or a slotted spoon. Transfer to a baking sheet and shred using two forks. Transfer the baking sheet to a 450°F oven and brown for 10 minutes, stirring once halfway through.
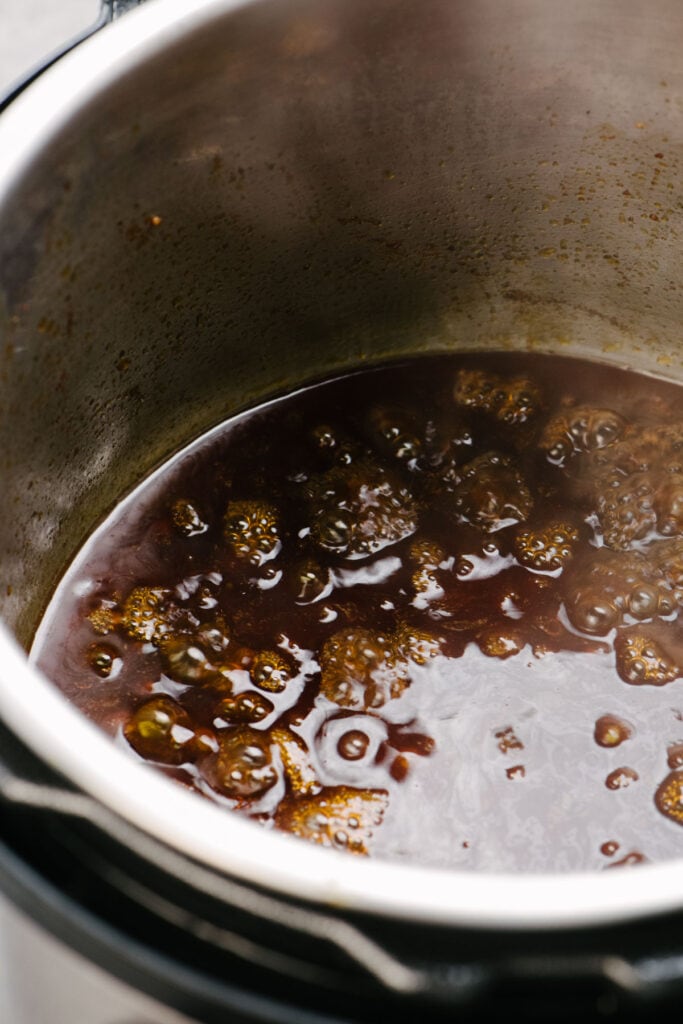
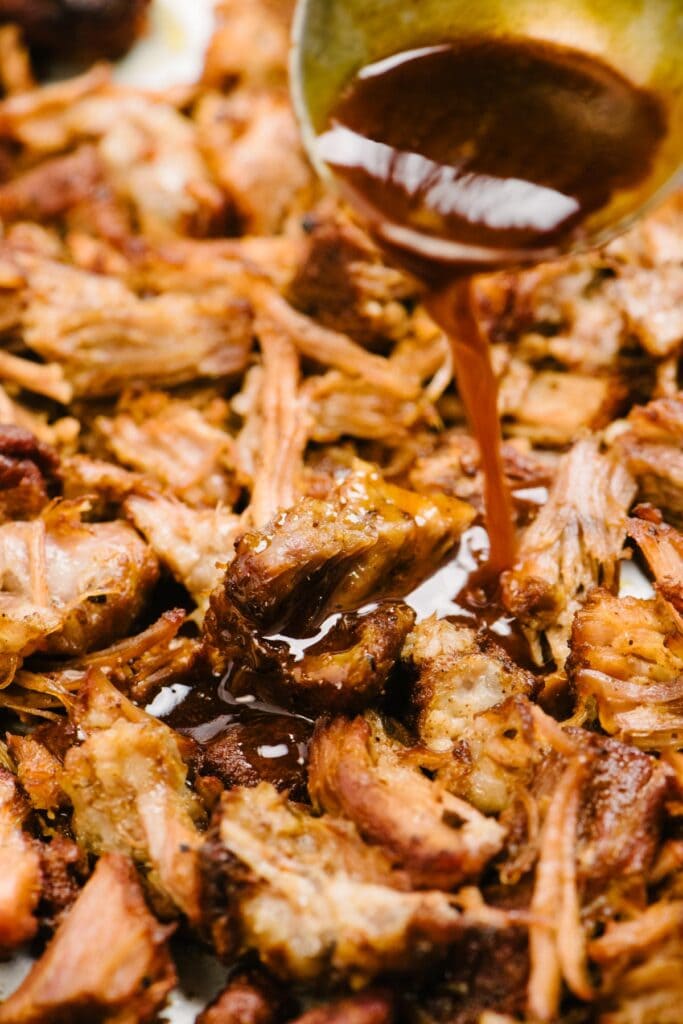
- Reduce the sauce. Meanwhile, press the “Saute” function on the Instant Pot and bring the rendered pan sauce to a simmer. Simmer for 10 minutes, until reduced by half.
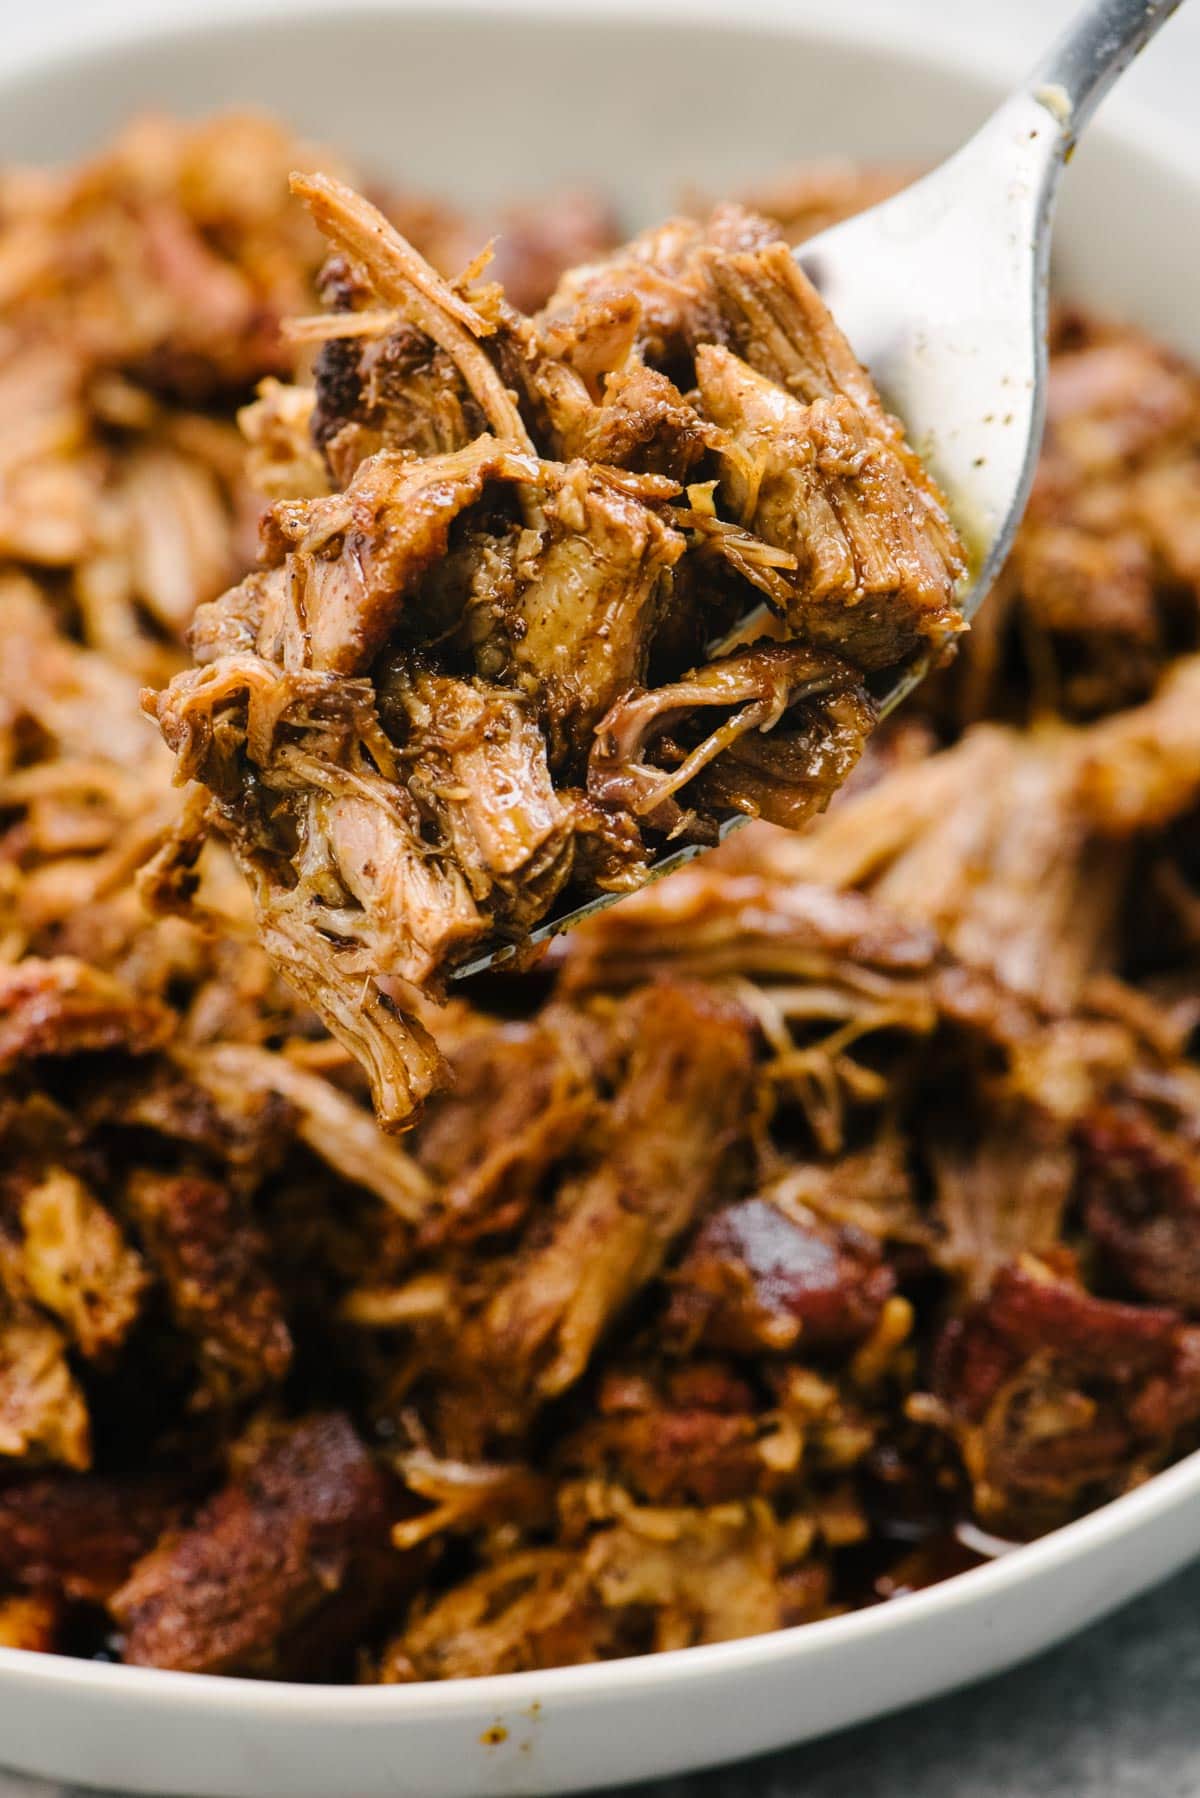
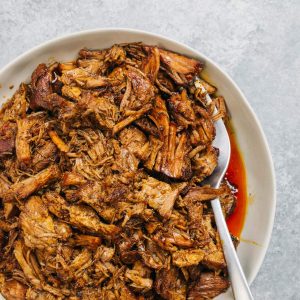
- Serve. Drizzle the sauce over the crispy pulled pork and toss to coat. Enjoy!
Recipe Notes and Tips
- Brown that pork! The Instant Pot is efficient, but you have to take some initiative to make sure the final recipe achieves the same flavor that a braised version would offer, and one of those is browning. Searing the meat adds so much flavor and while it takes a bit of time, this is a step you shouldn't skip.
- Deglaze the pot. Be sure to scrape up all of the browned bits from the bottom after adding the chicken broth. This will help the Instant Pot come to pressure efficiently and will ensure you don't get a "Burn" notice. The browned bits will also dissolve into the broth and season the sauce. More flavor = more winning.
- Reduce the sauce. If you think this is a flavor issue, you're right! Give the sauce time to reduce by half and you'll be rewarded with a more concentrated, intensely flavor sauce. It takes about 10 minutes, and can be done while the pulled pork is crisping in the oven.
- Oven crisping is optional, but recommended. One of the best things about oven pulled pork is those crispy edges in every bite. A quick trip through a very hot oven yields the same results.
Storing and Freezing
In the Fridge: store leftover pulled pork in an airtight container or ziplock bag in the refrigerator for up to 3 days. Reheat in a skillet over medium heat until the fat melts and the pork is warmed through.
In the Freezer: wrap 1 pound portions of pulled pork in plastic wrap, then store in a gallon zip-lock bag; squeeze out as much air as possible to ward of freezer-burn. Store for 3-6 months, depending on how well you’ve packed it. Defrost portions overnight in the fridge or in the microwave, then reheat in a skillet over medium heat.
Did you make this Instant Pot Pulled Pork? I'd love to know how it turned out! Leave a comment and a rating below.
While you're at it, let's be friends - follow me on Pinterest and Instagram for the latest and greatest.
Instant Pot Pulled Pork
Description
Ingredients
- 4 pound boneless Boston butt
- 2-4 tablespoons olive oil, bacon fat, or avocado oil
- 1 cup chicken broth, beef broth, or water
Dry Rub
- 2 tablespoons paprika
- 1 tablespoon kosher salt
- 2 teaspoons ground pepper
- 1.5 teaspoons garlic powder
- 1.5 teaspoons dried oregano
- 2 tablespoons brown sugar, optional
- 1 tablespoon chili powder, optional
- 1 tablespoon cumin, optional
Instructions
- Make the dry rub. Combine the dry rub ingredients in a small bowl and mix until well combined.
- Remove the pork from its elastic mesh and pat very dry. If desired, trim the fat cap, then divide the pork into 3-4" chunks. Dip each piece of pork into the dry rub, coating evenly on all sides.
- Press the "Sautee" button on the Instant Pot, add two tablespoons cooking fat, and allow the inner pot to heat up until the fat shimmers.
- Add 3-4 pieces of pork to the pot in a single layer, leaving a bit of space between each piece. Sear 4-5 minutes, until a deep golden brown crust forms. Turn the pieces and sear on at least one more side. Remove the seared pieces and set aside on a plate; repeat this process until all pieces are seared, adding more oil if the pot gets too dry.
- Pour in one cup of chicken broth and scrape up any browned bits from the bottom of the pot using a wooden spoon. Continue scraping and stirring until the bottom of the pot is completely "clean" – if browned bits are stuck to the pot, you may get the "Burn" notice.
- Press the "Cancel" button to turn off the sautee feature. Transfer all of the seared pork pieces back to the inner pot. Secure the lid and ensure the pressure valve is set to sealing. Program the Instant Pot to "High Pressure" for 35 minutes. Once the timer goes off, allow a 15 minute natural pressure release, then perform a quick release to release any remaining pressure. Alternatively, you may allow all of the pressure to release naturally.
- Heat the oven to 450°F.
- Remove the pork pieces from the pot using tongs and place onto a baking sheet. Shred the pork using 2 forks and spread into an even layer. Transfer the pork to the oven and brown for 10 minutes, stirring once halfway through.
- While the pulled pork browns, reduce the sauce. Press the "Sautee" button on the instant pot. Simmer the sauce until reduced by half, about 10 minutes. Pour the sauce over the crispy pulled pork and toss to coat. Serve warm, right away. Enjoy!

Sara
Instant family favorite! I have made this almost every month in the past year.